Chapter II
– The BAX® System X5 Software
22
BAX® System X5 User Guide
Installing and Upgrading the BAX® System Software
Because each release of BAX® System software builds on improvements from previous versions, it is strongly
recommended that you always install the most recent version as soon as possible for optimal performance.
Note: The BAX® System software upgrade must be transferred to the BAX® System X5 computer, using a
USB flash drive (memory stick), and network, or similar. The example below shows the process using a USB
drive.
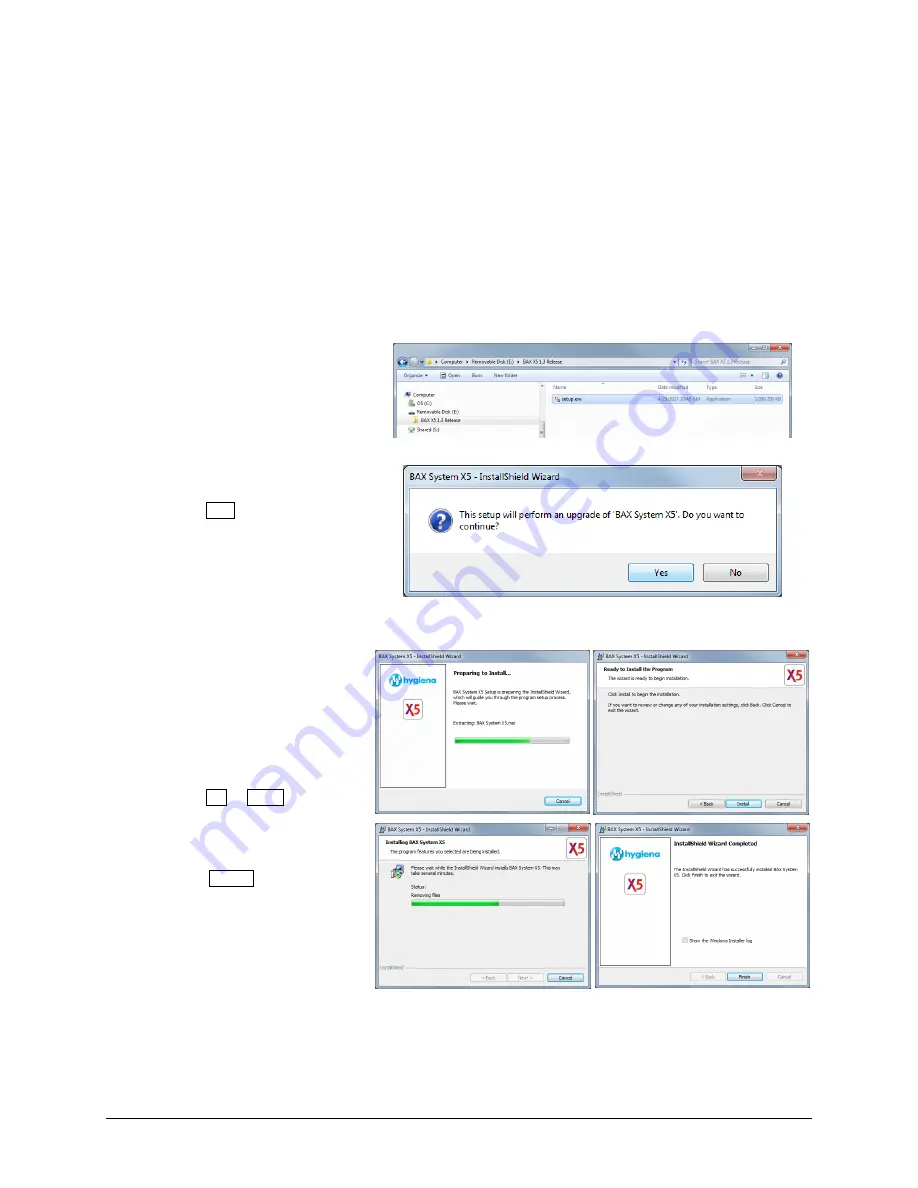
Insert a USB memory stick in the
BAX® System X5 computer. Navigate
to the folder that contains the BAX®
System software installation files.
Double-
click the file titled “BAX
Setup.exe” to begin installation.
If you are doing an upgrade, a
confirmation window may appear
asking if you want to continue with the
upgrade. Click YES to begin the
upgrade installation.
Note: You may also be asked some security
questions by Windows, depending on the
computer’s settings and your account
privileges. Allow the installation to modify
the computer if so.
The installation wizard begins and
proceeds through a number of
installation screens
– some examples
are shown here. There may be
different screens depending upon
whether this is a new install or an
upgrade. Click OK or NEXT to accept
any modifications required for the
software installation.
After the installation wizard is
complete, click FINISH to end the
installation.


