106
REMOVAL AND REPLACEMENT PROCEDURES
5
Before lifting the heatsink, carefully break the adhesive compound between the CPU heatsink and
processor by rotating the heatsink back and forth.
6
Use alcohol and a soft cloth to clean all of the thermal interface material residue from the CPU
heatsink and processor.
CAUTION
Allow the alcohol on the processor and CPU heatsink to dry completely.
Replacing the CPU Heatsink
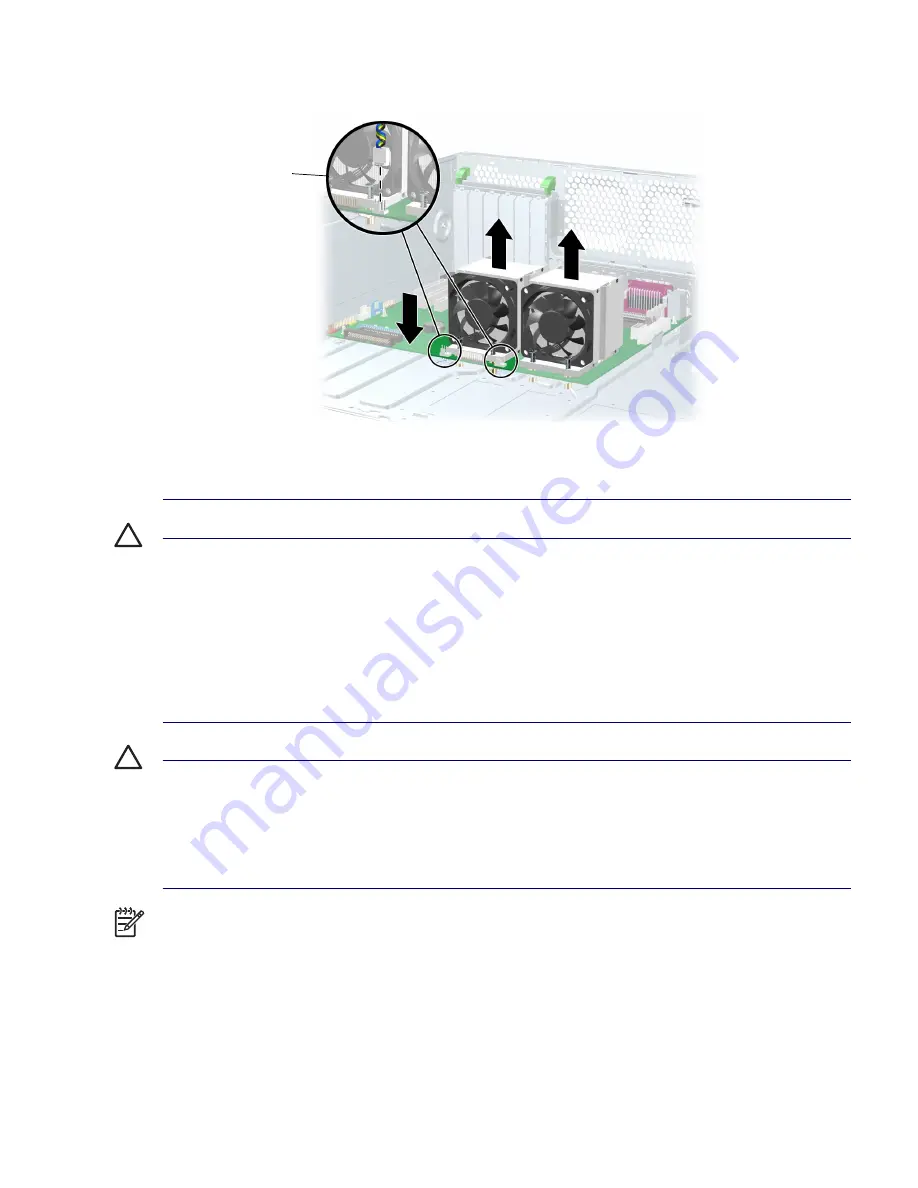
1
Disconnect power from the system (
page 68
), remove the access panel (
page 74
), and remove the
CPU heatsink (
page 105
).
2
Use alcohol and a soft cloth to clean all of the thermal interface material residue from the CPU
heatsink and processor.
CAUTION
Allow the alcohol on the processor and CPU heatsink to dry completely.
3
Apply the thermal grease to center of the processor.
4
Place the CPU heatsink on top of the processor and align the four mounting screws with the holes
1
in the system board.
NOTE
If both CPU heatsinks were removed, be sure all system board standoffs engage with the
keyholes in the chassis, be sure the system board connectors engage correctly with the rear I/O panel,
3
Summary of Contents for Xw6200 - Workstation - 2 GB RAM
Page 1: ...HP Workstation xw6200 Service and Technical Reference Guide ...
Page 8: ...VIII CONTENTS ...
Page 14: ...XIV PREFACE ...
Page 26: ...26 PRODUCT OVERVIEW ...
Page 62: ...62 SYSTEM MANAGEMENT ...
Page 112: ...112 REMOVAL AND REPLACEMENT PROCEDURES ...
Page 154: ...154 SCSI DEVICES ...
Page 158: ...158 SATA DEVICES ...
Page 174: ...174 CONNECTOR PINS 5 BLK GND 6 BLK GND 6 Pin Power Auxiliary PCI Express Pin Color Signal ...
Page 178: ...178 POWER CORD SET REQUIREMENTS ...
Page 184: ...184 ADDITIONAL PASSWORD SECURITY AND RESETTING CMOS ...
Page 186: ...186 QUICK TROUBLESHOOTING FLOWS Initial Troubleshooting ...
Page 187: ...NO POWER 187 Appendix I No Power No Power Part 1 ...
Page 188: ...188 QUICK TROUBLESHOOTING FLOWS No Power Part 2 ...
Page 189: ...NO POWER 189 Appendix I No Power Part 3 ...
Page 190: ...190 QUICK TROUBLESHOOTING FLOWS No Video No Video Part 1 ...
Page 191: ...NO VIDEO 191 Appendix I No Video Part 2 ...
Page 192: ...192 QUICK TROUBLESHOOTING FLOWS No Video Part 3 ...
Page 193: ...ERROR MESSAGES 193 Appendix I Error Messages Error Messages Part 1 ...
Page 194: ...194 QUICK TROUBLESHOOTING FLOWS Error Messages Part 2 ...
Page 195: ...ERROR MESSAGES 195 Appendix I Error Messages Part 3 ...
Page 196: ...196 QUICK TROUBLESHOOTING FLOWS No OS Loading ...
Page 198: ...198 QUICK TROUBLESHOOTING FLOWS No OS Loading from Hard Drive Part 2 ...
Page 199: ...NO OS LOADING FROM HARD DRIVE 199 Appendix I No OS Loading from Hard Drive Part 3 ...
Page 200: ...200 QUICK TROUBLESHOOTING FLOWS No OS Loading from Diskette Drive ...
Page 201: ...NO OS LOADING FROM CD ROM DRIVE 201 Appendix I No OS Loading from CD ROM Drive ...
Page 202: ...202 QUICK TROUBLESHOOTING FLOWS No OS Loading from Network ...
Page 203: ...NON FUNCTIONING DEVICE 203 Appendix I Non functioning Device ...
Page 204: ...204 QUICK TROUBLESHOOTING FLOWS ...
Page 208: ...208 ...
Page 209: ...209 Index ...


