Hardware options installation 62
o
For rack models, extend the server from the rack (on page
24
).
5.
Remove the access panel (on page
23
).
6.
Remove the air baffle (on page
25
).
7.
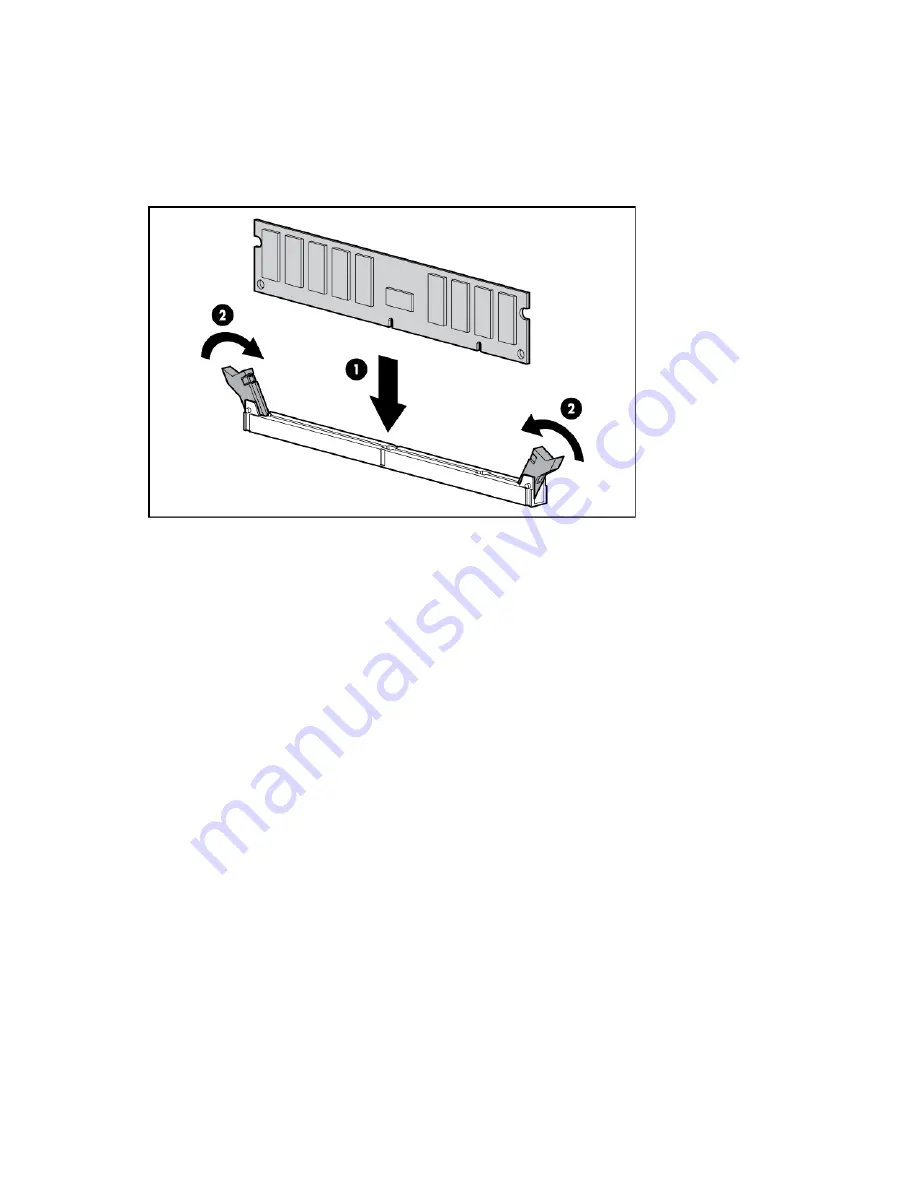
Open the DIMM slot latches.
8.
Install the DIMM.
If you are installing DIMMs in lock-step configuration, configure this mode in RBSU ("
HP ROM-Based Setup
Utility
" on page
115
).
For more information about LEDs and troubleshooting failed DIMMs, see Systems Insight Display LED
combinations (on page
14
).
Single-, dual-, and quad-rank DIMMs
To understand and configure memory protection modes properly, an understanding of single-, dual-, and
quad-rank DIMMs is helpful. Some DIMM configuration requirements are based on these classifications.
A single-rank DIMM has one set of memory chips that is accessed while writing to or reading from the
memory. A dual-rank DIMM is similar to having two single-rank DIMMs on the same module, with only one
rank accessible at a time. A quad-rank DIMM is, effectively, two dual-rank DIMMs on the same module. Only
one rank is accessible at a time. The server memory control subsystem selects the proper rank within the
DIMM when writing to or reading from the DIMM.
Dual- and quad-rank DIMMs provide the greatest capacity with the existing memory technology. For
example, if current DRAM technology supports 8-GB single-rank DIMMs, a dual-rank DIMM would be 16
GB, and a quad-rank DIMM would be 32 GB.
LRDIMMs are labeled as quad-rank DIMMs; however, they function more like dual-rank DIMMs. There are
four ranks of DRAM on the DIMM, but the LRDIMM buffer creates an abstraction that allows the DIMM to
appear as a dual-rank DIMM to the system. The LRDIMM buffer also isolates the electrical loading of the
DRAM from the system to allow for faster operation. These two changes allow the system to support up to
three LRDIMMs per memory channel, providing for up to 50% greater memory capacity and higher memory
operating speed compared to quad-rank RDIMMs.
Summary of Contents for ProLiant ML350p Gen8
Page 19: ...Component identification 19 Item Connector Description 5 J8 Graphic card power connector ...
Page 30: ...Operations 30 ...
Page 39: ...Setup 39 12 Remove the air baffle 13 Remove the fan cage ...
Page 46: ...Hardware options installation 46 o Cable routing to box 1 o Cable routing to box 2 ...
Page 137: ...Support and other resources 137 ...
Page 138: ...Support and other resources 138 ...


