


Features for Mac
6.
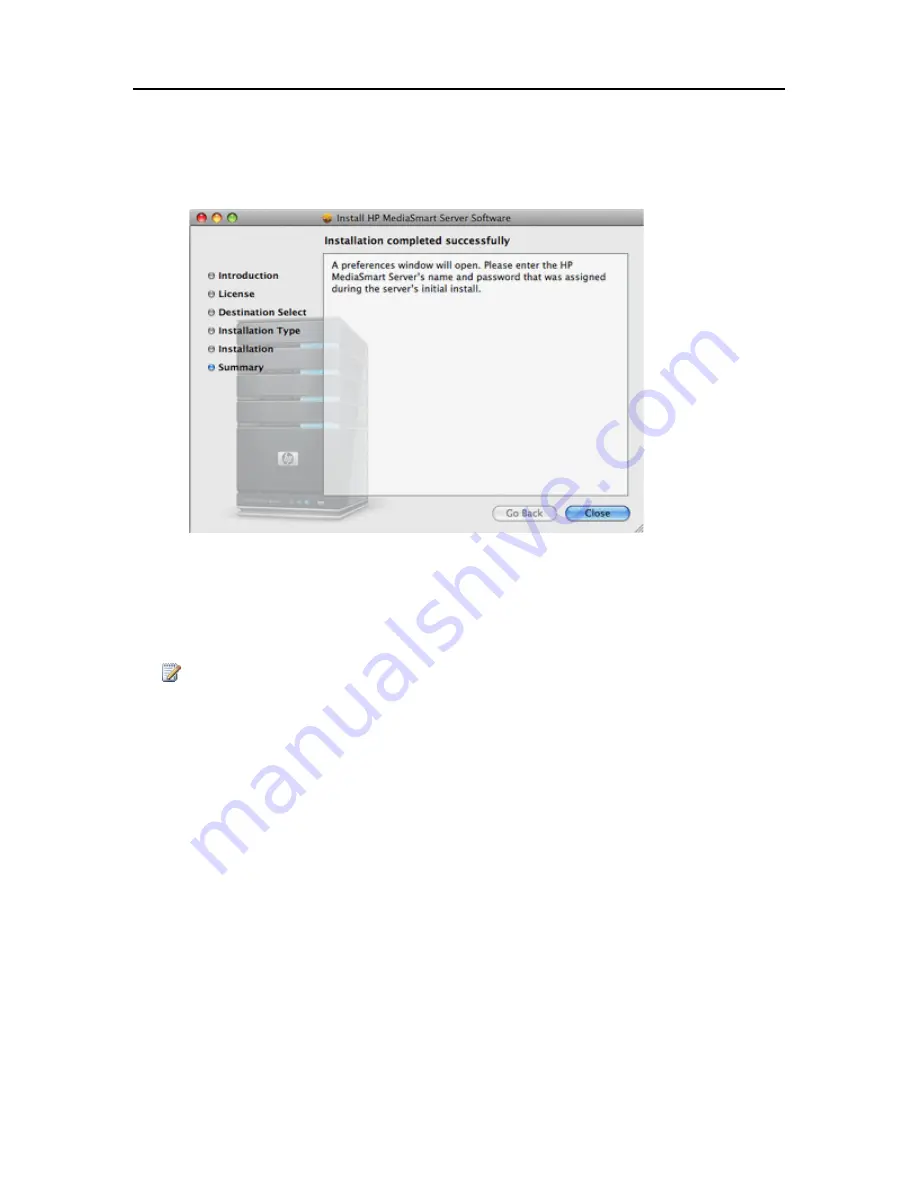
Once the install is completed a confirmation screen will appear followed by a settings or a
preferences screen.
7.
The confirmation screen can be closed or left open. It will not effect the rest of this process. Click
Close
, to close the summary screen.
8.
On the settings screen you will need to enter the
server name
and the server’s administrator
password
so that the Mac software can access your Server. The authentication process begins
when you stop typing the password.
9.
Once your credentials have been authenticated, click
Apply
to save the server name and password.
Note
Server Name and Password have to be authenticated prior to using the control center, or entering
preferences for BackUp.
10.
After clicking
Apply
, you can click
BackUp
to set your BackUp Preferences. Or you can click
Show All
to go to the Control Center.
119
Summary of Contents for EX485 - MediaSmart Server - 2 GB RAM
Page 1: ...HP MediaSmart Server User s Guide ...
Page 2: ......
Page 6: ......
Page 25: ...Set up and Installation 2 On the Personal Firewall page click Add 19 ...
Page 98: ......
Page 112: ......
Page 122: ...HP MediaSmart Server User s Guide 116 ...
Page 142: ......
Page 152: ...HP MediaSmart Server User s Guide 146 ...
Page 156: ......
Page 162: ...HP MediaSmart Server User s Guide 156 5 Click OK to finish ...
Page 182: ......
Page 194: ......
Page 252: ...HP MediaSmart Server User s Guide 246 ...
Page 322: ......