


29
3.Maintenance
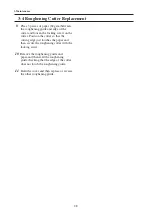
3-5 Draining the Glue
In normal operation, the glue does not need
to be drained and replaced frequently.
However, if the glue has deteriorated, replace
it.
WARNING
The melt tank is heated around
180 degrees Celsius. Always wear leather
or other thick material gloves when
working on the melt tank. Otherwise
severe personal injury could result.
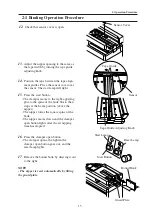
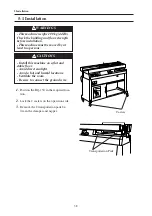
1.
Turn off the power switch.
2.
Remove the front cover of the machine.(6
screws)
NOTE
Remove the small front cover (2 screws) and
then the 4 screws at the bottom of front cover.
Tilt the cover so that the other 2 other screws
can finally be removed.
3.
Remove the bottom cover of the glue tank unit.
NOTE
Remove the 2 fixing screws on the operation
side of the bottom cover and loosen the other
2 screws. Then remove the bottom cover by
sliding it toward the operation side.
4.
Loosen 2 locking screws and slide the
rubber plug holder to the right.
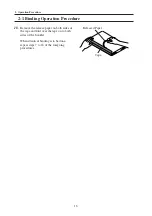
5.
Place a cardboard box or other suitable
container under the drain to catch the glue.
NOTE
Make sure that the container is big enough to
hold up to 2 liter of glue.
6.
As soon as the reset lamp lights,turn off
the power switch and loosen the rubber
plug.
7.
After draining all the glue from the tank,
clean up around the drain hole of the melt
tank and then refit the rubber plug.
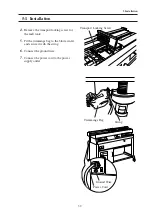
8.
Refit the rubber plug holder, bottom cover
of the melt tank unit, and front cover.
02BQ51A25
Screws
Front Cover
Small Front Cover
Bottom Cover
Locking Screws
Rubber Plug
Rubber Plug Holder
Drain
Summary of Contents for BQ-150
Page 1: ......
Page 5: ...IV 4 Troubleshooting 33 4 1 Troubleshooting 34 5 Installation 37 5 1 Installation 38 ...
Page 37: ...32 3 Maintenance PAGE INTENTIONALLY BLANK ...
Page 38: ...33 4 Trouble Shooting 4 Troubleshooting 4 1 Troubleshooting 34 ...
Page 41: ...36 4 Trouble Shooting PAGE INTENTIONALLY BLANK ...
Page 42: ...37 5 Installation 5 Installation 5 1 Installation 38 ...


