


20
2. Operation Procedure
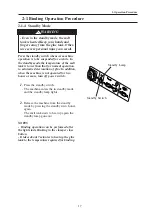
2-2 Achieving Good Quality Binding
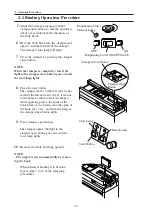
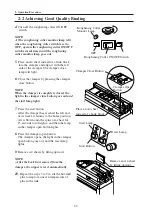
8.
Place an unneeded cover sheet on the
nipper unit.
9.
Loosen 2 fixing screws on each register
guides and adjust the position of the
register guides.
10.
Retighten these fixing screws while
keeping the register guides in their desired
position.
11.
Release the stop button.
- The reset lamp lights.
12.
Press the reset button.
- The clamper moves to the right and stops
in the home position (above the nipper).
NOTE
- The nipper moves up without nipping and
be returned to the home position by pressing
the reset button.
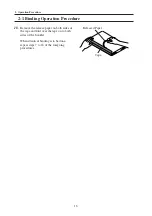
13.
Press the clamper open button.
14.
Remove the booklet to the right.
15.
Perform a binding operation and check
the binding quality.
NOTE
- If the book block is still not correctly
aligned with the cover, repeat steps 4 to 15.
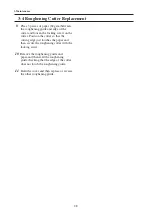
Guide Register
Nipper Center Mark
Sensor
Reset Button
Start Lamp
Start Button
Reset Button
Clamper Open Button
Bound Book
Summary of Contents for BQ-150
Page 1: ......
Page 5: ...IV 4 Troubleshooting 33 4 1 Troubleshooting 34 5 Installation 37 5 1 Installation 38 ...
Page 37: ...32 3 Maintenance PAGE INTENTIONALLY BLANK ...
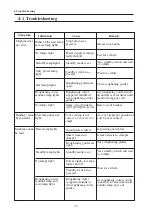
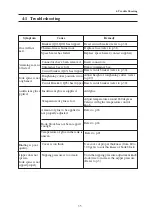
Page 38: ...33 4 Trouble Shooting 4 Troubleshooting 4 1 Troubleshooting 34 ...
Page 41: ...36 4 Trouble Shooting PAGE INTENTIONALLY BLANK ...
Page 42: ...37 5 Installation 5 Installation 5 1 Installation 38 ...


