


8. Verify that the new user privileges have been updated by issuing the command ipmitool –l lan –H <IP
ADDRESS> –U admin –P admin user list.
9. Log-in with the new username and password by issuing the command ipmitool –l lan –H <IP ADDRESS>
–U <USERNAME> –P <PASSWORD>.
4.4.1.2
Configuring Network Settings Using IPMItool
1. Launch a Terminal by clicking Applications > Accessories > Terminal.
The Terminal will appear.
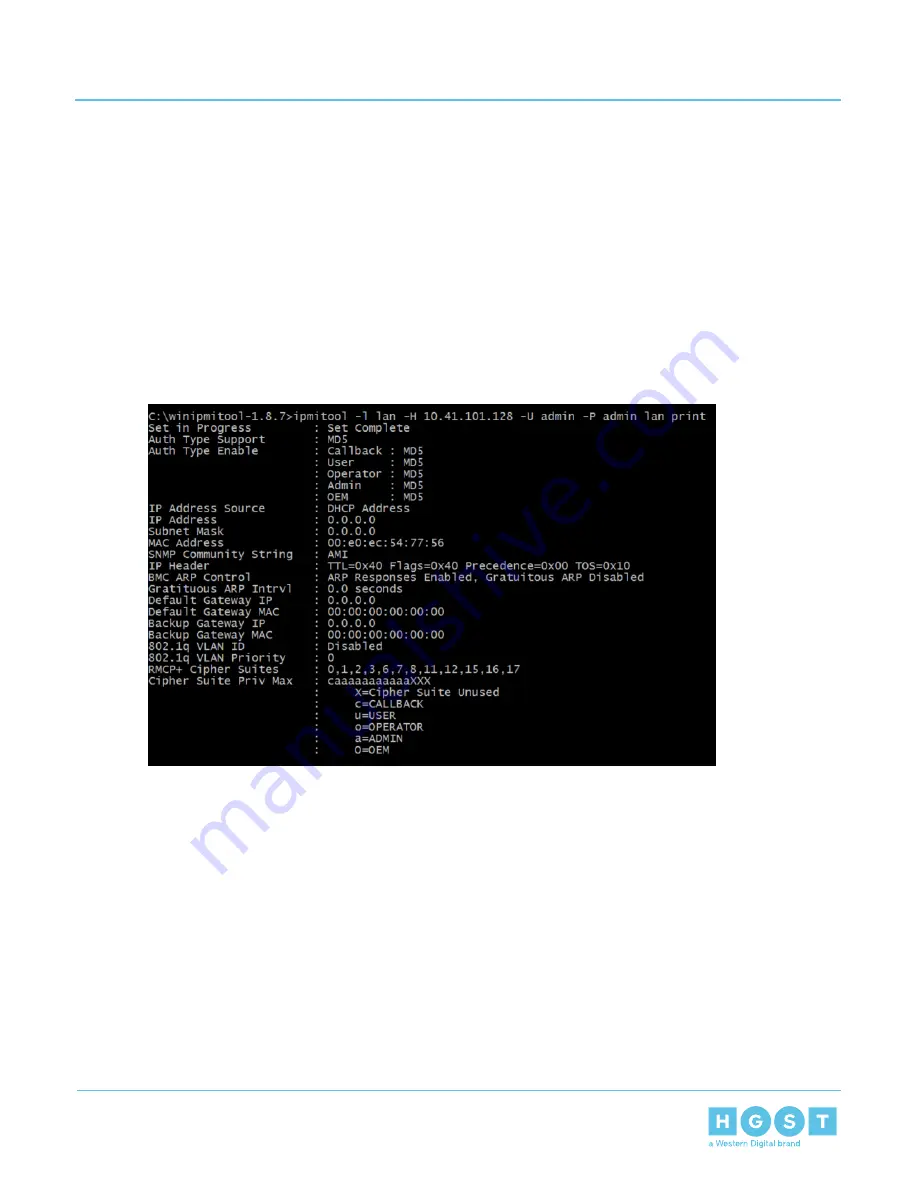
2. Display the Network Settings by issuing the command ipmitool –l lan –H <IP ADDRESS> –U admin –P
admin lan print.
The Terminal will provide a list of the current network settings.
Figure 288: Current Network Settings
3. Set whether the IP address will be static or DHCP by issuing the command ipmitool –l lan –H <IP
ADDRESS> –U admin –P admin lan set ipsrc <STATIC or DHCP>.
The Terminal will display set commands.
4. Set a static IP address by issuing the command ipmitool –l lan –H <IP ADDRESS> –U admin –P admin
lan set ipaddr <NEW IP ADDRESS>.
The Terminal will display the new IP address.
5. Set the netmask by issuing the command ipmitool –l lan –H <IP ADDRESS> –U admin –P admin lan
set netmask <NETMASK>.
The Terminal will display the new netmask.
6. Set the default gateway by issuing the command ipmitool –l lan –H <IP ADDRESS> –U admin –P admin
lan set defgw ipaddr <GATEWAY>.
7. Display the new Network Settings by issuing the command ipmitool –l lan –H <IP ADDRESS> –U admin
–P admin lan print.
The Terminal will provide a list of the new network settings.
195
4
System Management
User Guide
4.4
IPMI Overview


