84
User Manual Version 3.1
7.4.1
Adding a TCP/IP port to a printer driver
1. Modify the
existing
printer driver
•
Open “Devices and Printers” on your PC (START > Control Panel >
Hardware and Sound).
•
Select your printer and click on it with the right mouse button and
select “Printer properties” from the context menu.
•
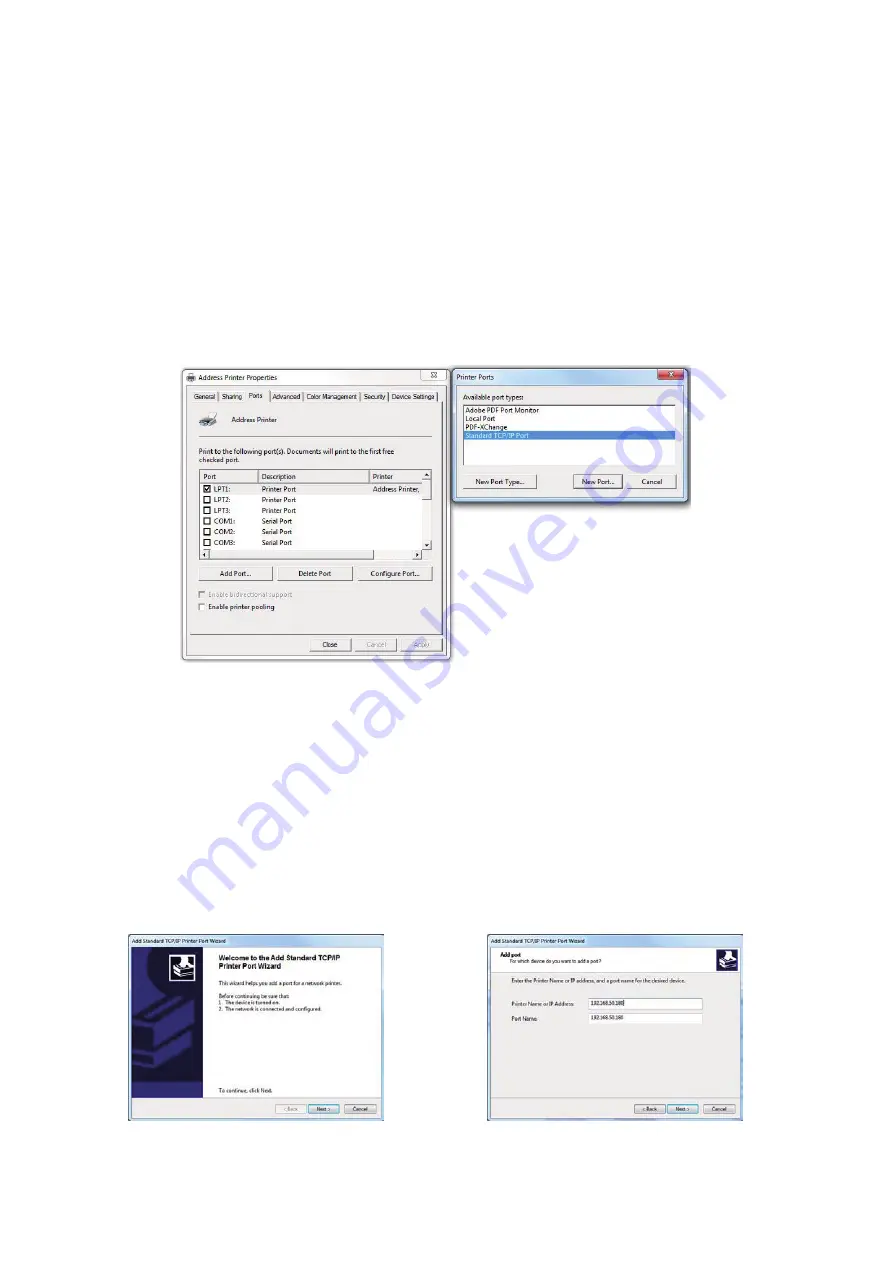
Click on the tab “Ports” and on the button “Add Port…”. This will
open a new window. In this window select “Standard TCP/IP Port”
and click onto “New Port…”.
Figure 42: Adding TCP/IP Port
2. Standard
TCP/IP Printer
Port Wizard
•
The “Add Standard TCP/IP Printer Port Wizard” will be opened.
Click onto “Next >” to continue (see Figure 50).
•
Now enter the exact IP address of your printer and click onto
“Next>” (See Figure 51. This figure only shows a sample IP
address. Make sure to enter the IP address used in your
installation).
•
Wait until the automatic detection is finished.
Figure 43: TCP/IP Printer Port Wizard
Figure 44: IP address of the printer


