Revision A • 6/06
H
A
R
R
I
S
C
O
R
P
O
R
A
T
I
O
N
4-3
4 Linking the NetWave
1 Community Monitor
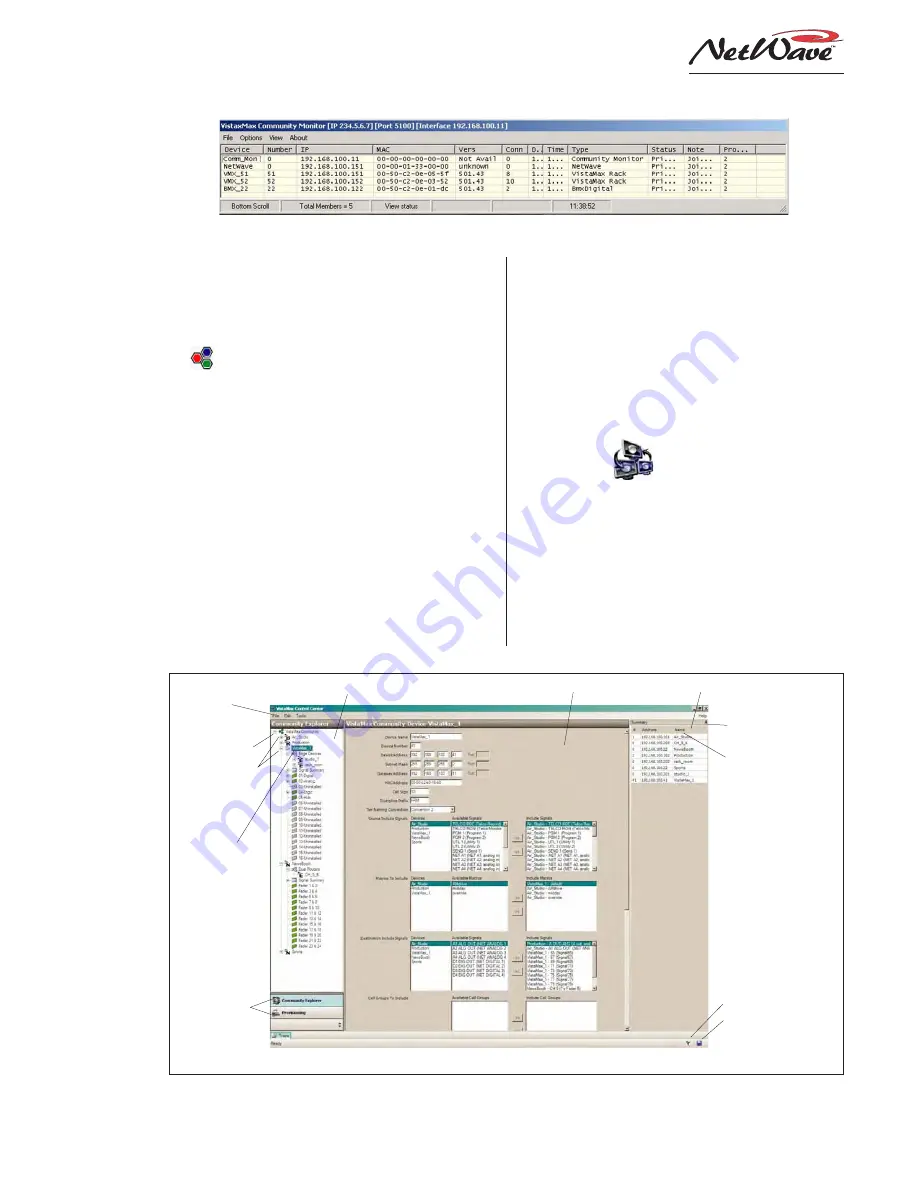
Normally CM is already running on the
setup computer with its miniature icon in the
taskbar tray. If not, click the desktop icon
(
) to start the program. Right-click on the
tray icon and select
Show Monitor Display.
Click on the menu item
View, then select Sta-
tus to view a list of the VistaMax community
members. An example of the Status display,
with a NetWave console connected, is shown
above. A “MAC address” is used to identify
the frame size of the NetWave since the Net-
Wave does not have a true MAC address.
With the new NetWave console and its TINI
cards shown in the CM display, the network
is properly communicating with the new con-
sole. If the console does not appear in the
display, check that the LAN and Link cables
are connected properly and that the setup com-
puter is running the CM software (version 3.55
or later) that is compatible with 500-series
VistaMax code. Earlier versions did not sup-
port NetWave consoles and Envoy card
frames.
2 VMCC (
)
It is assumed VMCC has already been used
to setup the other members of the VistaMax
community and that it is now being used to
add a new NetWave console to the existing
community—and that community is active
in VMCC. The VMCC program’s main graphi-
cal interface features are identified below.
Community Monitor Status Window, with a NetWave console connected to VMX_51
Community Explorer Pane
Editing Pane
Community Summary Pane
Hide Summary
Pane button
To Reorder Summary List,
click #, Address, or Name
Saved Status Flag
Saving Database Icon
Community Name
Menu items
(File, Edit, Tools)
Community Devices
R = RMXdigital
B=BMXdigital
N=NetWave
E= Edge device
Active Device
(parameters shown in
the editing pane)
Left Pane Activity
Selection Tabs
VMCC, graphical interface features


