background image

1-9 

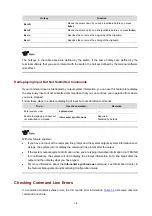
Hotkey 

Function 

Esc+N 

Moves the cursor down by one line (available before you press 

Enter

Esc+P 

Moves the cursor up by one line (available before you press 

Enter

)

Esc+< 

Specifies the cursor as the beginning of the clipboard. 

Esc+> 

Specifies the cursor as the ending of the clipboard. 


The hotkeys in the table above are defined by the switch. If the same hotkeys are defined by the 

terminal software that you use to interact with the switch, the hotkeys defined by the terminal software 

take effect. 


Redisplaying Input But Not Submitted Commands 

If your command input is interrupted by output system information, you can use this feature to redisplay 

the previously input but not submitted commands so that you can continue your operation from where 

you were stopped. 

Follow these steps to enable redisplaying of input but not submitted commands: 

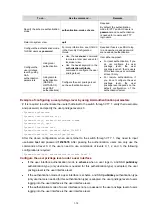
To do… 

Use the command… 

Remarks 

Enter system view 

system-view 

— 

Enable redisplaying of input but 
not submitted commands 

info-center synchronous 

Required 

Disabled by default 


With this feature enabled:  

z


If you have no input at the command line prompt and the system outputs system information such 

as logs, the system will not display the command line prompt after the output. 

z


If the system outputs system information when you are typing interactive information (not YES/NO 

for confirmation), the system will not redisplay the prompt information but a line break after the 

output and then display what you have typed. 

z


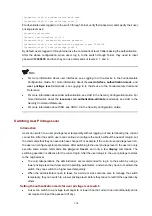
For more information about the 

info-center synchronous

 command, see 

Information Center

 in 

the 

Network Management and Monitoring Configuration Guide


Checking Command Line Errors 

If a command contains syntax errors, the CLI reports error information. 

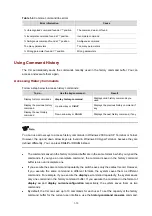
Table 1-4

 lists some common 

command line errors. 

Summary of Contents for SR6600 SPE-FWM

Page 1: ...H3C SR6600 Routers Fundamentals Configuration Guide Hangzhou H3C Technologies Co Ltd http www h3c com Document Version 20100930 C 1 08 Product Version SR6600 CMW520 R2420...

Page 2: ...ware Secware Storware NQA VVG V2 G Vn G PSPT XGbus N Bus TiGem InnoVision and HUASAN are trademarks of Hangzhou H3C Technologies Co Ltd All other trademarks that may be mentioned in this manual are th...

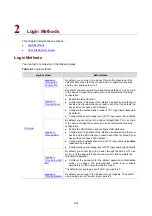
Page 3: ...the SR6600 Conventions This section describes the conventions used in this documentation set Command conventions Convention Description Boldface Bold text represents commands and keywords that you ent...

Page 4: ...as a router switch or firewall Represents a routing capable device such as a router or Layer 3 switch Represents a generic switch such as a Layer 2 or Layer 3 switch or a router that supports Layer 2...

Page 5: ...upgrading Obtaining Documentation You can access the most up to date H3C product documentation on the World Wide Web at http www h3c com Click the links on the top navigation bar to obtain different c...

Page 6: ...Command History 1 10 Accessing History Commands 1 10 Configuring the History Buffer Size 1 11 Controlling CLI Display 1 11 Multi Screen Display 1 11 Filtering Output Information 1 12 Configuring User...

Page 7: ...e SSH Server 3 49 Logging In Through the AUX Port 3 50 Introduction 3 50 AUX Login Authentication Modes 3 51 Configuring None Authentication for AUX Login 3 52 Configuring Password Authentication for...

Page 8: ...n 6 91 FTP Client Configuration Example On the SR6602 router 6 92 FTP Client Configuration Example On the SR6604 6608 6616 router 6 93 Configuring the FTP Server 6 95 Configuring FTP Server Operating...

Page 9: ...aving the Configuration 9 118 Setting Configuration Rollback 9 120 Configuration Rollback 9 120 Configuration Task List 9 121 Configuring Parameters for Saving the Current Running Configuration 9 121...

Page 10: ...Hotfix Configuration Example On the SR6602 router 12 146 Hotfix Configuration Example On the SR6604 6608 6616 router 12 147 13 Device Management 13 149 Device Management Overview 13 149 Displaying Dev...

Page 11: ...nsceivers 13 165 Configuring USB Device Port 13 165 Basic Functions of USB Device Port 13 165 USB Connectors and Cables 13 165 Connecting the Router and the Host 13 166 Unmounting the USB Device 13 16...

Page 12: ...vels z Saving the Current Configuration z Displaying and Maintaining CLI What Is CLI The command line interface CLI enables you to interact with your device by typing text commands At the CLI you can...

Page 13: ...hen typing them at the CLI Italic Command arguments are in italic Replace arguments with actual values at the CLI Items keywords or arguments in square brackets are optional x y Alternative items are...

Page 14: ...to disable the information center CLI View Description To facilitate CLI usage commands are grouped into different classes by function To use a command you must enter the class view of the command CLI...

Page 15: ...splay operations file operations and Telnet operations To perform further configurations for the device enter system view Follow the step below to enter system view To do Use the command Remarks Enter...

Page 16: ...Return to user view return Required Available in any view except user view Using the CLI Online Help At the CLI you can type a question mark to obtain online help See the following examples 1 Type in...

Page 17: ...is not full pressing a common key inserts the character at the position of the cursor and move the cursor to the right Backspace Deletes the character to the left of the cursor and move the cursor bac...

Page 18: ...you input an incomplete keyword which partially matches both a defined alias and the keyword of a command the alias wins to execute the command whose keyword partially matches your input input the com...

Page 19: ...urrent line Ctrl F Moves the cursor one character to the right Ctrl H Deletes the character to the left of the cursor Ctrl K Terminates an outgoing connection Ctrl N Displays the next command in the h...

Page 20: ...steps to enable redisplaying of input but not submitted commands To do Use the command Remarks Enter system view system view Enable redisplaying of input but not submitted commands info center synchr...

Page 21: ...e arrow keys to access history commands in Windows 200X and XP Terminal or Telnet However the up and down arrow keys are invalid in Windows 9X HyperTerminal because they are defined differently You ca...

Page 22: ...splay Multi Screen Display Controlling multi screen display If the output information spans multiple screens each screen pauses after displayed Then you can perform one of the following operations to...

Page 23: ...the output information z When the system displays the output information in multiple screens use or plus a regular expression to filter subsequent output information equals the keyword begin equals th...

Page 24: ...8 index Repeats the character string specified by the index A character string refers to the string within before index refers to the sequence number starting from 1 from left to right of the characte...

Page 25: ...ast line in the current configuration the output information depends on the device model and the current configuration Sysname display current configuration begin user interface user interface con 0 u...

Page 26: ...ings Commands at this level include debugging terminal refresh reset and send 2 System Provides service configuration commands including routing configuration commands and commands for configuring ser...

Page 27: ...ivilege level by using AAA authentication parameters It is required to authenticate the users that telnet to the switch through VTY 1 verify their username and password and specify the user privilege...

Page 28: ...nsole user interface is 3 and that for users logged in through the other user interfaces is 0 Follow these steps to configure the user privilege level under a user interface none or password authentic...

Page 29: ...mation about SSH see SSH 2 0 in the Security Configuration Guide Switching User Privilege Level Introduction Users can switch to a user privilege level temporarily without logging out and terminating...

Page 30: ...ntication first and then the remote AAA authentication The switch authenticates a user by using the local password first and if no password for privilege level switch is set for the user logged in fro...

Page 31: ...level To do Use the command Remarks Switch the user privilege level super level Required When logging in to the switch a user has a user privilege level which depends on user interface or authenticati...

Page 32: ...ge level switch password z When the authentication mode is set to local configure the local password before switching to a higher user privilege level z When the authentication mode is set to scheme c...

Page 33: ...and executed commands into the configuration file Commands saved in the configuration file can survive a reboot The save command does not take effect on one time commands such as display commands whic...

Page 34: ...0 by default Logging In Through SSH By default you cannot log in to a device through SSH To do so log in to the device through the console port and complete the following configuration z Enable the S...

Page 35: ...lowing four CLI configuration methods z Local configuration via the console port z Local Remote configuration via the AUX port Auxiliary port z Local Remote configuration via the asynchronous serial p...

Page 36: ...interfaces The specified user interfaces are numbered from number 0 with a step of 1 and in the sequence of console TTY AUX and VTY user interfaces You can use the display user interface command witho...

Page 37: ...through the console port without any authentication which brings security problems z By default you cannot log in to a device through telnet SSH or modem so you cannot remotely manage and maintain th...

Page 38: ...nsole cable shipped with the device to connect the PC and the device Plug the DB 9 connector of the console cable into the serial port of the PC and plug the RJ 45 connector into the console port of y...

Page 39: ...e Stop bits to 1 and Flow control to None as shown in Figure 3 2 through Figure 3 4 On the Windows 2003 Server operating system you need to add the HyperTerminal program first and then log in to and m...

Page 40: ...he connection Figure 3 4 Set the properties of the serial port Step3 Turn on the device You are prompted to press Enter if the device successfully completes the power on self test POST A prompt such a...

Page 41: ...l user and related parameters To use remote authentication configure the username and password on the remote authentication server For more information about authentication modes and parameters see AA...

Page 42: ...ice through the console port without authentication and have user privilege level 3 after login For how to log in to the device with default configuration see Configuration Requirements Configuration...

Page 43: ...n see Configuration Requirements Configuration procedure Follow these steps to configure password authentication for console login To do Use the command Remarks Enters system view system view Enter co...

Page 44: ...rt without authentication and have user privilege level 3 after login For how to log in to the device with default configuration see Configuration Requirements Configuration procedure Follow these ste...

Page 45: ...device If command accounting is enabled and command authorization is not enabled every executed command is recorded on the HWTACACS server If both command accounting and command authorization are enab...

Page 46: ...unting you need to perform the following configuration to make the function take effect z Create a HWTACACS scheme and specify the IP address of the accounting server and other accounting parameters F...

Page 47: ...st number Configure the baud rate speed speed value Optional By default the transmission rate is 9600 bps Transmission rate is the number of bits that the device transmits to the terminal per second C...

Page 48: ...ol software flow control type1 hardware flow control type2 Optional Configure the type of terminal display terminal type ansi vt100 Optional By default the terminal display type is ANSI The device sup...

Page 49: ...upports telnet You can telnet to the device to remotely manage and maintain it as shown in Figure 3 9 Figure 3 9 Telnet login The following table shows the configuration requirements of telnet login O...

Page 50: ...ername and password authentication at the next login through telnet Authentication falls into local authentication and remote authentication To use local authentication configure a local user and rela...

Page 51: ...le telnet telnet server enable Required By default the telnet service is enabled Enter one or multiple VTY user interface views user interface vty first number last number Specify the none authenticat...

Page 52: ...s Enters system view system view Enable telnet telnet server enable Required By default the telnet service is enabled Enter one or multiple VTY user interface views user interface vty first number las...

Page 53: ...device through the console port without authentication and have user privilege level 3 after login For how to log in to the device with default configuration see Configuration Requirements Configurat...

Page 54: ...not enabled every executed command is recorded on the HWTACACS server If both command accounting and command authorization are enabled only the authorized and executed commands are recorded on the HW...

Page 55: ...ation to make the function take effect z Create a HWTACACS scheme and specify the IP address of the accounting server and other accounting parameters For more information see AAA in the Security Confi...

Page 56: ...pyright information copyright info enable Optional Enabled by default Enter one or multiple VTY user interface views user interface vty first number last number Enable the terminal service shell Optio...

Page 57: ...e specified command when a user logs in to the user interface and tears down the user connection after the command is executed If the command triggers another task the system does not tear down the us...

Page 58: ...en the device serves as the Telnet client telnet client source interface interface type interface number ip ip address Optional By default no source IPv4 address or source interface is specified for T...

Page 59: ...ng the SSH Server z Configuring the SSH Client Configuring the SSH Server Configuration prerequisites You have logged in to the device and want to log in to the device through SSH in the future By def...

Page 60: ...sword publickey publickey assign publickey keyname Required By default no SSH user exists and no authentication mode is specified Configure common settings for VTY user interfaces Optional See Configu...

Page 61: ...ble used in AUX port login is the same as that in console port login For a device that has separate console and AUX ports you can use both to log in to the device to facilitate system maintenance Figu...

Page 62: ...authentication modes and parameters see AAA Configuration in the Security Volume Keep your username and password The following table lists AUX port login configurations for different authentication m...

Page 63: ...igure none authentication for AUX login To do Use the command Remarks Enters system view system view Enter one or more AUX user interface view user interface aux first number last number Specify the n...

Page 64: ...interface aux first number last number Specify the password authentication mode authentication mode password Required By default you can log in to the device through the AUX port with password authen...

Page 65: ...number Specify the scheme authentication mode authentication mode scheme Required By default the authentication mode for users that log in through the AUX port is password Enable command authorization...

Page 66: ...e hwtacacs scheme name local local none radius scheme radius scheme name local Configure the authentic ation mode Exit to system view quit Optional By default the AAA scheme is local If you specify th...

Page 67: ...other accounting parameters For more information see AAA in the Security Configuration Guide z Reference the created HWTACACS scheme in the ISP domain For more information see AAA in the Security Con...

Page 68: ...By default the stop bits of the AUX port is 1 Stop bits are the last bits transmitted in data transmission to unequivocally indicate the end of a character The more the bits are the slower the transmi...

Page 69: ...ers user privilege level level Optional By default the default command level is 0 for the AUX user interface Set the maximum number of lines on the next screen screen length screen length Optional By...

Page 70: ...ributes The port properties of the hyper terminal must be the same as the default settings of the AUX port shown in the following table Setting Default Bits per second 9 600 bps Flow control On for an...

Page 71: ...lowing takes the HyperTerminal of Windows XP as an example Select a serial port to be connected to the device and set terminal parameters as follows set Bits per second to 9600 Data bits to 8 Parity t...

Page 72: ...ection Figure 3 23 Set the properties of the serial port Step3 Turn on the device You are prompted to enter the login password if the device successfully completes the power on self test POST A prompt...

Page 73: ...ne Authentication for Modem Login z Configuring Password Authentication for Modem Login z Configuring Scheme Authentication for Modem Login z Configuring Common Settings for Modem Login Optional Confi...

Page 74: ...y connected the modem is connected to a telephone cable and the telephone number of the remote modem connected to the AUX port console port of the remote device is obtained On the device z The baud ra...

Page 75: ...2003 Server operating system you need to add the HyperTerminal program first and then log in to and manage the device as described in this document On the Windows 2008 Server Windows 7 Windows Vista...

Page 76: ...3 65 Figure 3 27 Enter the phone number Figure 3 28 Dial the number Step4 Character string CONNECT9600 is displayed on the terminal Then a prompt such as H3C appears when you press Enter...

Page 77: ...odem Login Authentication Modes Three authentication modes are available for modem dial in login none password and scheme z none Requires no username and password at the next login through modems This...

Page 78: ...re the AAA scheme used by the domain as local For more information see Configuring Scheme Authentication for Modem Login Modem login authentication changes do not take effect until you exit the CLI an...

Page 79: ...the device through the console port without authentication and have user privilege level 3 after login For how to log in to the device with default configuration see Configuration Requirements Config...

Page 80: ...igure 3 31 Configuration page Configuring Scheme Authentication for Modem Login Configuration prerequisites You have logged in to the device By default you can log in to the device through the console...

Page 81: ...of the corresponding command level the authorization server checks whether the command is authorized If yes the command can be executed Enable command accounting command accounting Optional z By defa...

Page 82: ...on Settings for VTY User Interfaces Optional After you enable command authorization you need to perform the following configuration to make the function take effect z Create a HWTACACS scheme and spec...

Page 83: ...default Enter one or more AUX user interface views user interface aux first number last number Configure the baud rate speed speed value Optional By default the baud rate is 9600 bps Transmission rate...

Page 84: ...e2 flow control software flow control type1 hardware flow control type2 Optional Configure the type of terminal display terminal type ansi vt100 Optional By default the terminal display type is ANSI T...

Page 85: ...ogin take effect immediately If you configure the common settings after you log in through the AUX port the current connection may be interrupted Therefore use another login method After you configure...

Page 86: ...without interruption from the users that have logged in through other user interfaces the administrator can execute the command to release the connections established on the specified user interfaces...

Page 87: ...default you cannot log in to the device through NMS To enable NMS login log in to the device via the console port and make the configurations described in the following table The following table show...

Page 88: ...ks Enter system view system view Enable SNMP agent snmp agent Optional Disabled by default You can enable SNMP agent with this command or any command that begins with snmp agent Create or update MIB v...

Page 89: ...f device Make sure the device and the NMS can reach each other Configuration steps are omitted Enter system view Sysname system view Enable the SNMP agent Sysname snmp agent Configure an SNMP group Sy...

Page 90: ...nfigure SNMP settings for the iMC to find the device After the device is found you can manage and maintain the device through the iMC For example query device information or configure device parameter...

Page 91: ...3 80 Click Help in the upper right corner of each configuration page to get corresponding help information...

Page 92: ...rsConfiguring Source MAC Based Login Control over Telnet Users Ethernet frame header ACL NMS Configuring Source IP Based Login Control over NMS Users Basic ACL Configuring Login Control over Telnet Us...

Page 93: ...login control over telnet users To do Use the command Remarks Enter system view system view Create an advanced ACL and enter its view or enter the view of an existing advanced ACL acl ipv6 number acl...

Page 94: ...telnet packets The above configuration does not take effect if the telnet client and server are not in the same subnet Source MAC Based Login Control Configuration Example Network requirements As sho...

Page 95: ...n Guide Follow these steps to configure source IP based login control over NMS users To do Use the command Remarks Enter system view system view Create a basic ACL and enter its view or enter the view...

Page 96: ...o access Figure 5 2 Network diagram for configuring source IP based login control over NMS users Configuration procedure Create ACL 2000 and configure rule 1 to permit packets sourced from Host B and...

Page 97: ...ike bin and btm files z ASCII mode Transfers files as text like txt bat and cfg files Operation of FTP FTP adopts the client server model Your device can function either as the client or the server as...

Page 98: ...configuration on the device Configure authentication and authorization Configure the username password and authorized directory for an FTP user The device does not support anonymous FTP for security r...

Page 99: ...address of the transmitted packets is selected following these rules z If no source address is specified the FTP client uses the IP address of the interface determined by the matched route as the sour...

Page 100: ...view open ipv6 server address service port i interface type interface number Use either approach The ftp ipv6 command is available in user view and the open ipv6 command is available in FTP client vi...

Page 101: ...s directory 5 Upload or download the file Follow these steps to operate the files on an FTP server To do Use the command Remarks Display detailed information about a directory or file on the remote FT...

Page 102: ...lish an FTP connection see Establishing an FTP Connection you can perform the following operations to locate and diagnose problems encountered in an FTP connection To do Use the command Remarks Displa...

Page 103: ...ername being abc and the password being pwd Figure 6 2 Network diagram for FTPing a boot file from an FTP server Internet Device 10 1 1 1 16 FTP server FTP client 10 2 1 1 16 PC Configuration procedur...

Page 104: ...d the boot file must be saved on the first partition You can copy or move a file to the root directory of the storage medium For the details of the boot loader command see Software Upgrade in the Fund...

Page 105: ...ewest bin Upload the configuration file config cfg of Device to the server for backup ftp ascii ftp put config cfg back config cfg 227 Entering Passive Mode 10 1 1 1 4 2 125 ASCII mode data connection...

Page 106: ...s data to the storage medium while receiving data This means that any anomaly power failure for example during file transfer might result in file corruption on the FTP server This mode however consume...

Page 107: ...me Required No local user exists by default and the system does not support FTP anonymous user access Assign a password to the user password simple cipher password Required Assign the FTP service to t...

Page 108: ...user ftp to access the root directory of the cfa0 and specify ftp to use FTP Sysname system view Sysname local user ftp Sysname luser ftp password simple pwd Sysname luser ftp authorization attribute...

Page 109: ...boot loader file newest bin main Reboot the device and the boot file is updated at the system reboot Sysname reboot The boot file used for the next startup must be saved under the root directory of t...

Page 110: ...te work directory cfa0 Sysname luser ftp service type ftp Sysname luser ftp quit Enable FTP server Sysname ftp server enable Sysname quit Check files on your device Remove those redundant to ensure ad...

Page 111: ...ified file will be used as the main boot file at the next reboot on slot 0 z Specify newest bin as the main boot file to be used at the next startup for the SMB in slot 1 Sysname boot loader file slot...

Page 112: ...6 101...
Page 113: ...TFTP uses the UDP port 69 for data transmission For TFTP basic operation see RFC 1986 In TFTP file transfer is initiated by the client z In a normal file downloading process the client sends a read re...

Page 114: ...emory and does not write it to the storage medium until the whole file is obtained In this way if you download a remote file using a filename destination filename that exists in the directory the orig...

Page 115: ...ce number ip source ip address Optional A device uses the source address determined by the matched route to communicate with the TFTP server by default Return to user view quit Download or upload a fi...

Page 116: ...omitted z On the PC enable the TFTP server z Configure a TFTP working directory 2 Configure Device TFTP Client If the available memory space of the device is not enough use the fixdisk command to clea...

Page 117: ...from PC for upgrading and uploads a configuration file named config cfg to PC for backup Figure 7 3 Smooth upgrading using the TFTP client function Configuration procedure 1 Configure the PC TFTP Serv...

Page 118: ...Specify newest bin as the main boot file to be used at the next startup for the SMB in slot 1 Sysname boot loader file slot1 cfa0 newest bin slot 1 main This command will set the boot file of the spe...

Page 119: ...rage media of the same type on the device the physical device name of a storage medium is composed of the storage medium type and the sequence number of the storage medium A sequence number is an Engl...

Page 120: ...cfg in the current working directory If the current working directory is on the active main board AMB a cfg represents file a cfg on the AMB if the current working directory is on the standby main bo...

Page 121: ...equired Available in user view Creating a Directory To do Use the command Remarks Create a directory mkdir directory Required Available in user view Removing a Directory To do Use the command Remarks...

Page 122: ...er view Displaying the Contents of a File To do Use the command Remarks Display the contents of a file more file url Required Currently only a txt file can be displayed Available in user view Renaming...

Page 123: ...rl command and then the reset recycle bin command in the same directory Restoring a File from the Recycle Bin To do Use the command Remarks Restore a file from the recycle bin undelete file url Requir...

Page 124: ...e to abnormal operations you can use the fixdisk command to restore the space of the storage medium The execution of the format command formats the storage medium and all the data on the storage mediu...

Page 125: ...cally mounted and in mounted state when connected to the system Unmount a storage medium umount device Optional By default a storage medium is automatically mounted and in mounted state when connected...

Page 126: ...03 46 j1 cfg 506336 KB total 461312 KB free File system type of cfa0 FAT16 Create a new folder called mytest in the logfile directory Sysname cd logfile Sysname mkdir mytest Created dir cfa0 logfile...

Page 127: ...es Types of Configuration The device maintains two types of configuration files Startup configuration Startup configuration is used for initialization when the device boots If this file does not exist...

Page 128: ...startup configuration file to be used at the next startup of the device as needed when the device has main and backup configuration files The device starts up using the main startup configuration fil...

Page 129: ...d SMB z If the configuration file auto save function is not enabled when you save the current configuration by executing the save safely backup main command or executing the save filename all command...

Page 130: ...be set as the file for the next startup save file url Save the current configuration to the root directory of the storage medium and specify the file as the startup configuration file that will be use...

Page 131: ...configuration file The specified configuration file must be a valid cfg file generated by using either the backup function manually or automatically or the save command or if a configuration file is g...

Page 132: ...on is saved manually or automatically the file path and filename prefix must be configured After that the system saves the current running configuration with the specified filename filename prefix_ser...

Page 133: ...nterval and archive configuration max commands restores to the default meanwhile the saved configuration files are cleared z The value of the file number argument is determined by the memory space You...

Page 134: ...ing of the current running configuration is performed periodically and manual saving can immediately save the current running configuration Therefore before performing complicated configuration you ca...

Page 135: ...may occur in configuration rollback Specifying a Startup Configuration File to Be Used at the Next System Startup To specify a startup configuration file to be used at the next system startup z Use t...

Page 136: ...z Use the display startup command in user view to check whether you have specified a startup configuration file to be used at the next startup If the file is set as NULL or does not exist the backup...

Page 137: ...iguration file from a TFTP server to the root directory of the storage media of both the AMB and SMB and specify the file as the startup configuration file to be used at the next startup On the SR6604...

Page 138: ...on rollback display archive configuration Available in any view Display the current running configuration file saved on the storage medium of the device display saved configuration by linenum Availabl...

Page 139: ...ers and adaption for hardware and implements service features The Boot ROM program and system boot file are required for the startup and running of a device Figure 10 1 illustrates their relationship...

Page 140: ...is causes running service interruption during the upgrade process and is not recommended Software Upgrade by Installing Hotfixes System boot file Hotfix is a fast cost effective method to repair softw...

Page 141: ...specified Boot ROM program take effect z On the SR6604 6608 6616 router Because the Boot ROM programs of the main boards and line processing units LPUs vary with devices users are easily confused whe...

Page 142: ...ot file take effect Follow the step below to specify a boot file to be used at the next boot To do Use the command Remarks Specify a boot file to be used at the next boot boot loader file file url mai...

Page 143: ...mand you can use this feature to upgrade the SMB quickly to make the SMB and AMB have the same version If the state of the SMB is faulty you need to plug out the SMB and upgrade it The device performs...

Page 144: ...upgrade the software version and Boot ROM version of the device to soft version2 and bootrom version2 respectively through remote operations z The latest applications soft version2 bin and bootrom ver...

Page 145: ...al Software ready for new user User 2 2 2 2 none aaa 331 Give me your password please Password 230 Logged in successfully ftp Download the soft version2 bin and bootrom version2 btm programs on the FT...

Page 146: ...address of the device is 1 1 1 1 24 the IP address of the FTP server is 2 2 2 2 24 and the device and FTP server can reach each other z A user can log in to the device via Telnet and the user and devi...

Page 147: ...txt on the FTP server ftp ascii ftp get auto update txt Download file new config cfg on the FTP server ftp get new config cfg Download file soft version2 bin on the FTP server ftp binary ftp get soft...

Page 148: ...t defects After loaded from the storage medium to the memory patch area each patch is assigned a unique number which starts from 1 for identification management and operation For example if a patch fi...

Page 149: ...patch active patch run patch deactive patch delete patch install and undo patch install For example if you execute the patch active command for the patches in the DEACTIVE state the patches turn to t...

Page 150: ...aded to the memory patch area and are in the DEACTIVE state At this time the patch states in the system are as shown in Figure 12 3 Figure 12 3 A patch file is loaded to the memory patch area ACTIVE s...

Page 151: ...tes change from ACTIVE to RUNNING At this time the patch states of the system are as shown in Figure 12 5 The patches that are in the RUNNING state are still in the RUNNING state after system reboot F...

Page 152: ...hes to or install them on the memory patch area Table 12 1 describes the default patch name for each card type Table 12 1 Default patch names for different card types Product Card type PATCH FLAG Defa...

Page 153: ...tion Required z The patch matches the card type and software version z The patch install command changes the patch file location specified with the patch location command to the directory specified by...

Page 154: ...n automatically changes from xxx to yyy Loading a Patch File Loading the right patch files is the basis of other hotfixing operations The system loads a patch file from the CF card by default Set the...

Page 155: ...em view system view Activate the specified patches patch active patch number slot slot number Required Confirming Running Patches After you confirm the running of a patch the patch state becomes RUNNI...

Page 156: ...view system view Stop running the specified patches patch deactive patch number slot slot number Required Deleting Patches Deleting patches only removes the patches from the memory patch area and does...

Page 157: ...reach each other Figure 12 6 Network diagram of hotfix configuration Configuration procedure 1 Configure TFTP Server The configuration varies depending on server type and the configuration procedure...

Page 158: ...Network diagram of hotfix configuration Configuration procedure 1 Configure FTP Server The configuration varies depending on server type and the configuration procedure is omitted z Enable the TFTP s...

Page 159: ...12 148 Patches will be installed Continue Y N y Do you want to continue running patches after reboot Y N y Installing patches Installation completed and patches will continue to run after reboot...

Page 160: ...of an Interface Card z Clearing the 16 bit Interface Indexes Not Used in the Current System z Identifying and Diagnosing Pluggable Transceivers z Configuring USB Device Port z Displaying and Maintaini...

Page 161: ...nterface interface type interface number by linenum begin exclude include regular expression Available in any view Display the saved configuration or in other words the content of the configuration fi...

Page 162: ...onal Use either command By default daylight saving time is not configured on the device and the UTC time zone is applied Displaying the System Clock The system clock is determined by the commands cloc...

Page 163: ...2007 1 and 3 If date time is in the daylight saving time range the system clock configured is date time summer offset Configure clock datetime 8 00 2007 1 1 and clock summer time ss one off 1 00 2007...

Page 164: ...1 00 00 zone time Mon 01 01 2007 Configure clock timezone zone time add 1 clock summer time ss one off 1 00 2008 1 1 1 00 2008 8 8 2 and clock datetime 1 30 2008 1 1 System clock configured 23 30 00 z...

Page 165: ...displays the legal banner before a user logs in waiting for the user to confirm whether to continue the authentication or login If entering Y or pressing the Enter key the user enters the authenticati...

Page 166: ...odem login users header incoming text Optional Configure the banner to be displayed at login authentication header login text Optional Configure the authorization information before login header legal...

Page 167: ...recover the system such as reboot the system Sometimes it is difficult for the system to recover or some prompts that are printed during the failure are lost after the reboot In this case you can use...

Page 168: ...nable the scheduled reboot function at the CLI You can set a time at which the device can automatically reboot or set a delay so that the device can automatically reboot within the delay The last two...

Page 169: ...pecified Available in user view Follow these steps to enable the scheduled reboot function To do Use the command Remarks Enable the scheduled reboot function of the whole system and specify a specific...

Page 170: ...ctive Standby Switchover in the High Availability Command Reference If you do not specify the slot keyword the execution of the reboot command on the device results in the reboot of the device includi...

Page 171: ...system view GigabitEtherentx x x for Ethernet interface view and Vlan interfacex for VLAN interface view z timeID is used to uniquely identify the binding between a command and its execution time A sc...

Page 172: ...wer supply priorities for the slots A smaller number represents a higher power supply priority When the PSU recovers the system enables the power supplies for the cards in a sequence according to the...

Page 173: ...e interface card When the interface card works in OC 3c STM 1c mode the receive and transmit rate of all the interfaces on the interface card is 155 Mbps when the interface card works in OC 12c STM 4c...

Page 174: ...ndexes will be used up which will result in interface creation failures To avoid such a case you can clear all 16 bit interface indexes saved but not used in the current system in user view After the...

Page 175: ...tor type central wavelength of the laser sent transfer distance and vendor name or name of the vendor who customizes the transceivers to identify the pluggable transceivers Follow these steps to ident...

Page 176: ...nterface number Available for anti spoofing pluggable optical transceiver s customized by H3C only Configuring USB Device Port Basic Functions of USB Device Port Universal serial bus USB is now the mo...

Page 177: ...cable must be an A type plug and the other end of the cable must be a B type plug z The A type plug of the cable is plugged in the A type receptacle on the host z The B type plug of the cable is plugg...

Page 178: ...the host At this time the Windows operating system on the host unmounts the internal CF card and then the file system of the router loads the internal CF card again z When the LED of the USB device po...

Page 179: ...op up window and then click Stop Figure 13 5 The Safely Remove Hardware icon in the taskbar Figure 13 6 The Safely Remove Hardware dialog box z Click OK in the Stop a Hardware device window If Windows...

Page 180: ...play the terminal user information display users all Available in any view Display the information of the users that have logged in to the device but are not under user view display configure user Ava...

Page 181: ...le in any view Display the terminal user information display users all Available in any view Display the information of the users that have logged in to the device but are not under user view display...

Page 182: ...e scheduled task display job job name Available in any view Display the exception handling methods display system failure Available in any view During daily maintenance or when the system is operating...

Page 183: ...Configuring the Working Mode of an Interface Card 13 161 Configuring USB Device Port 13 165 Configuring User Privilege and Command Levels 1 15 Controlling CLI Display 1 11 D Deleting a Startup Config...

Page 184: ...9 118 Scheduled Upgrade Configuration Example On the SR6602 router 11 135 Setting Configuration Rollback 9 120 Setting Prompt Modes 8 114 Software Upgrade Methods 10 128 Specifying a Startup Configur...

Reviews: