Chapter 4
System Operation
4-58
HD NVR User Manual
4-5-14
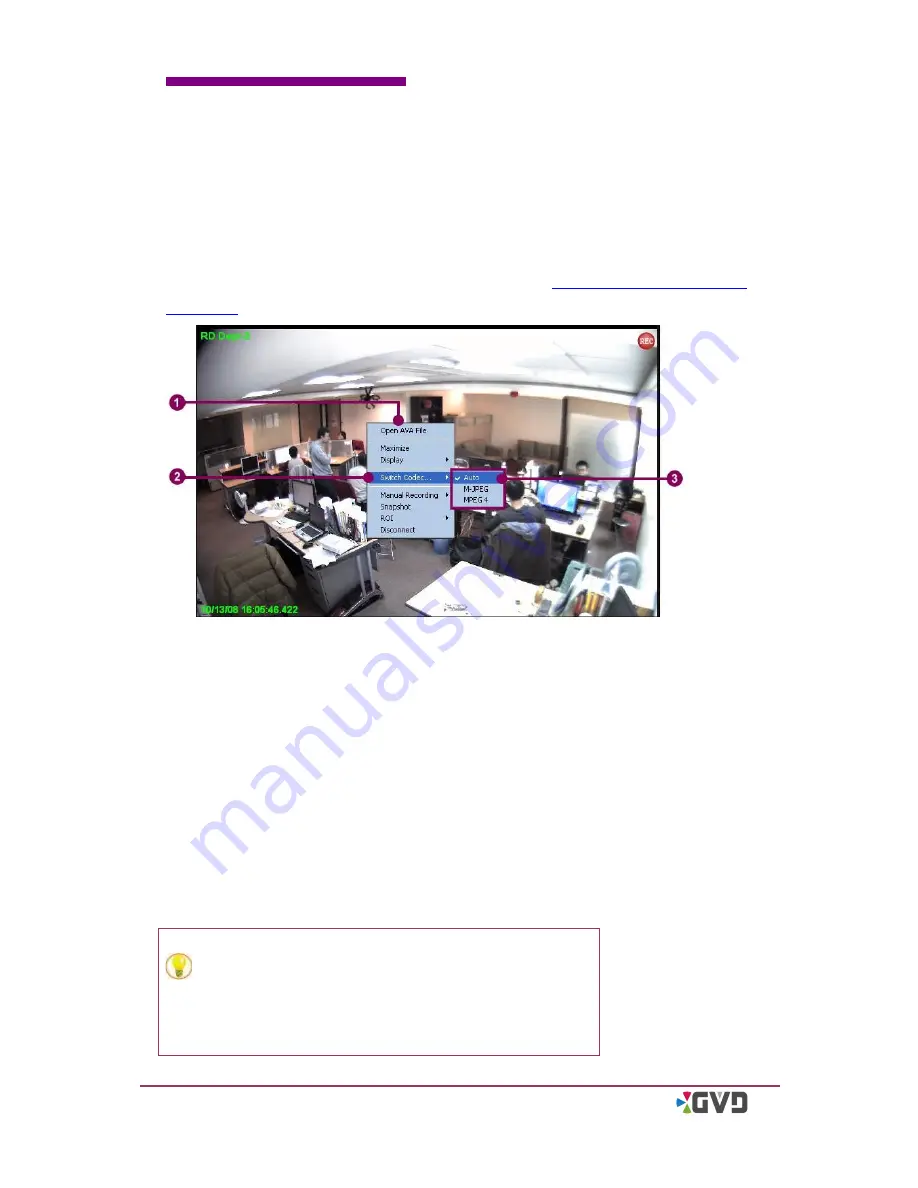
Switch Codec
Some specific cameras support the dual codec function, which means those cameras
are able to run different compression while playing and recording. To activate the dual
codec function, the camera should complete the dual codec setting in the
configuration mode in advance (refer to section 6-1-2-2
‘
Adding a camera/channel to
the system
’
.) The following steps describe the steps to change the codec compression.
Figure 4-41 Switch the codec on playing
1.
Right click the viewer connected by the dual codec camera, and a pop -up menu
appears.
2.
Move the cursor to the
‘
Switch Codec
’
item, and a sub menu appears.
3.
Depending on the supporting feature of the camera, there are three to f our options
in the sub menu: Auto, jpeg, mpeg4, and H.264
–
see the following descriptions:
Auto - the viewer sets the compression based on the video format setting of the
camera.
Jpeg
–
set
’
Motion-jpeg
’
as the video compression.
Mpeg4
–
set
‘
mpeg4
’
as the video compression.
H.264
–
set
‘
H.264
’
as the video compression
4.
The bandwidth requirement and the image quality change as the codec is changed.
TIP: Sometimes the image is uneasy to tell the
difference after switching the codec. Press hot key
‘
F9
’
to show the information of the channel image
and check the values of codec and Bitrate.
Summary of Contents for M3 series
Page 8: ......
Page 19: ...Chapter 2 Installation HD NVR User Manual 2 9...
Page 27: ...Chapter 2 Installation HD NVR User Manual 2 17 12 Click Finish to complete Restart the Windows...
Page 32: ......
Page 48: ......
Page 126: ......
Page 190: ......


