75
MIDI Control
■
Select Only
allows you use the Touchpad to select the MIDI Program Change to be sent. Press the Touchpad Control
Button again to send the selected MIDI Program Change message.
■
Select and Play
sends the MIDI Program Change message immediately when you touch the respective Touchpad segment
and exits MIDI Program Change mode.
4. Finally, assign a MIDI Program Change layout to a Touchpad Control Button. Press the SYS button and then navigate to the
Control Button assignment screen in system configuration.
See “Touchpad Control Button Assignment” on page 65 for more
MIDI OUT Control Change
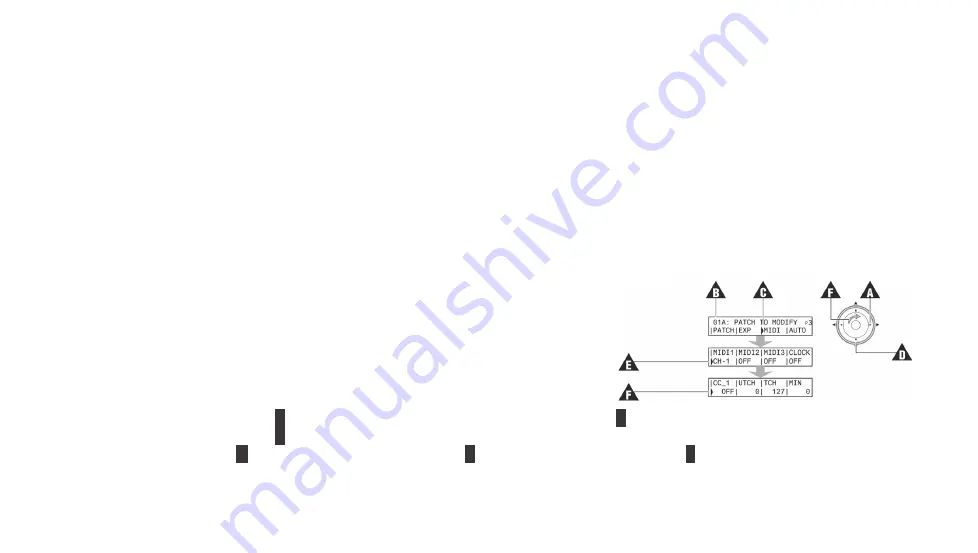
Setting up your REVPAD to send MIDI Control Change messages allows you to use the Touchpad to send up to six different CC values
to external MIDI devices.
1. Connect the MIDI OUT/THRU port on the back panel of the REVPAD base unit to
the MIDI IN port of your MIDI device using a standard MIDI cable. Make sure that
the MIDI TX channel on the REVPAD and the MIDI Receive channel on your MIDI
device are set to the same channel.
See “MIDI Control” on page 71 for more
2. Select a Patch for which you want to add MIDI OUT settings.
Patch” on page 37 for more information.
3. Press the right arrow button (
A
) eight times until you see the third effects screen (
B
).
4. Press the right arrow button (
A
) twice more to select
MIDI
.
5. Press the down arrow (
C
) to see the MIDI Channel page (
E
). Rotate the Navigation Roller (
F
) to set the appropriate MIDI
channel (CH-1 through CH-16). In this example, CH-1 has been selected.
Summary of Contents for REVPAD
Page 1: ...SAVE SYS X Y X Y X Y X Y X Y B C BYPASS GTC Sound Innovations REVPAD Manual ...
Page 2: ...II REVPAD Firmware version 1 0 Last manual update 2017 02 10 ...
Page 16: ...GTC Sound Innovations REVPAD Manual 10 ...
Page 66: ...GTC Sound Innovations REVPAD Manual 60 ...
Page 76: ...GTC Sound Innovations REVPAD Manual 70 ...


