310
Programming examples - Helicopter models
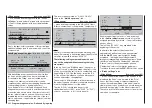
… which must be assembled from characters available
on the second page of the "
Model name
" line:
!"#$%&’()
Model name
Starl
e
@ACDEFGHIJKLMNOPQRSTUVWXYZ[¥]^_
?
+,–./0123456789:;
¾
¢ÇüéâäàåçêëèïîìÄÅÉæÆôöòûùÖÜ
`abcd
e
fghijklmnopqrstuvwxyz{|}~
After entering the "
Model name
", the settings
adopted from »
General basic settings
« for "
Stick
mode
" and "
DSC Output
" are to be checked and
changed as necessary for the given memory location.
The entry fi eld in the "Info" line can be used if needed
for a notice of up to 15 characters in length. This
notice will then be helpful in the selection of models
and so on.
Another option is to be activated in the
"
Autorotation
" line. Even if you are not an advanced
pilot, the autorotation switch should at least be set as
an emergency shutoff switch for the motor.
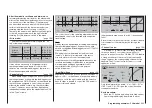
Do this by selecting the "
Autorotation
" line with a
brief tap on the center
SET
key of the right touch
pad, activate the switch assignment, assign a 2-way
switch, e.g. "2", an put it in its "ON" position.
BASIC SETTINGS, MODEL
SET
SET
RF transmit
on
RF range test
99s
DSC Output
PPM10
2I
Autorotation
The selected switch should be in a location on the
transmitter which is easily within reach – without letting
loose of a joystick – e.g. above the pitch joystick.
»Basic settings, model«
(page 84 … 92)
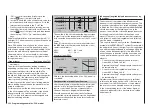
... To this end, switch to the line "
Module
".
Model name
Stick mode
Module
1
n/a
BASIC SETTINGS, MODEL
n/a
Info
n/a
n/a
Starlet
SEL
HoTT
BD1 BD2 BD3 BD4
2345g/090911
Note:
After confi rmation of the model selection in the base
screen, if you confi rm the message appearing in the
screen for a few seconds …
BIND. N/A
OK
… with a tap on the
SET
key of the right touch pad,
this line will be accessed automatically.
The line "Module" initiates a binding process between
model memory and receiver, as described in detail on
page 88. Otherwise, you cannot address the receiver.
Afterward, use the
c
selection key of the left or right
four-way pad to move up to the fi rst line and begin
with actual model programming in the "Model name"
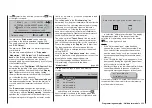
line. Now give the model memory an appropriate
name, …
Model name
Stick mode
Module
1
n/a
BASIC SETTINGS, MODEL
n/a
Info
n/a
n/a
Starlet
SEL
HoTT
BD1 BD2 BD3 BD4
2345g/090911
Note:
More more information about the setting of this
"emergency shutoff", see the beginning of the second
following double-page.
Another tip:
Make a habit of giving all switches a common switch-
on direction; then a quick glance over the transmitter
prior to the fl ight should suffi ce – all switches off.
Setting options for the "
Autorotation C1 position
",
"
Motor stop
", "
Marking
" and "
Stick warning
" are not
yet of particular interest …
… and the "
Auto Trim
" line should only be assigned
to a switch if "Initial trimming" is to be performed
on the helicopter in the context of a trimming fl ight.
Following such a fl ight, this switch should be erased
once again, for reasons of safety.
Additional settings specifi c to helicopters are made in
the menu …
»Helicopter type«
(page 98)
In the "
Swashplate type
" line, select control for
swashplate or pitch function. In this example:
"3Sv(2rol)".
The "
Linearis. swashpl.
" line is not yet of interest.
In the "
Rotor direction
" line, it is established whether
the rotor – as viewed from above – turns to the right
(clockwise) or left (counter-clockwise). In other words,
whether it rotates counterclockwise or clockwise. In
this example "right".
Check the default for "
Pitch min
", which was adopted
from »
General basic settings
«, to confi rm that the
entry "front" or "rear" is in keeping with personal
preferences or should be changed.
Summary of Contents for 32032
Page 1: ...33020 mc 20HoTT 2 en Programming Manual o Pro Pro mc 20 mc 20...
Page 15: ...15 For your notes...
Page 21: ......
Page 27: ...27 For your notes...
Page 41: ...41 For your notes...
Page 53: ...53 For your notes...
Page 59: ...59 For your notes...
Page 63: ...63 For your notes...
Page 93: ...93 For your notes...
Page 97: ...97 For your notes...
Page 141: ...141 How is a ight phase programmed...
Page 145: ...145 For your notes...
Page 155: ...155 For your notes...
Page 175: ...175 For your notes...
Page 203: ...203 For your notes...
Page 219: ...219 For your notes...
Page 253: ...253 For your notes...
Page 283: ...283 For your notes...
Page 321: ...321 For your notes...
Page 322: ...322 For your notes...
Page 323: ...323 For your notes...


