USER'S MANUAL
36
|
P a g e
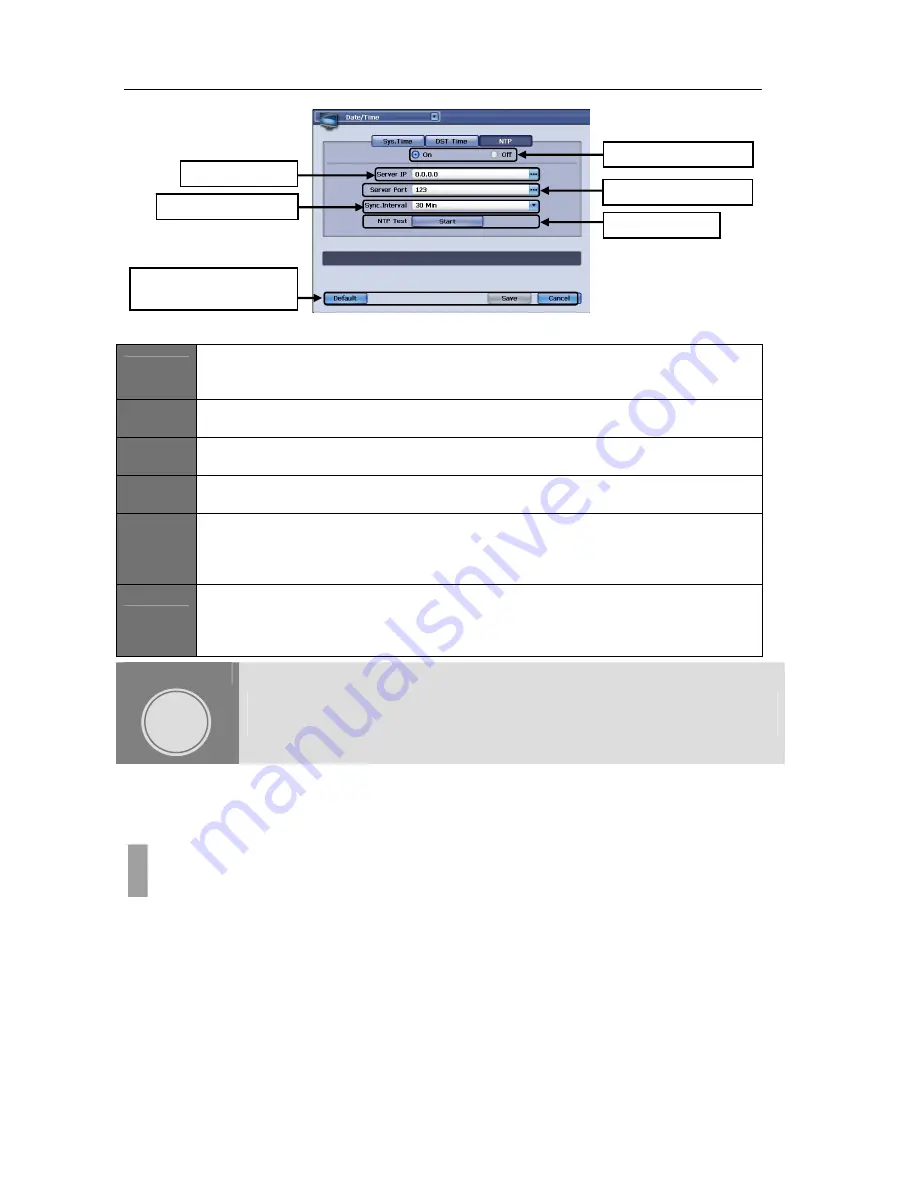
Figure 40 Date/Time Window with NTP button selected
ITEM
1
NTP On or OFF
In this section, you may enable NTP by selecting “On” radial button and disable it by selecting
“Off” radial button.
ITEM
2
Server IP
In this section, provide IP address number for the NTP time server IP address.
ITEM
3
Server Port
In this section, provide Port number for the NTP time server.
ITEM
4
Sync. Interval
In this section, define synchronization interval time by selecting drop down button.
ITEM
5
NTP Test
In this section, press the “NTP Test” button to test the connection to the time server. Upon
successful connection, system will prompt Connection Success message. If connection can not
be established then, it will prompt Connection Failure message will show.
ITEM
6
Default, Save or Cancel button
Click on the “Default” button to reset all parameter in current window.
Save button: use this button to commit the time configuration set on the Date/Time window.
Cancel button: use this button to cancel the time configuration set on the Date/Time window.
DISPLAY
In this chapter configuration options for display related setting are discussed. They are the option
settings for the On Screen Display, VGA monitor settings, SPOT Monitor settings and Picture in Picture
settings.
The On Screen Display (OSD) options dictate how label indicators will display for both live display
screen and for playback display screen. It is also this section that you will choose system language,
viewable margin, and window transparency settings. OSD window may be accessed by using the drop
down button located near upper left corner of any configuration window.
CHAPTER 11. DISPLAY
1. On Screen Display
CHAPTER
11
Item
1
NTP
On
or
Off
Item
3
Server
Port
Item
5
NTP
Test
Item
2
Server
IP
Item
6
Save, Cancel and Default
Item
4
Sync
Interval
Summary of Contents for H.264 Digital Video Recorder
Page 1: ......
Page 77: ...USER S MANUAL 77 P a g e...


