


GNS 530(A) Pilot’s Guide and Reference
190-00181-00 Rev. G
10-8
SECTION 10
AUX PAGES
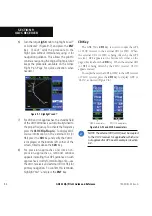
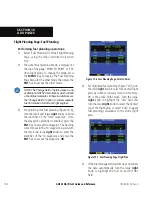
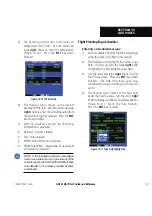
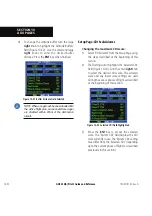
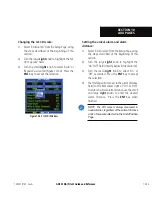
5)
The flashing cursor moves to the time/date field.
Use the small and large
right
knobs to set the
time or date (Figure 10-12) required before
the message is displayed. Time is entered as
hours/minutes/seconds (hhh:mm:ss). Event-
based messages expire at a specific date and
time. Press the
ENT
Key when finished.
Figure 10-12 Date Field Selected
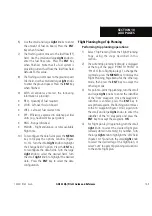
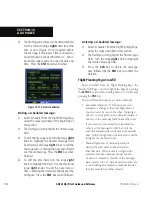
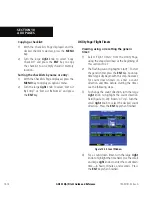
Editing a scheduled message:
1)
Select ‘Scheduler’ from the Flight Planning Page,
using the steps described at the beginning of
this section.
2)
The flashing cursor highlights the first message
field.
3)
To edit the message text, turn the large
right
knob to highlight the desired message field.
Use the small and large
right
knobs to edit the
message text—entering the new text directly
over the old message. Press the
ENT
Key when
finished.
4)
To edit the time field, turn the large
right
knob to highlight the field. Use the small and
large
right
knobs to edit the new date or
time—entering the new value directly over the
old figure. Press the
ENT
Key when finished.
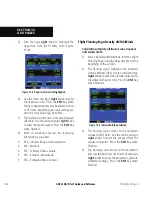
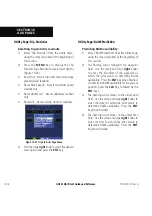
Deleting a scheduled message:
1)
Select ‘Scheduler’ from the Flight Planning Page,
using the steps described in this section.
2)
The flashing cursor highlights the first message
field. Turn the large
right
knob to highlight
the desired message field.
3)
Press the
CLR
Key to delete the message
text, followed by the
ENT
Key to confirm the
deletion.
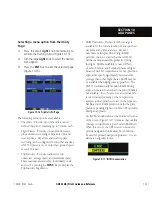
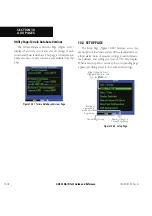
Flight Planning Page: Crossfill
Select
¼ÀÃÃw¶½Ê vÀÊ Ì iÊ } ÌÊ *>}Ê *>}i]Ê Ì iÊ
iv>ÕÌÊ 6Ê*>}i]ÊÀÊVÌÛiÊ} ÌÊ*>Ê*>}iÊLÞÊ«ÀiÃÃ}Ê
the
MENU
Key, and then scrolling down to
¼ÀÃÃw½Ê>`Ê
pressing the
ENT
key.
/ iÊVÀÃÃwÊiÌ `Ê«ÌÃÊ>ÀiÊÕÌÊÀÊ>Õ>\
UÊ ÕÌ>ÌVÊ"«iÀ>Ì\ÊÊvÊLÌ ÊÕÌÃÊ>ÀiÊÃiÌÊÌÊ
automatic, a change in the active flight plan of
one unit is also be seen in the other. Initiating a
direct-to to a waypoint on one unit also initiates a
direct-to to the same waypoint on the other unit.
If one unit is set for automatic crossfill and the
other is set for manual crossfill, then only the
auto unit automatically sends data to the manual
unit. In this configuration, the auto unit could be
thought of as the master unit.
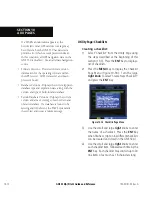
UÊ >Õ>Ê"«iÀ>Ì\ÊÊvÊ>Õ>Ê«iÀ>ÌÊÃÊ
desired, the pilot must invoke all transfers
vÀÊÌ >ÌÊÕÌ°ÊÊ7 iÊ>ÊÕÌÊÃÊVw}ÕÀi`ÊvÀÊ
automatic transfer, a manual transfer can also
be done on command. If either of the messages
¼`>Ì>ÊÌÀ>ÃviÀÊiÀÀÀ½ÊÀÊʼ`>Ì>ÊÌÀ>ÃviÀÊV>Vii`½Ê>ÀiÊ
received during an automatic or manual transfer,
the pilot must force another transfer.
Summary of Contents for GNS 530
Page 1: ...GNS 530 A Pilot s Guide and Reference...
Page 2: ......
Page 10: ...GNS 530 A Pilot s Guide and Reference 190 00181 00 Rev G viii WARRANTY Blank Page...
Page 36: ...GNS 530 A Pilot s Guide and Reference 190 00181 00 Rev G 2 6 SECTION 2 COM Blank Page...
Page 116: ...GNS 530 A Pilot s Guide and Reference 190 00181 00 Rev G SECTION 6 PROCEDURES 6 34 Blank Page...
Page 142: ...GNS 530 A Pilot s Guide and Reference 190 00181 00 Rev G 7 26 SECTION 7 WPT PAGES Blank Page...
Page 190: ...GNS 530 A Pilot s Guide and Reference 190 00181 00 Rev G 10 30 SECTION 10 AUX PAGES Blank Page...
Page 280: ...GNS 530 A Pilot s Guide and Reference 190 00181 00 Rev G I 6 INDEX Blank Page...
Page 281: ......