background image

Part # 4521653 Rev 1 (03/05/13)

Page 9

6.  To increase the life of the shortening, it should be filtered 

with Garland fryer filter cones daily or more often, if 

necessary.

7.  Baskets should never be more than half full.

8.  Keep fat at operating level.

9.  Fry pieces of similar size at the same time for best results.

10. Excessive moisture should be shaken from the product 

before frying.

11. Your shortening manufacturer can supply excellent frying 

and shortening guides. 

Controls

1.  All ED series fryers are equipped with a manually 

resettable high limit located at the rear of the element 

termination box. In the event that shortening 

temperatures exceed normal limits, the high limit will trip 

and can only be reset by pushing the red button when 

shortening has cooled.

2.  All ED series are equipped with a precision electronic 

thermostat which has been factory calibrated and is 

designed to hold that calibration. There should never be 

the need to calibrate this thermostat in the field. Should 

there ever be an abnormal discrepancy in the set point 

of actual temperatures, or repeated tripping on the high 

limit occurs, the fryer should be serviced by an authorized 

Garland service agency.

Griddles – Models: ED-15G,  

ED-24G & ED-36G 

Grooved Griddles – Models:  

ED-15G-U, ED-24-U,  

ED-24G-U1, ED-36G-U,  

ED-36-U1 & ED-36G-U2

Wall Clearances

Do not install appliance closer to a wall of combustible 

material than:


Back 1 1/2” (38mm)


Sides 1” (25mm)

Supply Connection

For supply connection, use wire suitable for 75°C (167°F).

INDIVIDUAL MODEL INSTALLATIONS continued

Electrical Connection

A knockout is provided near the front left side of the unit 

located behind the control panel. To view knockout, loosen 

the two acorn nuts and hinge control panel downward. The 

terminal block is also located in this area.

The supply cable entrance is located on the right side when 

facing the rear of the unit. The cable is fed towards the front 

through a wire way.

Controls

Griddles are equipped with snap action thermostats.

Calibration Instructions

1.  Field calibration is seldom necessary and should not 

be attempted unless experience with cooking results 

definitely proves that the control is not maintaining the 

temperature to which the dial is set.

2.  Should calibration be required, use a test instrument 

(pyrometer) which special disc type thermocouple or 

reliable “surface” type thermometer.

NOTE:  A drop of oil on face of disc will provide better 

contact.

3.  Turn ALL griddle temperature control dials to 350°F 

(177°C). In order to allow griddle temperature to stabilize, 

the controls must be allowed to cycle twice before taking 

a test reading.

4.  Check temperature reading when control just cycles 

“OFF” (as indicated by the cycling amber pilot), by placing 

sensor firmly on griddle surface directly above sensing 

bulb of control. If the temperature does not read within 

15°F (8°C) of the dial setting recalibrate as follows.

5.  Carefully remove the thermostat dial making sure the 

setting is not disturbed. 

6.  Hold dial shaft steady and with a screwdriver, turn 

calibration screw located inside the dial shaft, clockwise 

to decrease and counterclockwise to increase the 

temperature.

EXAMPLE: 1/4 turn = 35°F (19°C)

7.  Replace thermostat dial and repeat steps 2 through 4 to 

verify correct adjustment has been made.

Summary of Contents for ED Series

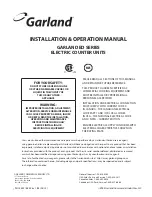
Page 1: ...9 General Inquires 1 95 624 0260 USA Sales Parts and Service 1 800 424 2411 Canadian Sales 1 888 442 4526 Canada or USA Parts Service 1 800 427 6668 Part 4521653 Rev 1 03 05 13 2005 Garland Commercial...

Page 2: ...state of california to cause cancer and or birth defects or other reproductive harm Installation and servicing of this product could expose you to airborne particles of glass wool ceramic fibers Inha...

Page 3: ...els ED 15F ED 15SF ED 30FT ED 30SFT 8 Wall Clearance 8 Supply Connection 8 Electrical Connection 8 Before Operating the Fryer 8 Operating Suggestions 8 Controls 9 Griddles Models ED 15G ED 24G ED 36G...

Page 4: ...i Line 2 0r 3 Phase In mm in mm in mm 208V 240V 208V 240V 240V 380V 240V 425V 220V 380V 240V 415V ED 15H 15 381 24 610 11 25 286 21 18 18 16 20 18 10 9 ED 15HSE 15 381 24 610 11 25 286 25 22 22 19 24...

Page 5: ...ar of each two units being banked together If optional 2 1 2 64mm legs are supplied with unit discard leveling bolts and replace with legs 1 Level each unit by adjustment of leveling bolts or legs Use...

Page 6: ...on on counter stand securing the first unit with 8 32 machine screws and flat washers Insert 8 32 machine screws through the 7 32 5mm diameter holes in stand into the nutserts in the bottom of ED Seri...

Page 7: ...kout is provided near the front left side of the unit located behind the control panel To view knockout loosen the two acorn nuts and hinge control panel downward The terminal block is also located in...

Page 8: ...s gained by removing the fry tank assembly the rear shield and contactor box cover all located at the rear of the fryer Before Operating the Fryer 1 Before leaving the factory the fryer was tested and...

Page 9: ...nued Electrical Connection A knockout is provided near the front left side of the unit located behind the control panel To view knockout loosen the two acorn nuts and hinge control panel downward The...

Page 10: ...se a wire suitable for 90 C 194 F Electrical Connection NOTE Applicable to Model ED 15W only A knockout is provided near the front left side of the unit located behind the control panel To view knocko...

Page 11: ...ompound is used that has been allowed to cool and become solidified first turn the thermostat dial to 121 C 250 F until the compound is in a liquid state Turn the thermostat dial s to off O Lift the e...

Page 12: ...is carbonizes on the broiler grates requiring major cleaning with detergent soap or degrease agent The broiler racks can be completely removed from the attached elements for cleaning WARNING All power...

Page 13: ...Part 4521653 Rev 1 03 05 13 Page 13...

Page 14: ...Part 4521653 Rev 1 03 05 13 Page 14...

Page 15: ...Part 4521653 Rev 1 03 05 13 Page 15...

Page 16: ......

Page 17: ......

Page 18: ...Pi ce n 4521653 Rev 1 03 05 13 Page 15...

Page 19: ...Pi ce n 4521653 Rev 1 03 05 13 Page 14...
Page 20: ...n de nettoyage quotidien 2 Les pinces des l ments fixant les l ments aux grilles sont alors visibles Retirer les pinces des l ments et nettoyer les grilles de la r tissoire 3 Inverser la proc dure ci...
Page 21: ...Appr tage Avant de les utiliser pour la premi re fois toutes les surfaces du gril doivent tre appr t es 1 Laver le gril avec une solution chaude de d tergent ou de savon rincer et s cher soigneusement...
Page 22: ...diff rentes tailles En fonction de l tablissement on d terminera les tailles des bacs utiliser Les bacs peuvent tre achet s aupr s de votre concessionnaire en quipements de cuisine ATTENTION Ne pas la...

Page 23: ...p ter les tapes 2 4 pour v rifier que le r glage est correct R tissoires Mod les ED 15B ED 30B Et ED 42B D gagements Par Rapport Aux Murs Ne pas installer l appareil une distance de mat riaux combusti...

Page 24: ...9 Pour de meilleurs r sultats faire frire des morceaux de taille similaire 10 liminer du produit l humidit en exc s avant de le faire frire 11 Votre fabricant de shortening peut vous offrir d excellen...

Page 25: ...re utilisation des plaques chauffantes les faire chauffer pendant 5 minutes sur le r glage 3 les arr ter et les laisser refroidir Cette op ration fera durcir et br ler le rev tement de protection 2 P...

Page 26: ...liser un c ble convenant une temp rature de 75 C 167 F NOTA Tout les modeles ED 15THSE a 208V 1 phase 60 hZ seront munis d un cordon electrique de 4 pieds de long NEMA L6 30P HUBBELL HBL2621 ou equiva...

Page 27: ...an de travail comme indiqu dans les instructions se trouvant dans le carton du socle 2 Retirer et jeter les boulons de mise niveau des appareils devant tre install s sur un socle de plan de travail IN...

Page 28: ...ec d autres quipements de s ries ED ou GD Pour assurer la correspondance et l ajustement permanent entre les unit s deux plaques d union sont livr es pour ce type d installation Une plaque se trouve l...

Page 29: ...phas Monophas Hi Line 2 Ou 3 Phases Po mm Po mm Po mm 208V 240V 208V 240V 240V 380V 240V 425V 220V 380V 240V 415V ED 15H 15 381 24 610 11 25 286 21 18 18 16 20 18 10 9 ED 15HSE 15 381 24 610 11 25 286...

Page 30: ...30FT Et ED 30SFT 8 D gagements Par Rapport Aux Murs 8 Connexion D alimentation 8 Alimentation lectrique 8 Avant D utiliser La Friteuse 8 Suggestions D utilisation 9 Commandes 9 Grils Mod les ED 15G E...

Page 31: ...nie comme causant le cancer et ou des malformations cong nitales ou d autres probl mes de reproduction L installation et l entretien de ce produit peut vous exposer aux poussi res de laine de verre fi...

Page 32: ...260 Ventes pi ces et service U 1 800 424 2411 Ventes Canada 1 888 442 7526 Pi ces Service Canada ou U 1 800 427 6668 Pi ce n 4521653 Rev 1 03 05 13 2004 Garland Commercial Industries LLC POUR VOTRE S...

Reviews: