


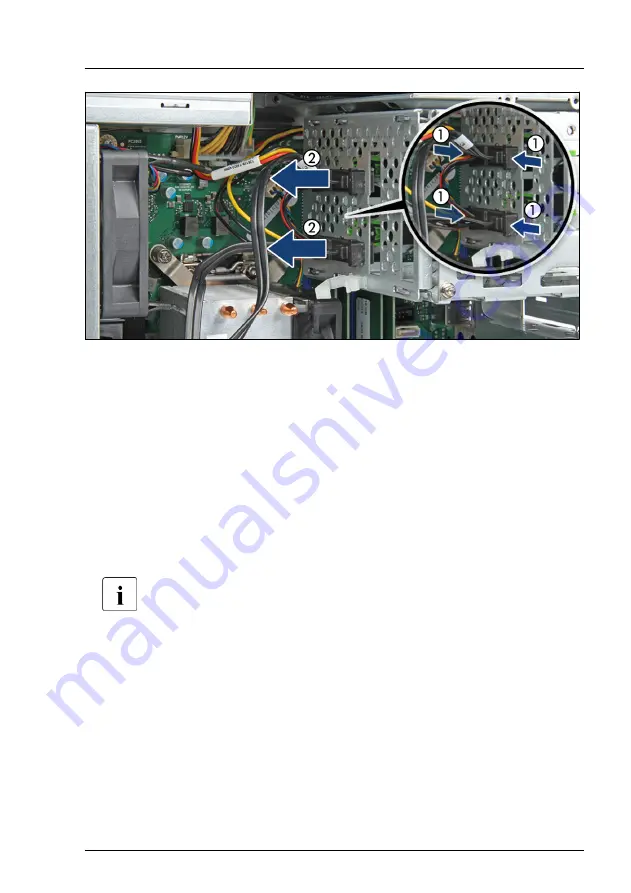
Figure 146: Removing the connectors from top HDD cage
▶
Pinch the sides of the connector (1) and remove it from the top HDD cage
(2).
▶
Disconnect all system cable connectors from the system board.
▶
Remove the defective cable.
Installing the new system cable
▶
Install the new cable to the top HDD cage and accessible drives.
▶
Connect the cables to the system board.
For more cabling information, see
.
▶
"Installing the standard PSU" on page 77
.
▶
"Installing the ODD" on page 161
.
▶
Push back the RDX backup drive until it snaps into place.
▶
If applicable, install HDD3 and HDD4, see
"Installing a 3.5-inch HDD" on
Cables
TX1310 M5
Upgrade and Maintenance Manual
219
Summary of Contents for PRIMERGY TX1310 M5
Page 14: ...Content Upgrade and Maintenance Manual TX1310 M5 ...
Page 80: ...Power supply unit PSU 80 Upgrade and Maintenance Manual TX1310 M5 ...
Page 124: ...Expansion cards 124 Upgrade and Maintenance Manual TX1310 M5 ...
Page 156: ...Processor CPU 156 Upgrade and Maintenance Manual TX1310 M5 ...
Page 174: ...Front panel and front USB 174 Upgrade and Maintenance Manual TX1310 M5 ...
Page 216: ...System board and components 216 Upgrade and Maintenance Manual TX1310 M5 ...
Page 238: ...Appendix A 238 Upgrade and Maintenance Manual TX1310 M5 ...
Page 257: ...List of all used screws for PRIMERGY Servers Assembled in WCZ and FIT July 2021 ...