Chapter 3 Installation and Uninstallation
50 |
Rack2-Filer User's Guide
6.
Confirm the installation directory and click the [Next] button.
In most cases, you do not need to change the installation directory. Click
the [Next] button.
D
The "Start Copying Files" window appears.
7.
Confirm the installation content and click the [Next] button.
D
Rack2-Filer is installed.
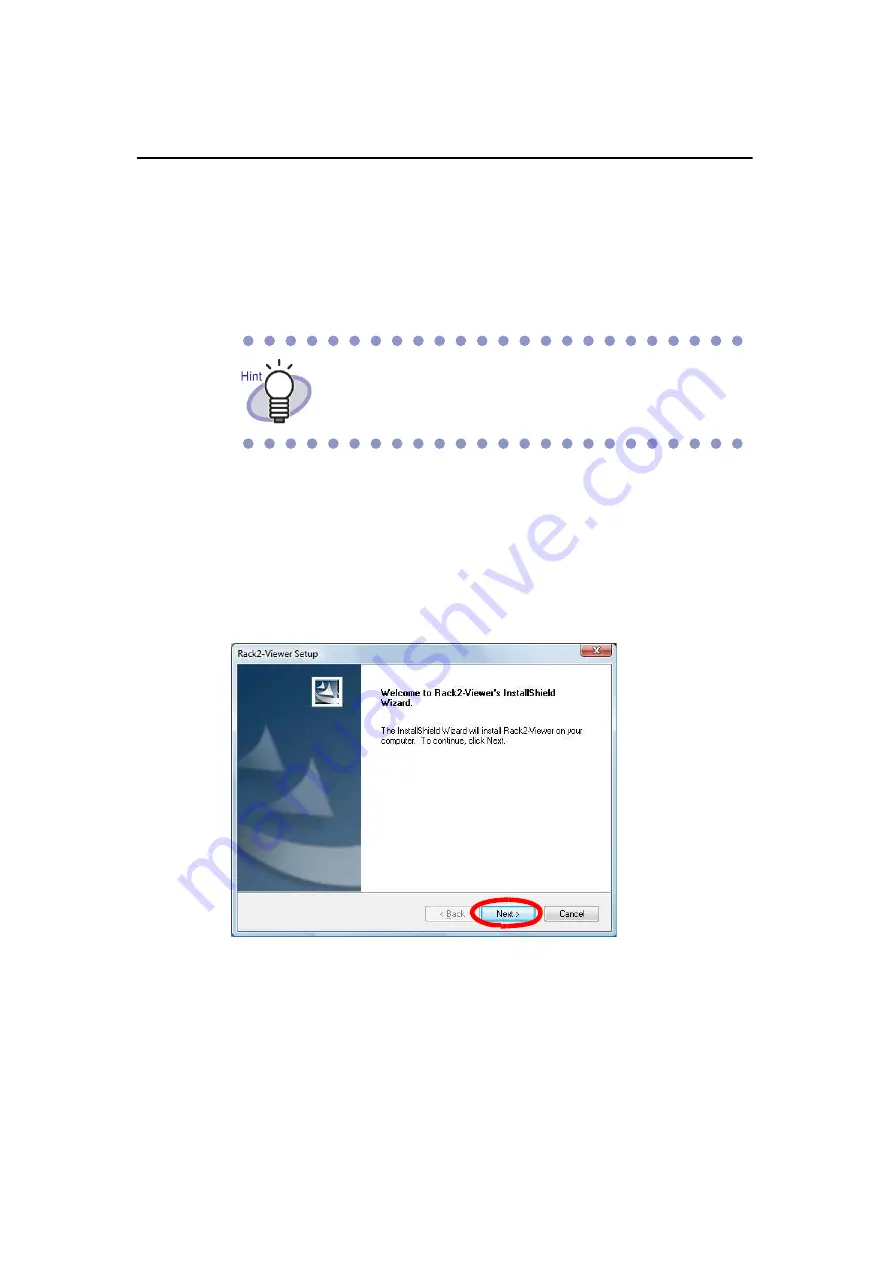
The Rack2-Viewer installation window appears.
8.
Click the [Next] button.
D
The "License Agreement" window appears.
To change the installation directory, click the [Browse] button.
The [Choose Folder] dialog box appears. Choose the
installation folder using this dialog box.
Summary of Contents for PFU Rack2-Filer
Page 2: ......
Page 22: ...Contents 22 Rack2 Filer User s Guide ...
Page 46: ...Chapter 2 Operating Environment 46 Rack2 Filer User s Guide ...
Page 58: ...Chapter 3 Installation and Uninstallation 58 Rack2 Filer User s Guide ...
Page 69: ...Rack2 Filer User s Guide 69 4 On the Application tab select Rack2 Filer for Application ...
Page 95: ...Rack2 Filer User s Guide 95 4 Click the Add New Cabinet button D The cabinet is created ...
Page 97: ...Rack2 Filer User s Guide 97 4 Click the Rename Cabinet button D The cabinet is renamed ...
Page 110: ...Chapter 6 Rack2 Filer Window Operations 110 Rack2 Filer User s Guide 4 Set the details ...
Page 156: ...Chapter 6 Rack2 Filer Window Operations 156 Rack2 Filer User s Guide ...
Page 177: ...Rack2 Filer User s Guide 177 Page width mode One page is displayed at a time ...
Page 300: ...Chapter 7 Rack2 Viewer Window Operations 300 Rack2 Filer User s Guide ...
Page 338: ...Chapter 8 Exporting to a Cloud Service Mobile Device 338 Rack2 Filer User s Guide ...
Page 370: ...Chapter 9 Creating a Photo Album 370 Rack2 Filer User s Guide ...
Page 388: ...Chapter 10 Other Functions 388 Rack2 Filer User s Guide ...
Page 456: ...Chapter 13 Messages 456 Rack2 Filer User s Guide ...


