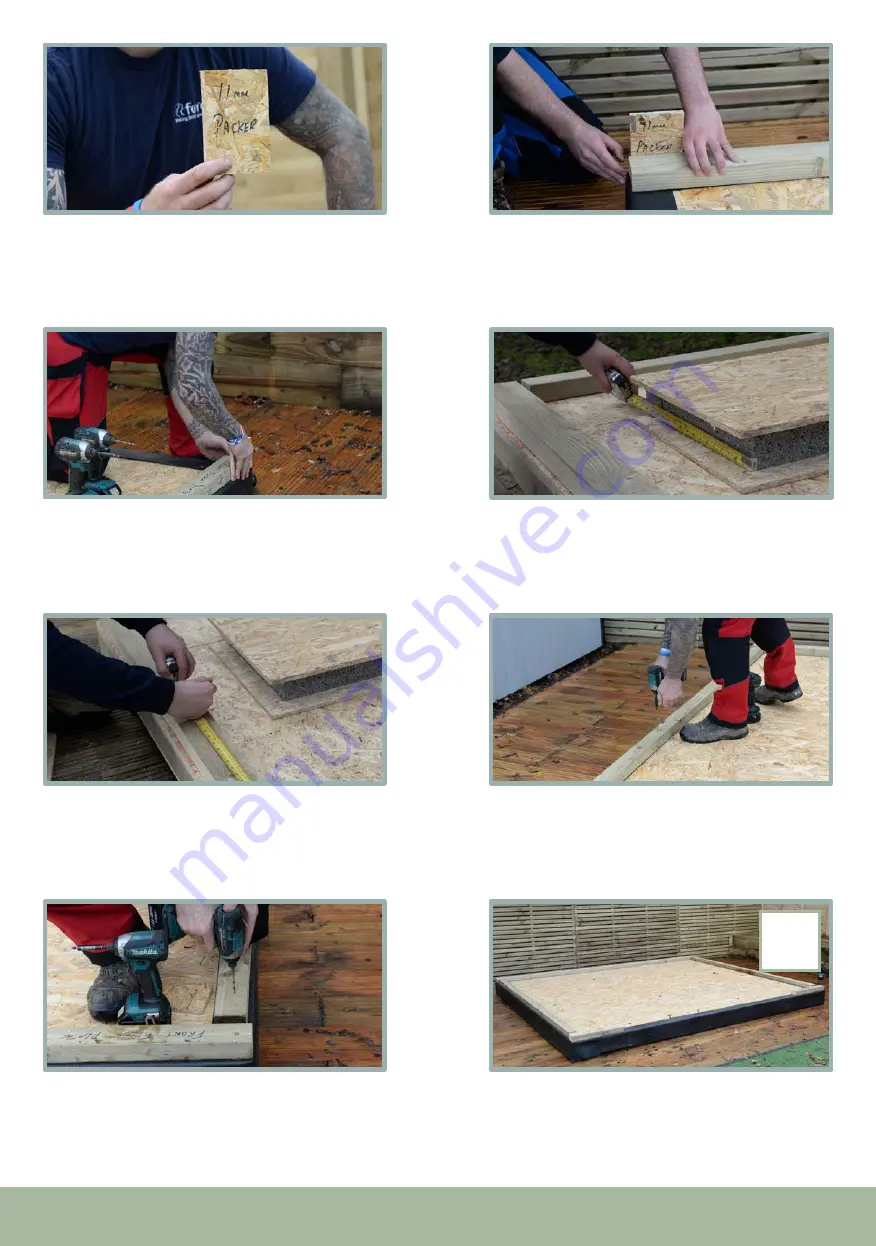
FLOOR PLATES
As part of your assembly pack, you will have been
provided with an off cut of OSB to use as an 11mm
guide when positioning the floor plates.
25
25
Repeat the process with the front floor plate (AP).
Ensure the one end is flush to the side and 11mm
from the front edge.
27
27
Repeat the process on the other side floor plate
(AN) and screw into place.
31
31
Mark and cut off the excess timber from the front
floor plate. This will remove any timber from your
door opening.
29
29
Starting with the back floor plate (AP), ensure
it’s flush end to end and provide 11mm spacing
from the bases’ back edge. Pre-drill and screw 4 x
125mm screws along the timber.
26
26
Pre-drill and use 4 x 125mm screws for the front
floor plate (AP) Apply 2 x 125mm screws per end.
Measure out your front panel (P) and ensure your
front panel is placed flush to the edge.
28
28
The final result is shown above.
32
32
Your side floor plates (AN) will fit in between your
front and back plates. Ensure 11mm from the outer
edge and 11mm at each end. Once happy with the
position, pre-drill and screw into place using 4 x
125mm screws.
30
30
a
9


