


OMNIS
CANNER
User Guide
2 - 14
5. Press the
AUTOTEST
key to start the test.
6. Press ESC at any time to cancel the Autotest.
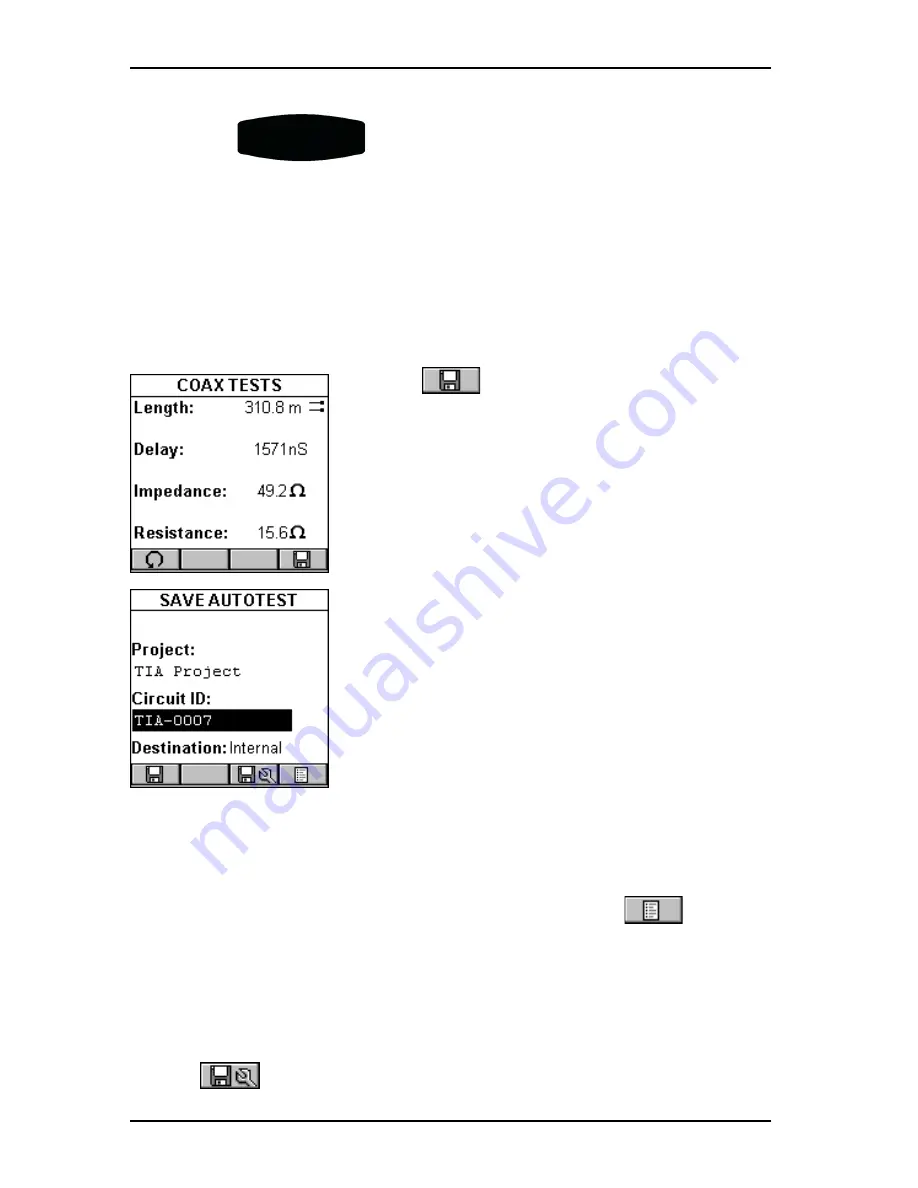
7. The
COAX TESTS
screen is displayed when the Autotest is com-
pleted.
Saving Coaxial Autotest Results
1. Press
(Save) from the
AUTOTEST
screen to open the
SAVE AUTOTEST
screen,
where the Autotests can be stored into
OMNIS
CANNER
’s memory.
2. The
Project:
field contains the name of the
project.
3. To change the name using OMNIS
CANNER
’s
edit feature, highlight the field, and press
ENTER to initiate the editing mode. (See
Chapter 1 - Introduction:
Editing with
OMNIS
CANNER
for more information.)
4. To assign a unique circuit id to the Autotest,
enter a Circuit ID into the
Circuit ID:
field.
Circuit IDs can be setup to automatically
increment. (See Chapter 4 - Setup:
Projects:
Editing a Circuit ID
for further information.)
If an incrementing Circuit ID was created in the
PROJECT
Setup screen,
the
Circuit ID:
field will already contain the next available Circuit ID
that can be used as a default.
5. To change the circuit ID using the list function, press
(List).
The
CIRCUIT ID
screen opens and displays all Circuit IDs available for
the project. Use the
ç
or
è
to quickly scroll through the pages. Use
the
é
or
ê
to highlight a Circuit ID and press ENTER to select it as the
name for the Autotest to be saved and return to the
SAVE AUTOTEST
screen.
6. Press
(Autotest Save Options) to open the
SAVE OPTIONS
Summary of Contents for OMNIFiber
Page 1: ...OMNIScanner 2 OMNIFiber ...
Page 9: ...OMNISCANNER User Guide TOC 6 ...
Page 25: ...OMNISCANNER User Guide 1 16 ...
Page 33: ...OMNISCANNER User Guide 2 8 ...
Page 41: ...OMNISCANNER User Guide 2 16 ...
Page 103: ...OMNISCANNER User Guide 7 6 ...
Page 111: ...OMNISCANNER User Guide 9 2 ...
Page 129: ...OMNISCANNER User Guide A 8 ...
Page 133: ...OMNISCANNER User Guide C 2 ...
Page 136: ......


