background image

IJ PUMP OPERATION AND MAINTENANCE MANUAL 

 6-1 

BO2660-01 

6.  REPLACEMENT AND REPAIR 

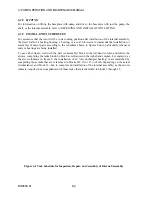
Replacement and repair instructions cover the disassembly, cleaning, inspection, repair (or 
replacement), and assembly of the major assemblies that make up the pump. Repair instructions for 
principal auxiliary equipment are prepared by their manufacturers (see APPENDIX or your plant's 
data file).  

6.1 GENERAL INSTRUCTIONS 

6.1.1  ITEMS AND DETAILS EXCLUDED FROM INSTRUCTIONS 

Since removal, installation, and tightening procedures for common hardware such as bolts, nuts, keys, 
and connectors are apparent to the journeyman millwright, detailed steps for handling such hardware, 
where it is external to the pump, are not included in the repair tasks. Accordingly, removal and 
installation procedures are not included for piping, coolers, oil filter, and instruments (gauges, 
thermometers etc.). Unless there is a handling requirement that is peculiar to the pump, specific lifting 
and related rigging instructions are not given in this manual.  

6.1.2  DISTURBING AN INSTALLATION 

It is unnecessary to disconnect the pump's suction and discharge piping or to change the position of 
either pump or driver except to remove it from the baseplate. Auxiliary piping should be disconnected 
only at such points as necessary for the removal of a part of the pump. When piping is disconnected, 
clean material such as plastic should be securely tied over openings to prevent entrance of foreign 
materials.  

6.1.3  GASKETS REQUIRE CONSIDERATION 

When disassembling parts separated by a gasket (see ASSEMBLY drawing in the back of this 
manual), make certain that all of the old gasket is removed. Make certain that the new gasket is of the 
same material and has the same thickness as the old one and that it is properly positioned for 
assembly. 

6.1.4  WHEN TO REPLACE WORN PARTS 

See OPERATING SPECIFICATIONS. 

6.1.5  PARTS ORDERING INFORMATION 

See PARTS ORDERING AND SERVICING INFORMATION. 

6.1.6 SETSCREWS 

Unless specified otherwise in the instructions for assembly of bearing, seal, head, and internal 
assembly, stake all setscrews. 

6.1.7 WEAR PARTS 

Before you begin to disassemble the pump, bearings, or seals, you should have on hand new 
replacements for those parts subject to considerable wear, abuse, or deformation such as bearing 
journals, thrust bearing shoes, wearing rings, bushings, O-rings, gaskets, seal bellows, seal primary 
rings, and seal mating rings. Of the parts named, O-rings, gaskets, and seal bellows must be new for 
reassembly. 

Summary of Contents for IJ

Page 1: ...s for these pumps The IJDS is the double suction version The IJ was officially made passive in 1994 as part of the IDP integration but is still sold today in some applications or as a duplicate The stiff shaft successor of the IJ is the WIK mainly sold in decoker applications NOTE This information is intended for the use of Flowserve Employees The information provided is based on standard catalogu...

Page 2: ...IJ PUMP INSTALLATION OPERATION MAINTENANCE ...

Page 3: ......

Page 4: ... and the purchaser The sales contract between the parties contains the sole warranty for this equipment During initial start up of the equipment it is recommended that the services of an Flowserve service representative be obtained to assure trouble free operation In some cases the presence of a Flowserve service representative may be a contractual requirement for continuation of warranty Check yo...

Page 5: ...IJ PUMP OPERATION AND MAINTENANCE MANUAL BO2660 01 iv ...

Page 6: ...ES 1 3 1 2 1 PUMP FLOW 1 3 1 2 2 BALANCE 1 3 1 2 2 1 Radial Balance 1 3 1 2 2 2 Axial Balance 1 3 1 2 3 BALANCING DRUM PIPING 1 3 1 2 4 MINIMUM FLOW 1 4 1 2 5 MINIMUM FLOW ORIFICE 1 4 1 2 6 NET POSITIVE SUCTION HEAD 1 4 1 2 7 SHAFT SEAL 1 4 1 2 8 COOLING WATER SYSTEM 1 4 1 2 9 LUBE OIL SYSTEM 1 4 1 2 9 1 Auxiliary Oil Pump 1 4 1 2 9 2 Pressure Switch 1 5 1 2 9 3 Pressure Relief Valve 1 5 1 2 10 TH...

Page 7: ...S AND EQUIPMENT 3 3 3 2 2 ONE BASEPLATE FOR ENTIRE TRAIN OF UNITS 3 4 3 2 3 BASEPLATES OR SOLEPLATES IN TRAIN 3 8 3 2 4 BASEPLATE FOR PUMP OR SINGLE UNIT 3 15 3 2 5 LEVELING SOLEPLATES 3 15 3 3 INSTALLING NOZZLE EXTENSIONS AND GROUTING 3 16 3 3 1 GROUTING WITH CEMENT AND SAND 3 16 3 3 2 GROUTING WITH EPOXY 3 17 3 3 3 INSTALLING NOZZLE EXTENSIONS 3 18 3 4 COUPLING PUMP AND DRIVER 3 18 3 4 1 TOOLS A...

Page 8: ...ting Pump Driver and Piping 4 3 4 1 2 8 Warming Up Pump 4 3 4 1 3 STARTING PUMP 4 5 4 2 OPERATION 4 7 4 2 1 CHECKS AND MINOR ADJUSTMENTS 4 7 4 2 2 ADJUSTING PACKING LEAKAGE RATE 4 9 4 2 3 OPERATING AT REDUCED CAPACITY 4 9 4 3 STOPPING 4 10 4 3 1 FROM ON LINE OPERATION TO COLD SHUTDOWN 4 10 4 3 2 FROM ON LINE OPERATION TO HOT STANDBY 4 11 4 4 MAINTENANCE AND INSPECTION TIPS 4 12 4 4 1 PERIODIC SEAL...

Page 9: ... Removing Seal Unit 6 9 6 4 4 2 Removing Seal Housing 6 10 6 4 5 HEAD 6 10 6 4 5 1 Removing Head Using Carriage 6 10 6 4 5 2 Removing Head Without Using Carriage 6 11 6 4 5 3 Disassembly 6 11 6 4 6 INTERNAL ASSEMBLY 6 12 6 4 6 1 Removing Internal Assembly 6 12 6 4 6 2 Disassembling Internal Assembly 6 13 6 4 6 2 1 Interference Fit Part Removal 6 13 6 4 6 2 2 Stage Number System And Balanced Parts ...

Page 10: ...mbly 6 27 6 6 1 1 1 Interference Fit Part Installation 6 27 6 6 1 1 2 Vertical Assembly 6 28 6 6 1 2 Installing Internal Assembly 6 30 6 6 2 HEAD 6 32 6 6 2 1 Assembling Head 6 32 6 6 2 2 Installing Head Using Carriage 6 32 6 6 2 3 Installing Head Without Using Carriage 6 33 6 6 3 ROTOR ALIGNMENT 6 33 6 6 3 1 Rotor Radial Alignment 6 33 6 6 3 2 Rotor Axial Alignment 6 34 6 6 4 MECHANICAL SEAL 6 35...

Page 11: ...IJ PUMP OPERATION AND MAINTENANCE MANUAL BO2660 01 x ...

Page 12: ...ware prepared by vendors for equipment such as the driver coupling and seals which is included in the pump order Components not purchased through Flowserve will not be included in this manual See TABLE OF CONTENTS for more details Part reference numbers included in parentheses match those called out in the ASSEMBLY drawing in the back of this manual The terms inboard drive and coupling nearest the...

Page 13: ...IJ PUMP OPERATION AND MAINTENANCE MANUAL BO2660 01 xii ...

Page 14: ...ngs removed minimum 375 9 52 Thrust bearing axial clearance 0 0 00 00 Deflector ring axial position clearance 060 1 52 Impeller wear surface removal maximum for truing 060 1 52 Rotor centering at seal bores maximum TIR 001 03 Runout maximum TIR Bare shaft in V blocks 001 03 Rotor 002 05 Wear rings and bushings 002 05 Thrust collar face 0005 013 Thrust collar outer diameter 0055 140 Running Clearan...

Page 15: ...rge spacer 140 60 Part installation heat maximum F C Impeller 350 177 Pressure reducing sleeve 350 177 Destaging spacer impeller spacer sleeve 160 71 Thrust collar 300 149 Suction spacer intermediate cover discharge spacer 140 60 Warm up temperatures F C Recommended warm up rate degrees per hour 50 to 75 28 to 42 Maximum differential between top and bottom of case 75 42 Maximum differential betwee...

Page 16: ...0 0045 1 50 1 75 0035 0050 1 75 2 00 0040 0055 2 00 3 00 0040 0055 3 00 4 00 0050 0070 015 018 4 00 5 00 0060 0080 5 00 6 00 0070 0090 019 022 6 00 7 00 0080 0100 7 00 8 00 0090 0110 023 026 Metric Units mm Shaft Diameter Sleeve Bearing Oil Baffle Over Including Min Max Min Max 0 00 25 40 064 102 28 33 25 40 38 10 076 114 38 10 44 45 089 127 44 45 50 80 102 140 50 80 76 20 102 140 76 20 101 60 127...

Page 17: ...IJ PUMP OPERATION AND MAINTENANCE MANUAL BO2660 01 xvi ...

Page 18: ...nted on the studs or bolts until no further rotation of the nuts can be achieved This may require several retorquings since as one stud is torqued it will relieve the stress on the adjacent stud until an equilibrium has been achieved 8 On high pressure high temperature applications it is recommended that the flange be retorqued to 100 percent of torque required after 24 hours at operating temperat...

Page 19: ...IAMETER Stud diameter in Torque value ft lb Stud diameter in Torque value ft lb 1 2 36 9 1 3 4 1968 9 16 53 7 1 7 8 2430 5 8 73 3 2 2960 3 4 131 2 1 4 4250 7 8 210 2 1 2 5860 1 315 2 3 4 7830 1 1 8 502 3 10200 1 1 4 697 3 1 4 13100 1 3 8 936 3 1 2 16400 1 1 2 1220 3 3 4 20200 1 5 8 1560 4 24600 ...

Page 20: ...ves the rail rail and guide together keep the inner casings from rotating There is a removable head on the discharge or outboard end of the pump case And there is a removable seal housing in the head and the inboard end of the case A seal unit is attached to or set in each seal housing Outside and at each end of the case a bearing supports the radial load of the shaft In the same housing with the ...

Page 21: ... Lube Oil System Your pumps are equipped with a pressurized lube oil system For detailed description see the APPENDIX 1 1 1 8 Seal Piping For a description of seal piping see PIPING drawings in the back of this manual 1 1 1 9 Baseplates The pump is factory mounted on a baseplate and its driver if furnished by Flowserve is mounted on a baseplate or soleplate see OUTLINE drawings in the back of this...

Page 22: ...s must be controlled to prevent damage to bearings and to the internal parts of the pump 1 2 2 1 Radial Balance Two separate radial forces must be balanced one dynamic the other hydraulic Dynamic unbalance is caused by variations in the distribution of weight in castings for impellers The impellers in your pump have been balanced at the factory in special dynamic balance machines Radial hydraulic ...

Page 23: ...equired NPSH will cause cavitation in the inlet eye resulting in immediate and major damage to the internal assembly of the pump 1 2 7 SHAFT SEAL In your pump shaft sealing is provided by a mechanical seal A mechanical seal is a precision device in which the face of a mating ring on the shaft sleeve rotates against the face of a primary ring on the seal housing The sealing faces are highly polishe...

Page 24: ...ged by the valve directly into the lube oil reservoir There is a pressure relief valve in both the main and auxiliary supply lines 1 2 10 THERMAL EXPANSION Aligning dowels and keys permit thermal expansion along the centerline of the pump and in the horizontal plane perpendicular to the centerline while prohibiting turning and thereby maintain the pump case in horizontal alignment with the driver ...

Page 25: ......

Page 26: ...dence of mishandling and clear plastic cover for tears rips and misuse also verify presence of vapor phase inhibitor 2 Remove enclosure and cover and check shipment for damage from collision and the elements 3 Check auxiliary equipment and piping for distortion breakage gouges and deep scratches 4 Check pump driver and accessories for deep scratches and gouges painted surfaces for damage 5 Check f...

Page 27: ... by pipes that act as holders for lifting bars or lugs that afford use of clevises These pipes or lugs are welded to the baseplate structure see the OUTLINE drawing in the back of this manual To set up for lifting the baseplate proceed according to the following outline 1 Slide 3 in 75 mm bars which are long enough to extend well past sides of baseplate into pipes in baseplate or attach clevises t...

Page 28: ...mp and cradle or just pump a remove lagging if installed exposing pump feet b install clevis in hole in each pump c attach hoist to cables and take up slack d verify that cables will not cut into pump panels piping etc Remove any items that will be damaged or protect items with wood blocks e establish that hoist is over center of gravity then f hoist unit or pump and dispose of it NOTE With pump a...

Page 29: ...nt handling 1 Insure that load on pump shaft is equalized by using two pick up points one at each end of rotor normally between first and second impellers from end depending on center of gravity one point might fall between second and third impellers on light end 2 Do not lift rotor a with one cable or strap at the balance point b with strap around ends of shaft c by one end d when held in bind ho...

Page 30: ... NOTE The shaft should be stored on wood in an indoor environment where the temperature does not fall below 60 F 16 C completely away from sunlight and at least 4 inches 100 millimeters above floor 4 Use spreader bar to hold straps in place attach hoist to center of bar lift shaft and place it a on wood supports of equal height that are not more than 24 inches 600 millimeters apart and no further ...

Page 31: ...led for welding are protected by wood or metal covers attached and sealed with adhesive tape 7 All threaded openings in the piping pump case and auxiliary equipment are closed with threaded pipe plugs made of metal and suitable for permanent use For international shipments crating and preservative measures are provided as specified by contract 2 2 1 1 Precautions At Job Site 1 Do not allow the uni...

Page 32: ...he bearing housing b Drain and refill anti friction bearing housings with vapor phase inhibiting preservative to the level of the baffles c Inspect and recoat the external unpainted surfaces of the pump the shaft coupling and the internal surfaces of the pump d Inspect accessible shaft seal parts for cleanliness and moisture 2 2 1 5 Long Term Outdoor Storage The precautions for long term outdoor s...

Page 33: ... inside the plastic lining CAUTION The internal assembly or rotor should never be supported or lifted at the journals 2 2 2 1 Rotor Storage Factory preservative measures will protect rotors and complete internal assemblies for up to 3 years under indoor storage conditions 2 2 3 DEPRESERVING NOTE It is recommended that an Flowserve service representative be employed to inspect any equipment stored ...

Page 34: ...ring a foundation are as follows 1 A concrete foundation built up from solid ground has proven the most satisfactory 2 A minimum space as given in OPERATING SPECIFICATIONS should be left between the underside of the baseplate flange and the top of the foundation for grouting 3 A concrete foundation should be poured early to allow ample curing time before bearing the pump load 4 Foundation bolts mu...

Page 35: ...IJ PUMP OPERATION AND MAINTENANCE MANUAL BO2660 01 2 10 Figure 2 1 Foundation Bolt ...

Page 36: ...ng to the pump the complete piping is checked to ensure a that the piping slopes in the correct direction b that no high spots or pockets are present in which air or vapor can collect as exemplified by the VAPOR POCKETS figure c that piping supports valves and fittings are properly located and all eccentric reducers or increasers are properly installed d that the piping is installed to avoid exces...

Page 37: ...IJ PUMP OPERATION AND MAINTENANCE MANUAL BO2660 01 3 2 Figure 3 1 Vapor Pockets Figure 3 2 Suction Piping Temporary Screen ...

Page 38: ... and fittings Common connections for hookup with the plant s piping are shown by the OUTLINE drawing in the back of this manual When others supply and install auxiliary piping Flowserve identifies sizes and locations of all auxiliary pipe openings in the case on the OUTLINE drawing in the back of this manual 3 2 INSTALLING BASEPLATES AND SOLEPLATES NOTE In the context of this subsection the term d...

Page 39: ...eling and grouting the baseplate Among the illustrations that highlight the instructions there is the BASEPLATE TOP VIEW figure which shows the pump mounted and two sets of mounting pads A B and C D vacant a typical example of a baseplate that is ready for leveling Of course your baseplate see OUTLINE drawing could include an additional set of pads or where only the driver and pump make up the ent...

Page 40: ...ond method using machinist level proceed as follows 1 Determine high end of baseplate Then start leveling across pads on high end by adding or removing shims at or adjusting leveling screws at anchor bolts adjacent to the pad that you are leveling For example when leveling driver pads A and B in crosswise direction level at anchor points 1 and 5 see BASEPLATE TOP VIEW figure with level positioned ...

Page 41: ...IJ PUMP OPERATION AND MAINTENANCE MANUAL BO2660 01 3 6 Figure 3 4 Leveling Pump End Crosswise Figure 3 5 Leveling Driver End Crosswise ...

Page 42: ...s illustrated in the four leveling figures and check leveling in both crosswise and lengthwise directions If tightening bolts disturbs leveling add or remove shims or adjust leveling screws until baseplate is level in both directions at places where leveling was disturbed Again tighten bolts and verify leveling in both directions Continue this procedure until all bolts are tight and the baseplate ...

Page 43: ...our aligning and leveling work as follows 1 Verify that your foundations as described under PREINSTALLATION section 1 have had ample curing time otherwise they may not support weight of baseplates or soleplates and operating units 2 To assure sufficient grouting provide for a minimum space of one inch 25 mm between baseplates or soleplates and their foundations by placing shims adjacent to each fo...

Page 44: ...manent position 2 Next set up common centerline by aligning centerline of high speed pump soleplates with centerline of turbine shaft 3 Then align centerline of low speed pump baseplate with common centerline 4 Finally align centerline of any other baseplate or soleplates which might be in train with common centerline Figure 3 8 Baseplates and Soleplates in Train ...

Page 45: ...gh speed pump baseplate with plant bench mark 2 Then align centerline of motor baseplate with common centerline 3 Next align centerline of low speed pump baseplate with common centerline 4 Finally align centerline of any other baseplate or soleplates which might be in train with common centerline Figure 3 9 Multiple Baseplates In Train ...

Page 46: ...w and 3 level a baseplate that supports only the pump or a single unit as described under BASEPLATE FOR PUMP OR SINGLE UNIT below 8 Set units that is driver pump etc in place on baseplates or soleplates and loosely install enough holddown bolts in each unit to ensure that all holes in units and baseplates or soleplates line up 9 Install half couplings on shafts NOTE Check hubs for run out or possi...

Page 47: ...IJ PUMP OPERATION AND MAINTENANCE MANUAL BO2660 01 3 12 Figure 3 10 Shaft Rough Alignment Schedules BRACKET SPAN PIPE BRACKET DIAL INDICATOR Figure 3 11 Determining Bar Sag ...

Page 48: ...Take the readings on the fixed unit coupling hub or shaft g Set the bar sag amount determined in steps a through e above into the indicator as a plus amount example an indicated 0 003 would be set in as a 0 003 while in the upright 12 o clock position h Rotate both shafts 180 to the 6 o clock position and record indicator reading i Repeat steps g and h to verify accuracy j Set the bracket to the h...

Page 49: ...r TIR between 3 o clock and 9 o clock points that is in the horizontal plane exceeds maximum allowable you should 1 verify that there is enough clearance between holddown bolts and holes to permit correction of misalignment in horizontal plane TIR should be rechecked and ensure that shimming will permit correction in the vertical plane but if these are inconclusive 2 remove every unit but pump fro...

Page 50: ...t places shown in LEVELING PUMP END LENGTHWISE figure if pump is on baseplate or in LEVELING DRIVER END LENGTHWISE figure if pads are vacant c Tighten foundation anchor bolts and pump feet holddown bolts if pump is installed As you tighten bolts position level as illustrated in the two figures that are referred to in the steps above and check leveling in both crosswise and lengthwise directions If...

Page 51: ...LING BASEPLATES OR SOLEPLATES b that driving units i e motor fluid drive gear clutch etc have been removed from baseplate which has been leveled aligned too if necessary as described in INSTALLING BASEPLATES OR SOLEPLATES 2 Build a suitable wooden form similar to that illustrated by GROUTING SOLEPLATES OR BASEPLATE figure below To keep form from floating anchor securely and shore around the applic...

Page 52: ...r 6 4 mm hole one that is compatible with grease type fitting for example a Zerk fitting wherever there is a void b Install fitting then using a compatible hand gun filled with epoxy grout pump the void full c Again tap drip plate and listen for resound for drumlike hollow resound repeat steps a and b d Remove fittings plug holes with epoxy and level off epoxy 3 3 2 GROUTING WITH EPOXY To grout th...

Page 53: ... as follows a Lift pump and cradle as outlined in RECEIVING by 1 instructions for Soleplate Mounted Barrel Pump or 2 instructions for Soleplate Mounted Single stage Pumps whichever is applicable to your situation b Set pump and cradle on soleplates and install all cradle to soleplate holddown bolts with washer under each head Tighten only enough to keep cradle from shifting 3 Remove pump to cradle...

Page 54: ...e noise shaft vibration hot bearings and rapid wear of bearings bushings rings and packing and may cause the rotating element to seize To assure that the pump and driver are in accurate alignment their shafts must be checked for alignment and corrected if necessary and the holddown bolts tightened under these circumstances 1 after the baseplate or soleplate s has been grouted in at its permanent i...

Page 55: ...R SOLEPLATES 2 that baseplate or soleplate s is properly grouted see INSTALLING NOZZLE EXTENSIONS AND GROUTING 3 that cradle where applicable has been leveled to soleplate using vertical leveling screws and precision machinist level or equivalent tool 4 that pump holddown bolts are tight 5 that suction and discharge piping is not connected to pump until after completion of initial cold alignment 6...

Page 56: ...ft with pencil b Pull shaft out away from bearing face i e toward pump as far as it will go then using the same reference point that was selected in step a mark shaft with pencil c Measure distance between pencil marks the distance or total lateral movement should be at least the minimum given in the vendor documentation in the APPENDIX or the OUTLINE drawing in the back of this manual 4 Set endsp...

Page 57: ...driver mount pads have not been tapped for holddown bolts they must be tapped before attempting to align driver to pump Proceed as follows 1 Make certain that driver endspace has been established and that driver is positioned on clean mount pads with the space between driver and pump shafts as specified on OUTLINE drawing in the back of this manual see MEASURING DISTANCE BETWEEN ENDS OF PUMP AND D...

Page 58: ...he following paragraphs in this subsection have been satisfied a ALIGNMENT PRECONDITIONS b INSTALLING COUPLING c SETTING DRIVER SHAFT ENDSPACE d TAPPING DRIVER MOUNT PADS 2 Attach lifting equipment to driver and set it on its mount pads 3 Check hubs for run out or possible bent shaft conditions and correct if necessary before proceeding with alignment NOTE When using a double reverse dial indicato...

Page 59: ... 12 Repeat steps 10 and 11 to verify accuracy 13 Set the bracket s to the horizontal 9 o clock position Set indicator s at 0 Bar sag is not applicable in the horizontal plane 14 Rotate both shafts 180 degrees to the 3 o clock position and record indicator reading s 15 Repeat steps 13 and 14 to verify accuracy 16 Measure the distance between dial reading points and between dial reading point on fix...

Page 60: ... to verify alignment setting 19 Torque holddown bolts using procedure specified in OPERATING SPECIFICATIONS then repeat step 10 through 18 20 Remove dial indicators and brackets and detach lifting equipment 21 See RECOMMENDATIONS AND NOTES FOR PIPING CONNECTIONS and connect piping as required 22 Repeat steps 11 through 18 above and record readings If TIR at either position of dial indicator exceed...

Page 61: ... minutes thereof in order to determine whether the centerlines of the driver and pump shafts coincide when both units are hot This coincidence is necessary to assure efficient extended operation of the pump The dial indicators brackets and shims should be available at the pump before shutdown Requirements for a hot alignment check are 1 Remove coupling guard 2 Remove coupling spacer if applicable ...

Page 62: ...pressure indicator across the filter 3 5 1 1 Flushing Lube Oil System Using Auxiliary Lube Oil Pump The following flushing procedure applies to a pump that is equipped with an auxiliary lube oil pump For illustrations of piping and parts which are referred to in the procedure see LUBE OIL PIPING and ASSEMBLY drawings in the back of this manual 1 Remove inboard journal outboard journal and thrust b...

Page 63: ...ct piping at all points 9 Remove upper halves of bearing housing and install inboard journal outboard journal and thrust bearings according to instructions under PUMP ASSEMBLY BEARINGS 10 Fill lube oil system to required level as instructed in STARTUP Run auxiliary lube oil pump until lines are full and recheck reservoir 3 5 1 2 Flushing Lube Oil System Without Using Auxiliary Lube Oil Pump The fo...

Page 64: ...or extended operation 3 5 2 SEAL PIPING Whenever work is performed on seal flush piping other than disconnection at terminal points or new piping is fabricated it is essential to clean and flush the piping Additionally it is usually necessary to preserve carbon steel piping from rust 3 5 2 1 Carbon Steel Piping Following rework or fabrication of carbon steel piping to protect the seal from rust sc...

Page 65: ......

Page 66: ...peration to prevent thermal distortion and the consequent rubbing or breaking of parts The following paragraphs are given in the sequence recommended for startup 4 1 1 READYING AND SERVICING DRIVER Before operating the driver and gear if applicable see OUTLINE drawing in the back of this manual perform the operational readiness and servicing checks that are recommended in their manufacturer s oper...

Page 67: ...w section fabricated or lube oil reservoir is repaired 4 1 2 4 Servicing Empty Lube Oil System The principal steps in servicing your pump are outlined below 1 See that lube oil reservoir lube oil cooler filter and other points in lube oil system where water or condensation could accumulate are dry 2 Close reservoir heat exchanger and filter drain valves and any other drain valves in piping see LUB...

Page 68: ...evel should appear higher than 1 2 but less than 2 3 of the length of the glass To replenish reservoir fill reservoir with lube oil that is specified in OPERATING SPECIFICATIONS until lube oil level in level glass rises to maximum mark on glass If there is no mark lube oil level should rise higher than 1 2 but no more than 2 3 of the length of the glass Reinstall reservoir cover If lube oil system...

Page 69: ...llows CAUTION To prevent exposing low pressure ends of the casing to a pressure greater than specified maximum suction pressure and resulting pump damage make certain that the suction valve is always open before starting circulation in the warm up circuit and that it remains open throughout the warm up procedure a Open suction valve allowing pump to begin filling NOTE A vent connection or line may...

Page 70: ...rature to which the pump will be exposed when operating At this point the temperature of the pump satisfies the condition for hot standby or for being placed in operation As an alternative to this procedure warm the pump for the minimum time period worked out by using pyrometers 8 With hand operated valves still positioned as set up above and spare or auxiliary lube oil pump operating place pump i...

Page 71: ...uddenly d circulation of cooling water for heat exchangers or seal housing stops e lube oil pressure drops to zero f circulation of seal flushing liquid stops or g clutch malfunctions 4 Check pressure gauge PI that is located in lube oil system instrument panel see LUBE OIL SCHEMATIC drawing Gauge should read pressure of lube oil as given on LUBE OIL SCHEMATIC drawing and auxiliary or spare lube o...

Page 72: ...rding to your plant s setup and procedures for pump If alarm is activated shut down pump see STOPPING and correct cause see TROUBLESHOOTING and lube oil console manufacturer s data in APPENDIX 2 Monitor discharge pressure of pump If pressure of pump drops suddenly shut down pump see STOPPING and correct cause see TROUBLESHOOTING 3 After first 10 to 15 minutes of pump operation check for leakage ar...

Page 73: ...l console manufacturer s data see APPENDIX for back pressure control valve PCV If reading is off adjust valve so that indicator reads given setting The other indicator should read zero For information on valve see valve manufacturer s instructions in APPENDIX 10 In step 8 if discharge pressure indicator PI did not read inlet pressure of lube oil at bearings of pump and driving units as given in OP...

Page 74: ... gland nut s by one flat Restart pump and allow 10 to 15 minutes for packing to settle in then measure packing leakage Continue this procedure until packing leakage is correct 2 To decrease leakage rate shut down pump and increase torque on packing gland nut s by one flat Restart pump and allow 10 to 15 minutes for packing to settle in then measure packing leakage Continue this procedure until pac...

Page 75: ... backward rotation of the pump should the check valve stick 2 Cut power to driver recommended procedure for turbine unit is to stop turbine by tripping emergency overspeed trip NOTE To shut down the lube system and cooling water system of the lube oil console see the lube oil console manufacturer s instructions and drawings in the APPENDIX 3 When the pump has stopped rotating shut down lube oil sy...

Page 76: ...ws 1 See that valves in minimum flow circuit see you plant s data file are open then close discharge valve or place discharge valve in bypass 2 Cut power to driver recommended procedure for turbine unit is to stop turbine by tripping emergency overspeed trip 3 See that suction valve remains open 4 After rotation stops reopen discharge valve and see that the check valve is tightly closed by watchin...

Page 77: ... be external that is neither upper bearing housings seal units or the internal assembly should be removed except for 1 drop in capacity or drop in discharge pressure relative to suction pressure and 2 drop in pressure or other evidence of internal wear or mechanical trouble 4 4 1 PERIODIC SEAL REPLACEMENT To avoid unscheduled maintenance on the mechanical seal parts should be replaced when their t...

Page 78: ... wear occurs during startup and continues until all the solid particles are flushed out with the discharge Thus to preclude such imminent damage to a Flowserve multistage pump when using an acid or caustic wash to clean a system that includes the pump remove the internal assembly from the case and close off the seal cavities with blank plates which can be supplied by the factory For further inform...

Page 79: ......

Page 80: ...TIONS There are two lists of troubles the first includes troubles and their causes for which corrective action is considered obvious the second includes troubles caused by vibration with descriptions of corrective actions which are not always so obvious where vibration is the cause Should questions arise contact your nearest Flowserve Sales Office see PART ORDERING AND SERVICING INFORMATION 5 1 1 ...

Page 81: ...c gravity of liquid too high Rotating element dragging Packing too tight Overheated seal housing or stuffing box Packing too tight Packing or seal not lubricated Wrong grade of packing Cooling water not sufficient Box insufficiently packed Overheated bearings Lube oil pressure too low Improper or poor grade of lube oil Dirt in bearings or lube oil Moisture in lube oil Lube oil cooler clogged or sc...

Page 82: ...alignment is frequent Correct line installation as required Loose foundation bolts Tighten bolts check level and alignment and correct as required see ALIGNMENT ACCURACY Loose driver or pump holddown bolts Tighten bolts check alignment and correct as required see ALIGNMENT ACCURACY Worn or loose bearings vibration appears steady Check bearings and replace as required Out of balance rotor vibration...

Page 83: ......
Page 84: ...n of either pump or driver except to remove it from the baseplate Auxiliary piping should be disconnected only at such points as necessary for the removal of a part of the pump When piping is disconnected clean material such as plastic should be securely tied over openings to prevent entrance of foreign materials 6 1 3 GASKETS REQUIRE CONSIDERATION When disassembling parts separated by a gasket se...

Page 85: ... figures below particularly whenever seals or bearings are being installed To use either figure start with the part or assembly block in the left hand column and follow the arrows completing the tasks block by block as referenced in the right hand column For example as the arrows indicate in figure 2 the installation of an old unchanged bearing is accomplished by completing those tasks that are re...

Page 86: ...IJ PUMP OPERATION AND MAINTENANCE MANUAL 6 3 BO2660 01 Figure 6 2 Task Schedule For Installation of Major Part Assembly ...

Page 87: ...y manufacturer s instructions in APPENDIX the LUBE OIL SYSTEM SCHEMATIC drawing and OPERATING SPECIFICATIONS or by your plant data file and 8 comply with STARTUP requirements Flow glasses and temperature indicators in the return piping can be removed without draining the piping follow steps 1 3 through 5 7 and 8 immediately above 6 2 2 REPAIRING AND ADJUSTING LUBE OIL SYSTEM COMPONENT See manufact...

Page 88: ...nal 2 steel wedge s 3 jack screws 4 a hoist block and tackle or chain fall 5 a lifting eye and 6 nylon lifting straps soft cables or equivalent 6 3 4 INTERNAL ASSEMBLY In addition to hand tools the following tools and equipment are required to perform the assembly and disassembly tasks that are in this subsection 1 a hoist and related hoisting equipment 2 nylon lifting straps soft cables or equiva...

Page 89: ... that will permit traverse to a vertical height of approximately 10 ft 3 m 10 suction spacer pusher adapter see PUSHER ADAPTER figure and Pusher Carbon Steel Block or equivalent 1 in 25 mm thick Faces parallel within 0 002 in 0 05 mm Bronze Bushing Typical 2 places aprox 4 in 100 mm long ID OD of shaft 0 015 in 0 38 mm OD ID nominal wall thickness of 0 438 in 11 mm Schedule 40 pipe tube ID OD of b...

Page 90: ...ve type half coupling or solid half coupling with welding torch until you are able to pull hub off shaft with puller then 4 removing sleeve with O ring inside where applicable and 5 removing key from shaft 6 4 2 MAIN LUBE OIL PUMP REMOVAL These instructions provide for removal of a lubricating oil lube oil pump that is flange mounted to the outboard bearing housing end cover for direct and axial c...

Page 91: ... friction Loosen setscrews if furnished and pry deflector rings or rotors away with a screwdriver NOTE If the stationary oil baffles are solid rings then do not attempt to remove them until the bottom halves of the bearing housings have been removed 4 Remove the thrust bearing housing end cover 61 stationary oil baffle or Inproseal stator 385 if installed and outer retaining plate if applicable 5 ...

Page 92: ...d Start from the outer periphery and work continuously in a circular path toward the center For installation use an oven hot oil bath or a torch as above Overheating or uneven heating can distort the collar See installation heat given in OPERATING SPECIFICATIONS d Remove the thrust collar 57 key 309 if installed and spacer 76 e Remove inner retainer plate if applicable 9 Lift shaft slightly Rotate...

Page 93: ...nd intend using it to remove the head from the case 1 Remove any piping obstructing removal of head and internal assembly if applicable see ASSEMBLY and PIPING drawings in the back of this manual 2 Disconnect any wiring from outboard end of pump and remove any electrical conduits obstructing removal of head and internal assembly 3 Remove case nuts 477 and washers 27 4 Screw jack screws into holes ...

Page 94: ...te preparations for lifting head then work head off studs 3 Transport head 85 with pressure reducing bushing 65 and diffuser 280 if applicable attached to shop area or set it aside 6 4 5 3 Disassembly To disassemble the head proceed as follows 1 Remove a discharge diffuser 280 if applicable b inner head expansion gaskets 243 and inner head gasket spacers 169 and c head gasket 22 2 When removing pr...

Page 95: ...lty in removing the assembly contact your nearest Flowserve Sales Office for assistance see PART ORDERING AND SERVICING INFORMATION 3 To remove internal assembly from case using hydraulic ram and pusher adapter proceed as follows a Being careful not to scratch the shaft install pusher adapter against suction spacer 23 so that spacer fins are positioned in cutouts in adapter b Install solid steel b...

Page 96: ...ting equipment 6 4 6 2 Disassembling Internal Assembly The disassembly sequence is determined by shaft design the shaft is stepped up towards the coupling end All parts are removed from the free end of the shaft This manual offers two methods for disassembling the internal assembly vertical and horizontal The vertical method is preferred because it reduces the chances of damaging the register face...

Page 97: ...S Do not heat the entire outer surface and do not heat the cover that is to be removed CAUTION Do not allow the roll and heel bars to slip below the cutout on the discharge spacer intermediate covers or suction spacer as this may damage the sealing faces of those components 3 When a part has been heated to its removal temperature use two roll and heel bars 180 degrees apart on the outer edge of th...

Page 98: ...e weight of the assembly is on the suction spacer and the shaft is in suspension Remove cables hoists and vertical assembly apparatus NOTE See the ASSEMBLY drawing in the back of this manual to determine the method used to secure the pressure reducing sleeve 77 4 Remove pressure reducing sleeve locknut 86 or 678 or split ring retainer 277 and split ring 614 as applicable 5 Heat and remove pressure...

Page 99: ...he ends and lifting the shaft out of the V blocks using one hoist on each strap or one hoist and a spreader bar The shaft must be stored on a flat solid surface at least 6 inches 150 mm above a metal or concrete surface The suction spacer 23 may be set aside by installing lifting gear if required and moving it from the base assembly to any convenient area 6 4 6 2 4 Horizontal Disassembly To disass...

Page 100: ...the suction spacer 23 place two wooden blocks under the shaft to maintain its position Place one block about 25 of total shaft length from the free end the other next to the suction spacer 23 on the free end side of the suction impeller 28 Do not place blocks under the bearing journals on the shaft b Protect the coupling end of the shaft with gasket material Then attach lifting gear to the suction...

Page 101: ... that is softer than carbon steel Clean parting surfaces with denatured alcohol or acetone 6 5 2 INSPECTION AND REPAIR 6 5 2 1 General 1 Verify that all parts are free of gouges burrs scratches excessive wear and any other imperfections Replace worn or damaged parts 2 Ensure that all parts are free from dirt deposits or old gasket material Perfectly clean and smooth surfaces are required Any part ...

Page 102: ... part by using aluminum drift and mallet to strike evenly around circumference of bushing 5 Using same method as was observed in step 2 above tack weld bushing using welding wire specified in OPERATING SPECIFICATIONS and gas tungsten arc or install setscrews in bushing and parent part Stake setscrews 6 5 2 5 Head Before assembling the head inspect the following 1 Remove any traces of old gaskets f...

Page 103: ...e CHECKING CONCENTRICITY OF ROTATING ASSEMBLY below 6 5 2 6 2 Checking Running Clearances Actual running clearance is determined by measuring the inside diameter of the stationary part and the outside diameter of the rotating part and taking the difference Measurements should be taken with a micrometer and each part should be checked for trueness or roundness by taking diametrical readings 90 degr...

Page 104: ...nt to the ends of coupling keyway total runout of shaft shall not exceed maximum given in OPERATING SPECIFICATIONS If runout is exceeded shaft must be cold straightened or replaced 6 5 2 6 4 Checking Fit Of Impellers And Balancing Drum With Shaft The fit of each impeller bore around the shaft at the designated stage of each impeller see impeller numbering under STAGE NUMBER SYSTEM AND BALANCED PAR...

Page 105: ...ssembly see ASSEMBLY drawing must be verified before assembly To vertically assemble the rotating assembly proceed as follows 1 Assure yourself that you have complied with the instructions above under the headings a CLEANING b VISUAL INSPECTION c CHECKING RUNNING CLEARANCES d CHECKING SHAFT STRAIGHTNESS and e CHECKING FIT OF IMPELLERS AND BALANCING DRUM WITH SHAFT 2 Before starting to assemble par...

Page 106: ...by more than maximum decrease given in OPERATING SPECIFICATIONS 2 The impeller bore must be true see CHECKING FIT OF IMPELLER AND BALANCING DRUM WITH SHAFT above and must be perfectly centered while grinding so that skirt and hub wearing surfaces run true to shaft bore The surface shall be finished as specified in OPERATING SPECIFICATIONS 3 The impeller must be dynamically or two plane balanced To...

Page 107: ...parallel with face of table b Align centerline of part with centerline of table using register face of part as true side of dial indicator alignment shall be within limit given in OPERATING SPECIFICATIONS c Clamp around part to hold it in centered and parallel position d Set up dial indicator to run on inside diameter of wearing ring and rotate table total runout shall not exceed maximum given in ...

Page 108: ...hed with finish stock left on the running surface then verify trueness of wearing ring to part fit as outlined below or by an equivalent technique a Set part face down on table of vertical lathe and parallel with face of table b Align centerline of part with centerline of table using register face of part as true side of dial indicator alignment shall be within limit given in OPERATING SPECIFICATI...

Page 109: ...lip into place on skirt 5 If the replacement wearing ring has not been furnished with finish stock left on the running surface then verify trueness of wearing ring to impeller fit as outlined below or by an equivalent technique a Set impeller face down on table of vertical lathe and parallel with face of table b Align centerline of part with centerline of table using register face of part as true ...

Page 110: ... in OPERATING SPECIFICATIONS before installation 2 To heat a part to its installation temperature specified in OPERATING SPECIFICATIONS proceed as follows a Heat the impellers pressure reducing sleeve and spacer sleeve if installed in an oven to their required installation temperature as given in OPERATING SPECIFICATIONS For best results start with the suction impeller and place as many impellers ...

Page 111: ...roceed as follows NOTE The vertically held shaft and suction spacer 23 must be in correct relationship or the assembly will not be correct Therefore the base assembly must allow for adjustment of the height of either the shaft or suction spacer 1 Set up base assembly in work area 2 Set up soft faced V blocks near base assembly spaced to support the shaft at about 25 of total shaft length from each...

Page 112: ...aft shoulder if no split ring is installed using the procedure outlined in INTERFERENCE FIT PART INSTALLATION above 7 Assemble the discharge stage as follows a Install the discharge spacer 36 using the procedure outlined in INTERFERENCE FIT PART INSTALLATION above Install the assembly rail 462 in slots in covers b Install split ring 545 if installed and impeller key s 25 ensuring that ends of spli...

Page 113: ...bly To install the internal assembly in the case 37 proceed as follows 1 Verify that a the internal assembly is completely assembled b the inside surface of the case 37 and outside surface of the internal assembly are clean undamaged and clear of corrosion particularly the parting faces of the case 37 and suction spacer 23 2 Verify that the assembly skid or assembly carriage is bolted to free end ...

Page 114: ...nstall an eyebolt in the coupling end of the shaft and pull the internal assembly into the case with a cable However use of the eyebolt and cable may cause damage to the internal assembly and should be avoided 6 Place a pusher adapter against the discharge spacer 36 underneath the shaft and just below the register surface for the discharge diffuser 280 ...

Page 115: ...ce to shrink it enough to slide it into head Secure bushing with method employed originally by the factory see step 2 under PUMP DISASSEMBLY HEAD above CAUTION Failure to use inner head expansion gaskets and spacers that are of the same thickness diameter material quality and quantity as those supplied originally with the pump could result in improper makeup of intermediate covers the suction spac...

Page 116: ...ting eye in head make sure head gasket is installed on head lift head and move it into place on case studs Push head onto studs as far as possible Remove lifting eye and lifting equipment 2 Complete steps 6 through 8 under INSTALLING HEAD USING CARRIAGE above 6 6 3 ROTOR ALIGNMENT Following installation of a new journal a new bearing housing or an internal assembly rotor centering in accordance wi...

Page 117: ... collar spacer 76 collar 57 and key 309 if installed and b thrust collar nut 171 NOTE Install base rings in matched sets Matching identification appears on both halves 3 Assemble inner parts of thrust bearing 54 as follows a Lubricate base ring leveling plates and shoes with light oil b Set bottom half of base ring on shaft and rotate ring to bottom position c Set top half of base ring on shaft an...

Page 118: ...Reassemble inner parts of thrust bearing as instructed in step 3 above 8 Check running position of rotor as follows a Push shaft toward coupling end until thrust collar butts against faces of thrust bearing shoes b Hold straight edge against outer face of thrust collar and pencil position on tape Measure distance to inboard mark Distance should equal distance D determined in last phase of PUMP ASS...

Page 119: ...lation and assembly drawing in the APPENDIX 6 6 5 BEARING ASSEMBLY 1 Slide deflector rings 7 or Inproseal rotors and stators 385 over the shaft If stationary oil baffles 48 or oil seal rings 579 are solid rings install them at this time with their O rings 1259 2 If the sensor disk 282 is located inboard of the thrust bearing install sensor disk and key 1292 3 Install brackets bearing housings bolt...

Page 120: ...4 Wipe off any excess gasket sealant 15 Temporarily install end cover without sealant Evenly tighten capscrews 16 Install dial indicator to read on end of shaft 17 Firmly push shaft in one direction until it stops solidly and set dial indicator to zero NOTE If in doubt about how to machine the end cover contact your nearest Flowserve Sales Office See PART ORDERING AND SERVICING INFORMATION 18 Push...

Page 121: ...es of lube oil pump and end cover 61 then withdraw lube oil pump Measure 0 06 inch 1 5 millimeters from hub of half coupling toward lube oil pump case and mark distance on shaft then move half coupling hub to mark and secure it to shaft with setscrew There shall be a total gap of 0 06 inch 1 5 millimeters between spider and half couplings 6 Remove end cover Apply an even film of sealant to parting...

Page 122: ... instructions must be accomplished before operation of the pump Installation of the coupling halves should be performed by application of an even heat hammering is apt to distort the coupling or shaft or otherwise cause damage Familiarity with the coupling manufacturer s instructions see APPENDIX will facilitate installation The task of installing a tapered half coupling on either the driver or th...

Page 123: ...ings and spacer will cause imbalance use only bolts and nuts specified by the coupling manufacturer 5 bolting half couplings and coupling spacer together after all requirements under COUPLING PUMP AND DRIVER have been met 6 6 8 FINAL ASSEMBLY TASKS If you have not already done so 1 Remove thrust bearing housing end cover 61 Apply an even film of sealant to parting surface of end cover that abuts b...

Page 124: ...art in a set for example when the impeller wearing surfaces have been refaced the wearing ring on the mating stationary part can be supplied in undersize In such a case the required undersize diameter must be stated in the order 7 1 REGIONAL SALES OFFICES USA and Canada Flowserve Corporation Pump Division Millenium Center 222 Las Colinas Blvd 15th Floor Irving TX 75039 5421 USA Phone 972 443 6500 ...

Page 125: ...eland OH 44125 Phone 216 524 6155 Fax 216 524 3830 Chicago West Service Center 1400 Powis Court West Chicago IL 60185 Phone 630 762 0245 Fax 630 762 8994 Rancho Dominguez Service Center 1909 East Cashdan Dominguez Hills CA 90220 Phone 310 608 4500 Fax 310 608 4540 Fairfield Service Center 142 Clinton Road Fairfield NJ 07004 Phone 973 227 4565 Fax 973 227 6615 Greer Service Center 2431 South Highwa...

Page 126: ...20 Italy Augusta Contrada Cozzo delle Forche 99011 Augusta SR Italy Phone 39 0931 511326 Fax 39 0931 511304 Woodbridge Service Center 120 Vinyl Court Woodbridge Ontario L4L 4A3 Phone 905 856 1140 Fax 905 856 2010 Italy Caserta S S 87 Km 19 81025 Marcianise Caserta Augusta Italy Phone 39 0823 634232 Fax 39 0823 634218 Italy Desio Via Rossini 90 92 20033 Desio Milan Italy Phone 39 0362 612251 Fax 39...

Page 127: ...Kingdom Phone 44 151 3560555 Fax 44 151 3556222 United Kingdom Grangemouth BP Oils Gragemouth Ref P O Box 30 Bo ness Road Grangemouth Stirlingshire Scotland FK3 9XQ Phone 44 1324 477618 Fax 44 1324 476913 United Kingdom Newcastle Shields Road Byker Newcastle Upon Tyne England NE6 2YP Phone 44 191 2769100 Fax 44 191 2658509 ...

Page 128: ...8611555 Fax 8610317 Spain Worthington S A Bolivar 9 28045 Madrid Spain Phone 1 468 39 00 Fax 1 539 05 20 Taiwan Flowserve 3rd Floor 112 Tun Hua North Road Taipei Taiwan Phone 2 718 8121 Fax 2 719 3281 United Arab Emirates Flowserve Al Sayegh Building Umm Hurair Road P O Box 6408 Dubai United Arab Emirates Phone 9714 370995 Fax 9714 377250 United Kingdom Flowserve UK Ltd Queensway Team Valley Tradi...

Reviews: