background image


46   

are    triggered    to    SMPTE    time    code,    you    can    now    have    a    complete    concert    controlled    by    one    master    unit    and   

multiple   slave   units!   There   are   many   uses,   but   those   are   some   of   the   obvious   ones.   

What   do   I   put   on   the   Master   and   Slave’s   Media   Cards?   

That   is   up   to   your   situation.   Master   will   trigger   based   on   preset   #’s   and   bank   #’s.      So   Preset   #1   on   the   Master   

might    simply    be    an    Audio    backing    track,    Slave    #1’s    preset    #1    maybe    an    IEM    mix    with    a    MIDI    controller    file   
attached.   And   so   on.   Just   make   sure   that   presets   are   aligned   so   that   each   preset   has   some   correlation   to   the   other   
units.   If   a   particular   unit   should   do   nothing-­‐   set   it   up   without   Audio   or   Midi   and   keep   it   as   an   empty   preset.   It   

will   trigger   and   do   nothing.   

How   to   Setup   the   Master   


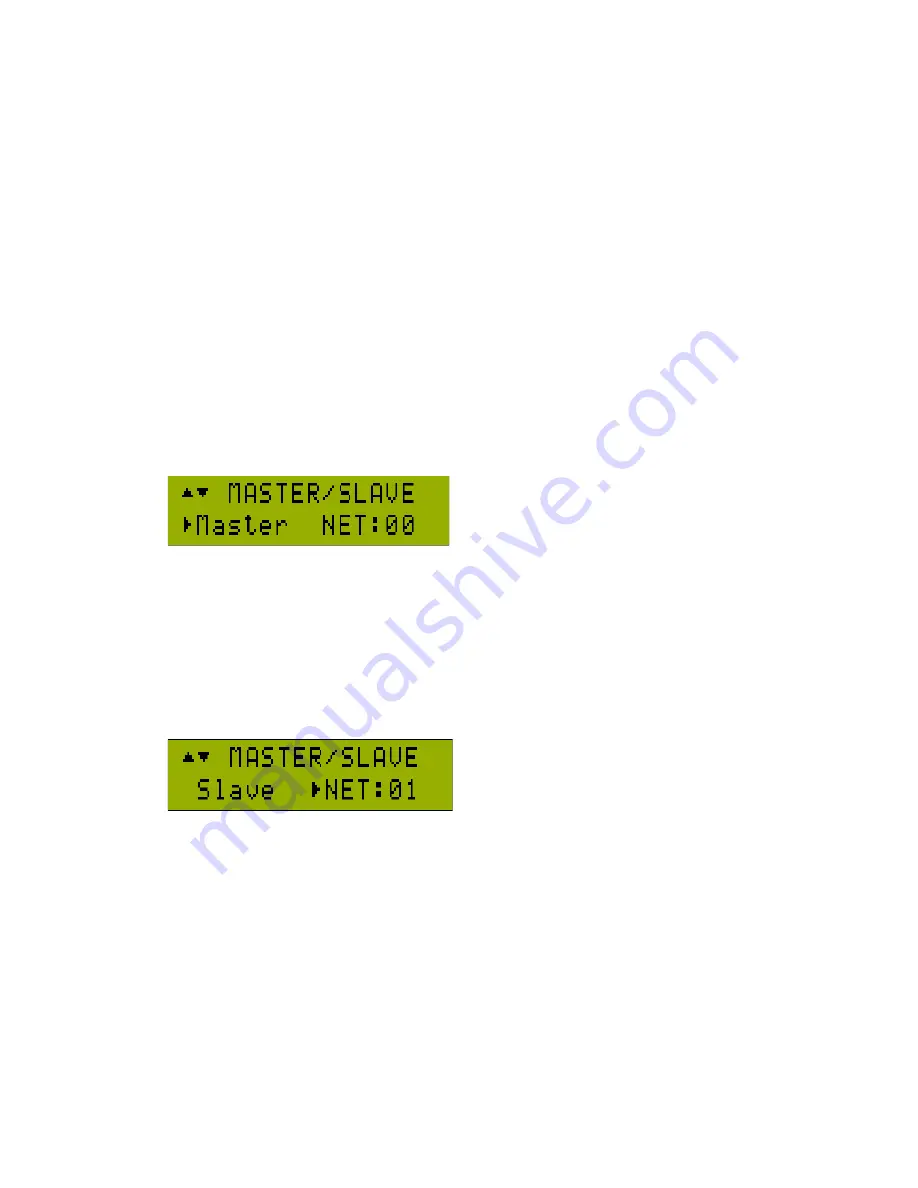
In    the    Global    menu,    select    “Master”    from    the    MASTER/SLAVE    screen.    Press    the   

[RIGHT]

    button    and    the   

indicator   arrow   will   be   next   to   NET.   Assign   your   Master   a   Network   ID.      Every   Master   and   Slave   unit   must   have   

the    Same    NET    ID    assigned    to    it.        You    can    have    multiple    Master/Slave    networks    running    on    the    same    midi   
network.   

   
In   an   example,   we   set   our   Master   unit   to   Master   and   assign   it   a   NET   of   1.   A   net   of   0   means   that   the   Liquid   Tracks   
is   not   a   master   and   is   not   on   a   network-­‐   it   is   a   stand-­‐alone   unit.   

ALWAYS

   assign   a   NET   of   0   for   

ANY

   device   not   

using   the   Master/Slave   system.   That’s   all   you   have   to   do   for   the   Master   Unit.   

How   to   Setup   a   Slave   


In   the   Global   menu,   select   “Slave”   from   the   MASTER/SLAVE   screen.   Press   the   

[RIGHT]

   button   and   the   indicator   

arrow   will   be   next   to   NET.   Assign   your   Slave   a   Network   ID   that   matches   the   Master   unit   you   want   to   sync   with.      
Every   Master   and   Slave   unit   must   have   the   Same   NET   ID   assigned   to   it.      You   can   have   multiple   Master/Slave   

networks   running   on   the   same   midi   network.   

Summary of Contents for Liquid Tracks

Page 1: ......

Page 2: ...Selecting a media source 11 Which MIDI Cables Should Be Used 11 Audio and MIDI File Format s and Suggestions 12 Care and Cleaning 12 Installing Add On Modules 12 Product Support 13 The User Interface...

Page 3: ...Creating a Trigger Event After the End of a Preset 35 Onboard Pre Amplifier Output Level 36 Clear and Erase the Preset 36 Bank Menu 37 Banks Behavior when Changing Media Cards 37 Parameters of the Ban...

Page 4: ...Recording a MIDI TYPE 0 File 51 Prepare Media Card for Use With Liquid Tracks 52 Loading FIRMWARE 52 What Firmware Version Do I have 53 Using the Media Card to Load the Firmware 53 Using MIDI to recei...

Page 5: ...gned as play pause stop systems and should not be confused with loopers In a simplistic summary the Liquid Tracks is a device that allows the triggering of presets Presets can be as simple as an audio...

Page 6: ...6 Example Configurations Midi Connection B a l a n c e d A u d i o O u t Simple Backing Track System controlled by a Liquid Foot Midi Controller...

Page 7: ...ntrolled by a Liquid Foot Midi Controller with one channel going to in ear monitor one to mixer and midi out controlling another Liquid Tracks and FX equipment MIDI MIDI MIDI MIDI B a l a n c e d a u...

Page 8: ...alanced Unbalanced Aux out addon modules 19 Pre Amp Input or in output for modules 20 Pre Amp Output or in output for modules 21 100V 240V AC power input 8 9 10 11 12 13 14 15 16 17 18 19 20 21 8 USB...

Page 9: ...ne it Encode your audio in MP3 320kbps format if possible See chart in section Audio File Speci ications at end of guide TYPE 0 MIDI iles only For best performance make sure ID3 labels are inside your...

Page 10: ...cards in these slots Liquid Tracks does not formally support hot swapping cards USB memory drives of compatible SD cards are recommended over all other media cards NOT ALL MEMORY cards are compatible...

Page 11: ...ables Should Be Used The Midi in connector should be connecting to any device that will be used to control the Liquid Tracks This maybe your computer a midi foot controller or perhaps another Liquid T...

Page 12: ...Guide for specifications of compatible Audio files SPECIAL NOTE Highly recommended that you remove images from the ID3 header of MP3 files While they will work flawlessly they add unnecessary latency...

Page 13: ...ill read this very paragraph Kind of like asking if a tree makes noise when it falls and no one is around Should you have questions or issues please start by referring to this user guide for basic ope...

Page 14: ...If you are in the menu system and press SELECT to save a parameter that you entered or modified you will see the status light blink quickly to indicate the save took place While most menu parameters...

Page 15: ...n for 1 second from any submenu item CHANGE MEDIA SOURCE Hold DOWN button for 2 seconds RELOAD NEW MEDIA press LEFT DOWN RIGHT Test a track edit menu Press HOLD RIGHT Track Playback and Midi parameter...

Page 16: ...please see the UTILITY menu section of the user guide BANKA BankA will contain all of your MP3 and MIDI files associated with BankA of the system While a bank can only have 128 presets numbered 0 127...

Page 17: ...ith The Utility menu has options to regenerate these files should something go wrong The preset file will contain saved preset data This file can not be recreated if damaged Each directory that contai...

Page 18: ...STEP 5 Reinsert into Liquid Tracks and enter menu system again Press ReScan All again and press SELECT If you want to Auto Load your Bank Presets STEP 6 Select Re Program All from and press SELECT ST...

Page 19: ...preset used or selected To select a preset and start it or trigger simply scroll to the preset and press the SELECT button This will arm and trigger the preset You can manually trigger a preset that i...

Page 20: ...ouncing Note indicates the Midi is playing back TRIGGER A rotating clock indicates a MTC SMPTE time receipt is actively triggered TRIGGER A square indicates a MIDI start or User Button Press will trig...

Page 21: ...eset is awaiting a trigger press any button to force the trigger to start the track TOGGLE BANKS HOLD LEFT until the display says it is switching banks Will toggle between BANKA and BANKB ENTER MENU S...

Page 22: ...anytime in the Preset Edit Menu holding the UP key will bring you to the main menu selection screen Selecting a Preset The first parameter is the selection of the preset to edit By default it will se...

Page 23: ...et Usually a preset will contain at least an Audio file if not a MIDI file On occasion you may need to create a preset that does not playback a track but simply waits for a trigger and then completes...

Page 24: ...s when you plan to simply send a MIDI file upon preset start To select an Audio file use the rotary dial to select the audio track contained in the bank Once you find the file you wish to playback pre...

Page 25: ...e audio track Usually if needed at all small modifications will most likely be best for live performance However the playback control will allow extreme deviations of time Super slow motion can be use...

Page 26: ...volume it is intended to stay at a set value Midi commands are best used for MUTE HALF FULL volume etc While editing a preset you can establish the initial volume level This is a logarithmic volume sc...

Page 27: ...PA or output mixer device Bass gain can be modified from 00 to 15db in increments of 1 db Frequency center can range from 000 150hz in increments of 10hz To make your changed press UP or DOWN to move...

Page 28: ...y dial to select NONE MIDI FILE or MIDI CREATE The default parameter value is NONE which indicates that no MIDI file will be associated with the preset By rotating the Dial to MIDI FILE you are tellin...

Page 29: ...this type will move you into record mode Creating a synchronized MIDI sequence If you press SELECT upon selecting MIDI CREATE as the type you will be moved into a special record mode You will see a s...

Page 30: ...lace this file Selecting a MIDI File If you selected MIDI FILE or created a file using the record feature then you will see the prompt to choose the MIDI file to associate with the preset being edited...

Page 31: ...can begin playback to sample your select by pressing HOLD SELECT Press SELECT to stop playback Playing back a sample will begin an audio file as well as the chosen MIDI file Press HOLD RIGHT to save t...

Page 32: ...generated within the Liquid Tracks should work as is If they are out of sync then typically the MIDI files will be ahead of the playing audio A delay setting of 762 should be the first trial delay per...

Page 33: ...message is received from MIDI then select Key CC 46 As the description says if you send a MIDI CC 46 with a value of 127 then the preset will trigger and begin to play If you desire is to have your Li...

Page 34: ...nt to the current edit parameter When all fields are entered press SELECT to save it When an preset is started with an MTC SMPTE trigger set the Liquid Tracks will display a rotating clock next to the...

Page 35: ...Audio file is set for playback then end of a Preset is immediately after starting it You can define one of three things to happen at the end of a Preset 1 stop and do nothing 2 immediately repeat the...

Page 36: ...ou can set an initial level The level is MIDI CC controllable in real time however an initial level is loaded upon the start of the Preset itself The range is from 0 OFF to 255 MAX Clear and Erase the...

Page 37: ...k described below Within the bank directory on the media card will be the working audio files midi files the scan file and preset backup file You can have up to 255 audio or MIDI files These files wil...

Page 38: ...em Switching Banks Two banks exist on the LT 50 and LT 100 Only one bank can be active at a time On the top of the bank menu screen you will see an indicator of which bank is currently active Notice t...

Page 39: ...o your next set of edits of presets New files will not show up on your list of options when browsing for files until a ReScan is complete Saving Preset Data to the Memory Card Preset memory is stored...

Page 40: ...tly selected bank This process will erase the existing bank data in memory Auto Loading Preset Bank Data When a new card is inserted with audio files for the first time it can be tedious to setup the...

Page 41: ...he device will assign unique serial s to every media card inserted It will know if the current media card is not the previously used card There are times when it can determine what to based on this in...

Page 42: ...scroll through the files press SELECT to start playback The audio controls Start Stop Pause change file all operate the same as when in Preset mode You will see a backwards arrow when a first track i...

Page 43: ...play all the files in random order kind of like Shuffle on some MP3 players Enter the Intermission menu and then use the rotary dial to select the mode of play Press SELECT and the Liquid Tracks will...

Page 44: ...acks as a separate device without using MASTER SLAVE mode then assign every unit a different midi channel MIDI Sysex ID The Liquid Tracks units must have a valid SYSEX ID assigned for it to allow comm...

Page 45: ...sync with all it s slaves by telling them what Bank what preset and when to trigger their presets It will also manage transport issues Usually it is only the master that receives data from the MIDI i...

Page 46: ...ter from the MASTER SLAVE screen Press the RIGHT button and the indicator arrow will be next to NET Assign your Master a Network ID Every Master and Slave unit must have the Same NET ID assigned to it...

Page 47: ...following two parameters should only be set changed on the MASTER unit All slave units should be set to 0 The Slave Delay Compensation parameter sets the pre trigger delay time The Slave Trigger Comp...

Page 48: ...or dump and then transmit it at anytime While the obvious use would be to bring backups of your other equipment s preset files on the road just in case there are also specific performance benefits Yo...

Page 49: ...r SYSEX directory there maybe times you need to capture live dumps and don t have a computer to do it Or don t want to use a computer to do it Then use this utility to automatically capture the data a...

Page 50: ...stored Hit any button to exit back to the Utility Menu NOTE Not all Media Card types are capable of maintaining writes speeds with Liquid Tracks IT IS HIGHLY recommended that you test your media card...

Page 51: ...ecord a midi file synchronized within a preset see MIDI CREATE in Preset Edit there maybe times you need to create a midi performance NOT A SYSEX DUMP based on a live performance and rig setup Use thi...

Page 52: ...Prepare will no longer be valid they are reset to empty defaults Once you start a Prepare you will see various update and ReScan status screens DO NOT interrupt this process if you can avoid it Depend...

Page 53: ...y start updating itself If successful when finished it will reboot itself and the screen will indicate the firmware version If it failed to update an error will probably display telling you the proble...

Page 54: ...pare media and rescan all media all in one step Press and hold LEFT UP and RIGHT buttons at the same time while powering on the system When you see Select Command on the LCD let go of the buttons A sp...

Page 55: ...1 Bank B PROGRAM CHANGE PC 0 127 Change to preset 0 127 VOLUME CC 10 0 127 Not meant to be cont controller use for Mute low mid high etc PREV PRESET CC 40 127 Trigger previous preset NEXT PRESET CC 4...

Page 56: ...di playback SYSEX data dumps of any type are supported for bulk SYSEX send receive SUPPORTED MP3 FORMATS 1 MP3 MPEG1 0 all VBR supported 2 MP3 MPEG2 0 all VBR supported 3 MP3 MPEG2 5 some incompatibil...

Page 57: ...l work in the media card slots If you are having trouble with a particular media card 1 make sure you powered down and turned on the unit with the card already inserted and 2 insure proper formatting...

Page 58: ...58 www FAMCmusic com...

Reviews: