PAI NT
M ET H O D M E N U
PA I N T M ET H O D
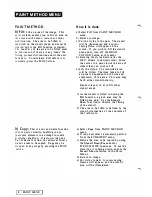
8)
F i l l :
Fill a n a rea of the image. This
p � i n t
method enables you to fill an a rea on
t h e
screen with colour, texture or colour
mod
i
fica tion. The area to be filled is
s p e c i f i ed on the stencil plane, and must be
c r e a t e d
be/ore
the
Fill
function is started.
T h e
b o u n d a r y of the area to be filled must
be
c
o
n
t
i n u
o
us
;
if there are any 'leaks' the
f i l l i n g p
r
o
cess will continue until the next
b o u n d a r y . To terminate
Fill
before it is
c o m plete, press the STOP button.
9) Copy:
This is a cut and paste function
t h a t
is q u i te versatile, enabling you to
j u x t a pose
elements in an image to create
m u l t i p l e
repeti tion. It is slower than the
C u t
&
P a s t e
function, but allows arbitrary
s t e n c i l a reas to be copied.
Copy
may be
s t o p p ed
a t any sta ge by pressing the STOP
b u t t o n .
8
-
PAINT MENU
H ow it is done:
a ) Select
F i l l
from PAINT METHOD
menu.
b) Return to ima ge.
c) Put the stylus to the pad. The stencil
will be illu minated and a cursor
saying
f i l l=>
will appear on the
screen. If you wish to fill the stencil
plane only, turn off the DRAW
COLOUR button at this point.
d) Keeping the stylus down, alter the
H.S.V. sliders to desired colour. Move
the cursor to a point
inside
the area of
stencil that you wish to fill.
e) Lift the stylus. The stencilled area
will be filled. The time taken to fill
an area is dependent on the size and
complexity of the area. This area may
be of either stencil polarity.
Repea t steps c) to e) to fill other
stencil areas.
I )
As the stencil i s filled in during the
Fill
function, a given area may be
filled once only. Use the
Stencil
Show
function to observe the filling
of the stencil.
2) The area to be filled is defined by the
stencil, irrespective of the contents of
the field store.
a ) Select
Copy
from PAINT METHOD
menu.
b) If req ui red, select a symmetry pattern
from the SYMMETRY menu.
c) Define the area to be copied by using
the
S t e n c i l Draw/Erase
a nd/or
STENCIL WIPE functions. To see the
stencil as it is being drawn, enable the
Stencil S h o w
selection in the Paint
Me nu
4.
d) Return to image.
e) Put stylus to pad.
A
cursor saying
fro m=>
will a p pear, and the stencil
a rea will be illu minated.
Summary of Contents for CVI
Page 1: ...r e User Manual Computer Video Instrument...
Page 4: ...Startea 2 Video Melius...
Page 102: ...33 Quad mirror Slow scan across L J _J...
Page 103: ......
Page 104: ...56 Under over stencil 57 Under over catch up 58 Push to freeze...
Page 105: ...60 L J _JI L...
Page 106: ...80 Under over texture wipe L J _J...
Page 107: ...L J _Jd r...
Page 197: ...RS232C Port ControI 1 Rev 7 Software Update 1...
Page 268: ...Glossary 1 Index 5...
Page 282: ......

