Manage Users and Authorities
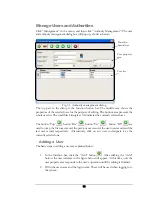
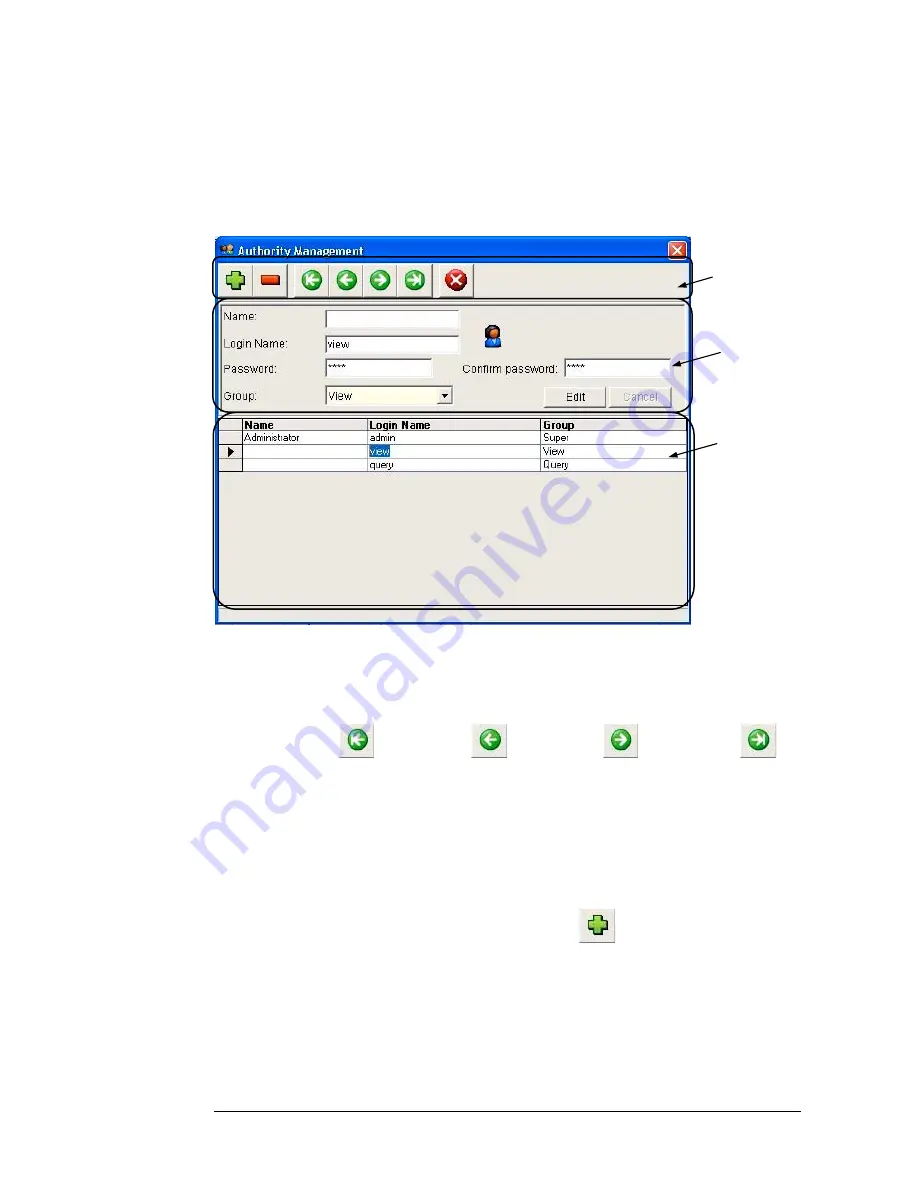
Click “Management” in the menu, and then click “Authority Management”. The user
and authority management dialog box will pop up, shown as below:
User list
User property
area
Function
button bar
Fig. 3.1 Authority management dialog
The top part in the dialog is the function button bar. The middle area shows the
properties of the selected user for the purpose of editing. The bottom area presents the
whole user list. The small black triangle at left indicates the currently selected user.
The button “Top”
, button “Bw”
, button “Fw”
、
button “BT”
are
used to jump the first user record, the previous user record, the next user record and the
last user record, respectively. Alternatively, click on any user to designate it as the
currently selected one.
Adding a User
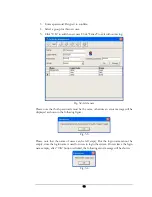
The basic steps to adding a user are explained below:
1.
In the function bar, click the “Add” button
. After clicking the “Add”
button, the user interface in the figure below will appear. At this time, only the
user property area responds to the user’s operation until the editing is finished.
2.
Fill in the user name and the login name. These will be used when logging in to
the system.
12
Summary of Contents for Flex1.0
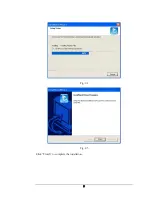
Page 14: ...Fig 2 4 Fig 2 5 Click Finish to complete the installation 7 ...
Page 16: ...Fig 2 8 9 ...
Page 54: ...Fig 6 2 Fig 6 3 47 ...
Page 85: ...Figure 8 27 Department data edit window 78 ...
Page 98: ...Fig 10 9 Message of out of date records deleted 91 ...
Page 110: ...Fig 11 15 Event warning message dialog 103 ...
Page 122: ...Notes 115 ...

