89
9.
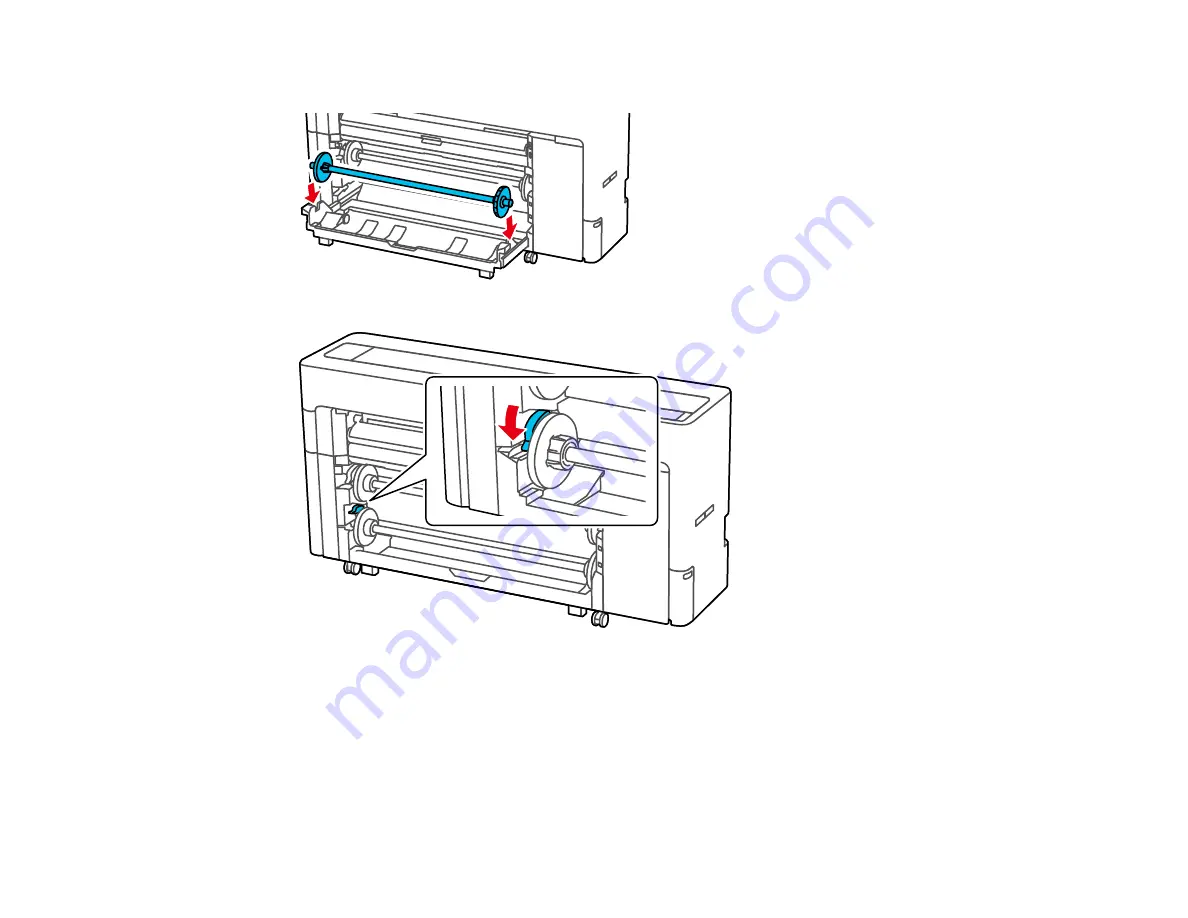
Place the spindle into the grooves on the Roll 2 unit with the black end of the spindle on the right.
10. Push down the lock lever on the roll paper holder to lock it in place.
11. Rewind the paper carefully and place it in its original package.
Note:
Store roll paper on its end or horizontally (if the packaging end-caps are installed). Never store
roll paper on its edge, as a flat spot can develop and lead to imaging artifacts on the prints. Do not
store roll paper in dusty areas. Print head maintenance and cleanings increase if dust accumulates
on the paper.
Parent topic:
Summary of Contents for SureColor P8570D Series
Page 1: ...Epson SureColor P8570D T7770D Series User s Guide ...
Page 2: ......
Page 10: ...10 Default Delay Times for Power Management for Epson Products 380 Copyright Attribution 381 ...
Page 59: ...59 6 Remove the spindle 7 Remove the transparent paper stop from the spindle ...
Page 92: ...92 Note Close the paper output flap if it is open ...
Page 95: ...95 ...
Page 102: ...102 Note Close the paper output flap if it is open ...
Page 105: ...105 ...
Page 120: ...120 6 Open the paper output flap ...
Page 121: ...121 7 Move the paper output tray into position B the middle position as shown ...
Page 123: ...123 10 Remove the transparent paper stop from the spindle ...
Page 124: ...124 11 Remove the rim of the paper stop from the end of the spindle ...
Page 129: ...129 21 Cut the leading edge of the paper as shown ...
Page 155: ...155 SureColor P8570D ...
Page 164: ...164 You can also place the same print data multiple times as shown here ...
Page 281: ...281 You see a window like this 5 Click Print The nozzle pattern prints ...
Page 294: ...294 4 Open the cutter cover ...
Page 304: ...304 4 Close the maintenance cover 5 Open the port cover at the back of the printer ...
Page 306: ...306 8 Close the rear maintenance cover ...
Page 313: ...313 8 Hold the cleaning stick in a vertical position and wipe the guides as shown ...
Page 315: ...315 10 Use a new cleaning stick to wipe any dirt off of the wiper ...
Page 319: ...319 17 Hold the cleaning stick in a vertical position and wipe the guides shown here ...
Page 344: ...344 5 Close the printer covers ...
Page 358: ...358 Parent topic Solving Problems ...


