Installing the paper separator
Once you’ve loaded paper into the FX-286 and are familiar with the
steps, you
can
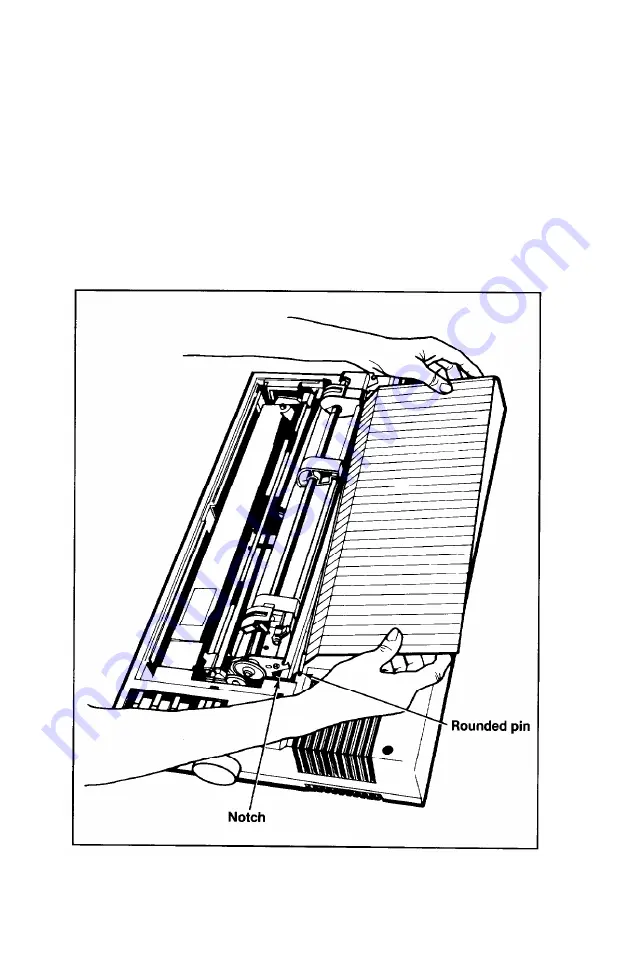
attach the plastic paper separator that comes packaged
in the cardboard enclosure. The separator ensures that the paper com-
ing out of the printer is not pulled back in.
The separator has rounded pins on
each
end that fit into notches
located just behind the tractor feed unit. Slide one of the separator’s
pins into one notch, then with a gentle pressure, snap the other pin
into the other notch as shown in Figure 1-15.
Figure 1-15. Installing the paper separator
1-14
Summary of Contents for FX-286 - Impact Printer
Page 1: ......
Page 2: ......
Page 35: ......
Page 40: ...2 4 ...
Page 48: ...3 8 ...
Page 56: ...4 8 ...
Page 91: ...6 16 ...
Page 118: ...C 10 ...
Page 133: ...Epson Mode Commands G 5 ...
Page 134: ...G 6 ...
Page 166: ...H 4 ...
Page 173: ...International Character Width Table Roman characters Italic characters I 7 ...
Page 174: ...I 8 ...
Page 180: ...J 6 ...
Page 181: ...IBM Proprinter Mode Commands J 7 ...
Page 182: ...J 8 ...
Page 202: ...J 28 ...
Page 208: ...K 6 ...
Page 216: ......
Page 220: ...IBM Mode See Appendix J for detailed explanations of codes Character Width Pitch ...
Page 221: ...Notes ...
Page 223: ......


