Service Manual for Proofer Oven with Touch Screen Controls (TSC)
14
Touchpad Controller
WARNING
BEFORE PERFORMING ANY SERVICE THAT
INVOLVES ELECTRICAL CONNECTION
OR DISCONNECTION AND/OR EXPOSURE
TO ELECTRICAL COMPONENTS, ALWAYS
FOLLOW THE ELECTRICAL LOCKOUT/
TAGOUT PROCEDURE. DISCONNECT ALL
CIRCUITS. FAILURE TO COMPLY CAN
CAUSE PROPERTY DAMAGE, INJURY OR
DEATH.
CAUTION: An ESD Wrist Strap is required when
replacing Touchpad Controller.
1. Place the unit’s Power ON/OFF Switch in its OFF
position, and follow the proper Lockout/Tagout
procedures.
2. Open the Control Access Panel; refer to the Panels
and Covers section of the manual for instructions.
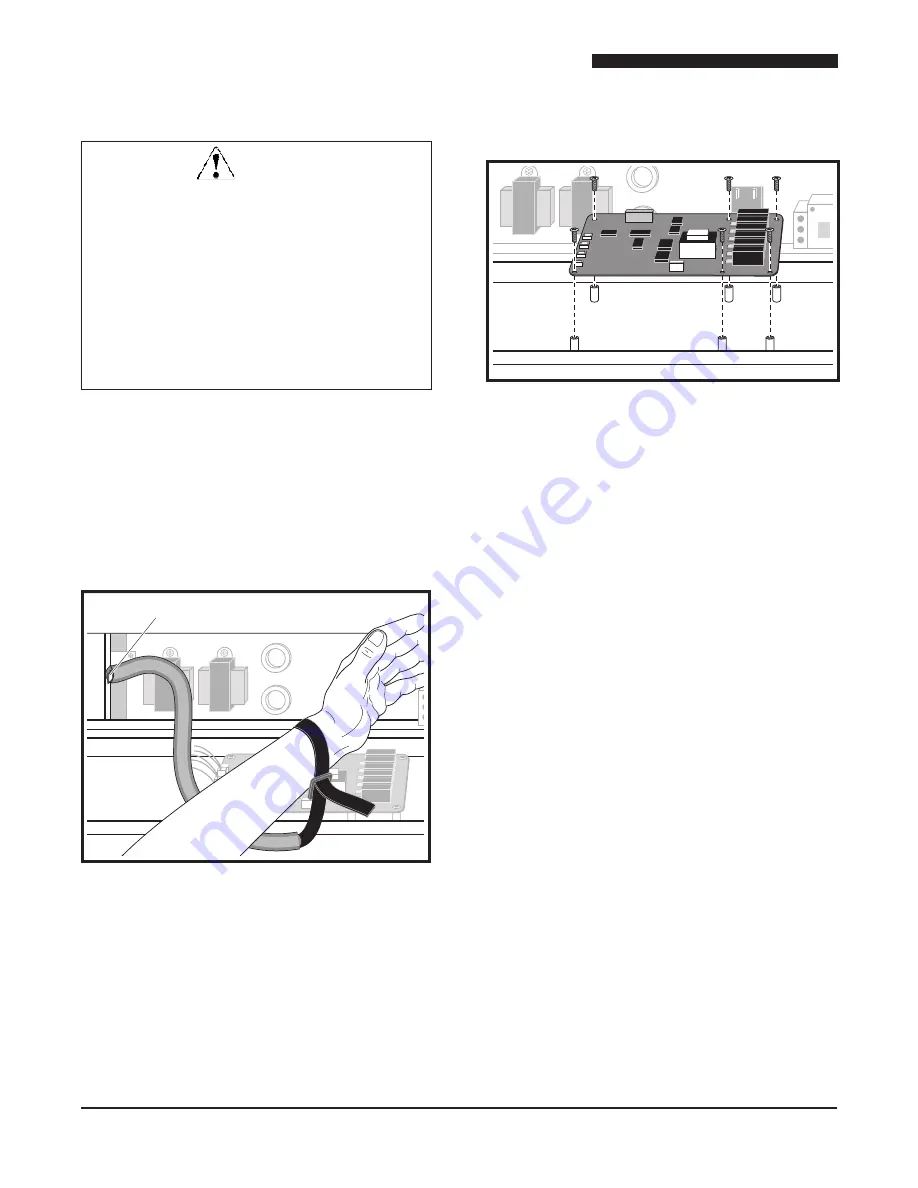
Attach strap to unit
Figure 11: Properly Connected
ESD Wrist Strap
3. Properly connect the ESD Wrist Strap to the unit
and secure it properly on the wrist.
4. Unplug all wire harnesses connected to the
Touchpad Controller.
5. Remove the six screws securing the Touchpad
Controller to the Control Access Panel.
Figure 12: Touchpad Controller
6. Lift the Touchpad Controller off of its mounts.
7. Unpack the new Touchpad Controller; make sure
the ESD wrist strap is properly attached for this
procedure.
8. Attach the new Touchpad Controller; be sure to line
up the screw holes properly. Do not over-tighten
the screws.
9. Reconnect all of the Touchpad Controller’s wire
harnesses.
10. Close the Electrical Compartment Access Panel
but DO NOT reattach or tighten the screws.
11. Restore power to the unit and ensure unit.
12. Place the Power ON/OFF Switch in its on position.
13. Touch the screen on the Touchpad Control to access
the main menu.
14. Observe the brightness of the screen.
15. If screen brightness is OK, Place Power ON/OFF
Switch in its OFF position, remove the ESD wrist
strap from the unit, reattach the screws removed
from the access panel and tighten the remaining
screws.
If the brightness requires adjustment go to step 18.
16. Ensure ESD wrist device is properly connected
before starting this procedure.


