54
Installing System Components
Removing a Hard-Drive Blank
CAUTION:
To maintain proper system cooling, all empty hard-drive bays
must have drive blanks installed.
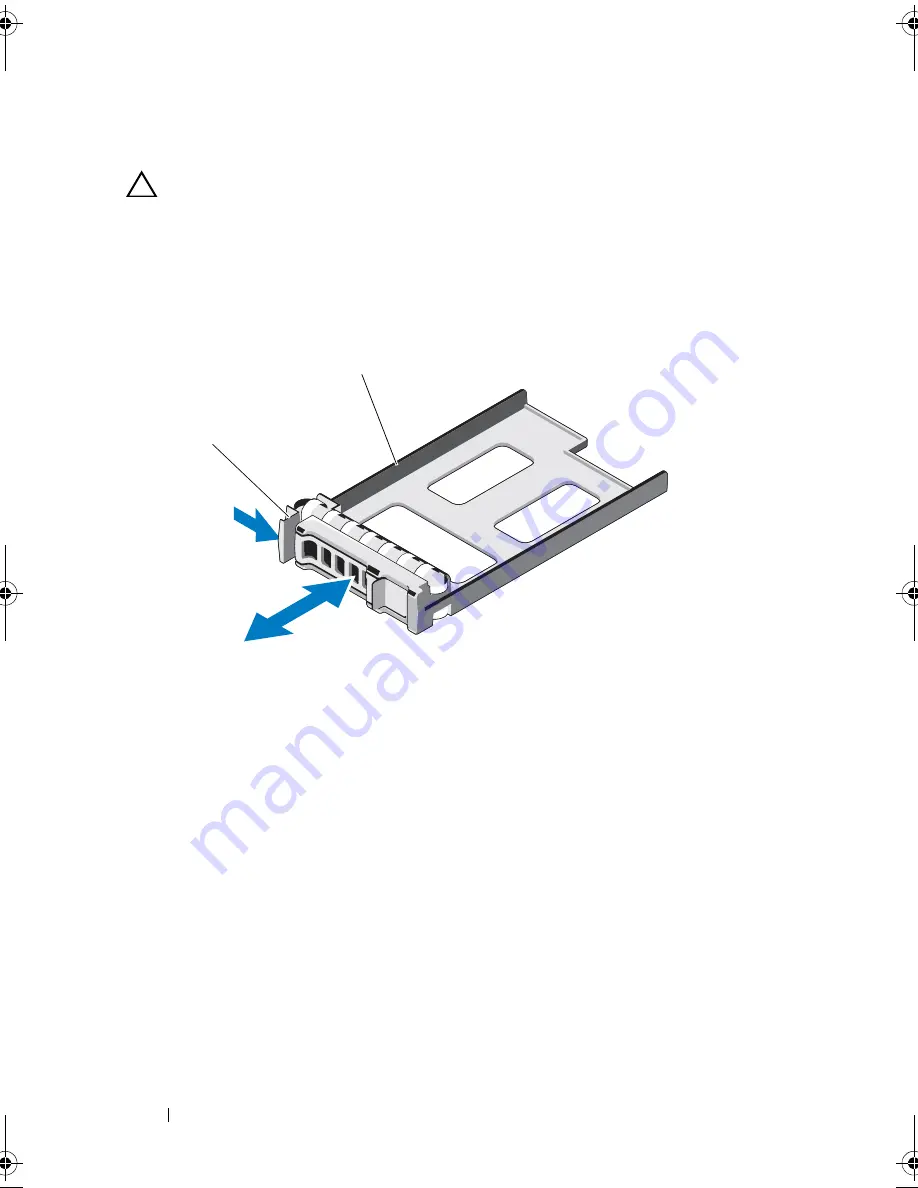
Press the release button and slide the hard-drive blank out of the hard-drive
bay. See Figure 3-2.
Figure 3-2. Removing and Installing a Hard-Drive Blank
Installing a Hard-Drive Blank
Align the hard-drive blank with the drive bay and insert the blank into the
hard-drive bay until the release lever clicks into place. See Figure 3-2.
Removing a Hard-Drive Carrier
1
From the RAID management software, prepare the drive for removal.Wait
until the hard-drive indicators on the drive carrier signal that the drive can
be removed safely. See your controller documentation for information
about hot-swap drive removal.
If the drive has been online, the green activity/fault indicator will flash as
the drive is powered down. When the drive indicators are off, the drive is
ready for removal. See "Hard-Drive Indicator Patterns" on page 12.
1
release lever
2
hard-drive blank
2
1
book.book Page 54 Friday, November 8, 2013 11:29 AM
Summary of Contents for PowerEdge C2100
Page 1: ...Dell PowerEdge C2100 Systems Hardware Owner s Manual Regulatory Model FS12 TY ...
Page 3: ......
Page 4: ......
Page 11: ...Contents 9 6 Getting Help 133 Contacting Dell 133 Index 135 ...
Page 12: ...10 Contents ...
Page 111: ...Installing System Components 107 ...
Page 112: ...108 Installing System Components ...
Page 138: ...124 Getting Help ...
Page 144: ...140 Index ...


