Installing System Board Options
8-5
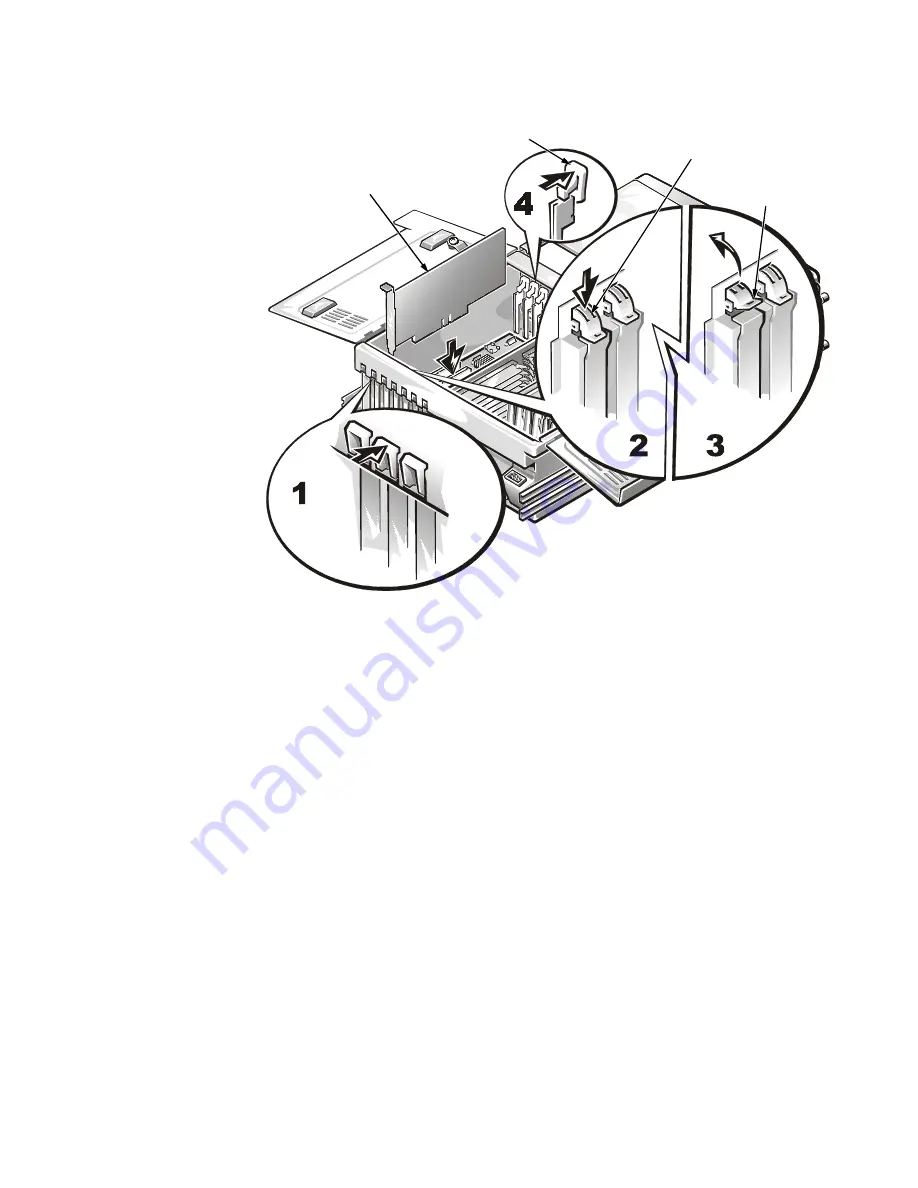
)LJXUH ([SDQVLRQ &DUG 5HPRYDO DQG ,QVWDOODWLRQ
5.
Insert the card-edge connector firmly into the expansion-card connector on the
chassis.
6.
When the card is firmly seated in the connector and the card-mounting bracket is
aligned with the brackets on either side of it, close the expansion card latch.
7.
Connect any cables that should be attached to the card.
See the documentation that came with the card for information about cable
connections.
8.
Close the computer panel doors, and then reconnect the computer and peripher-
als to their AC power sources and turn them on.
expansion card
release tab
expansion
card latch
card guide (thumb latch type)
Summary of Contents for PowerEdge 6350
Page 1: ... ZZZ GHOO FRP HOO 3RZHU GJH 6 VWHPV 167 7 21 1 7528 6 227 1 8 ...
Page 20: ...1 2 Dell PowerEdge 6350 Systems Installation and Troubleshooting Guide ...
Page 50: ...4 4 Dell PowerEdge 6350 Systems Installation and Troubleshooting Guide ...
Page 84: ...6 8 Dell PowerEdge 6350 Systems Installation and Troubleshooting Guide ...
Page 128: ...8 18 Dell PowerEdge 6350 Systems Installation and Troubleshooting Guide ...
Page 136: ...9 8 Dell PowerEdge 6350 Systems Installation and Troubleshooting Guide ...
Page 182: ...A 8 Dell PowerEdge 6350 Systems Installation and Troubleshooting Guide ...
Page 185: ...Jumpers Switches and Connectors B 3 LJXUH 6 VWHP RDUG XPSHUV jumpered unjumpered ...
Page 192: ...B 10 Dell PowerEdge 6350 Systems Installation and Troubleshooting Guide ...


