


2-38
Magellan
TM
8500Xt Scanner
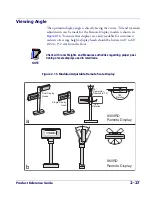
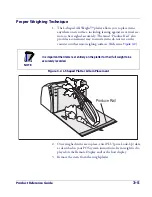
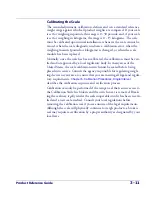
Figure 2-26. Using the Bubble Level
OK
OK
NO
Bubble Level
6. Reinstall the All Weighs™ Platter and verify that it is flush or just
below flush with the countertop. This is necessary to provide
smooth scanning from either direction. Make adjustments as
needed to align the platter with the counter by moving support
rails up or down, or consider installing screws in positions that
will allow their use in adjusting the unit’s position. Ensure that
leveling is maintained if adjustments are made.
NOTE
Failure to install a scanning-scale in a stable and level position will inhibit
weighing, calibration and zeroing operations. The platter MUST make unob-
structed contact with all of its supports for proper weighing operation.
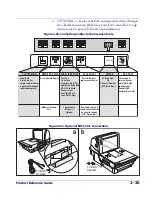
7. Once installation is complete, proceed with the
Operational Verifi-
cation
procedures that follow.
Summary of Contents for Magellan 8500Xt
Page 1: ...MagellanTM 8500Xt Product Reference Guide...
Page 14: ...12 MagellanTM 8500Xt Scanner NOTES...
Page 70: ...2 40 MagellanTM 8500Xt Scanner NOTES...
Page 88: ...3 18 MagellanTM 8500Xt Scanner Figure 3 6 Removing Replacing the Gasketed DLC Window a b c d...
Page 93: ...Product Reference Guide 4 5 Figure 4 1 7 Segment LED Display 7 Segment Display Models vary...
Page 102: ...4 14 MagellanTM 8500Xt Scanner NOTES...
Page 138: ...6 20 MagellanTM 8500Xt Scanner NOTES...
Page 416: ...7 278 MagellanTM 8500Xt Scanner NOTES...
Page 428: ...A 12 MagellanTM 8500Xt Scanner...
Page 448: ...D 2 MagellanTM 8500Xt Scanner NOTES...
Page 462: ...E 14 MagellanTM 8500Xt Scanner NOTES...
Page 477: ...Product Reference Guide F 15 NOTES...