Installing the Router 3-11
Connecting Interface Cables
Crossing high-power cables with interface cables can cause interference in some interface types.
It will not always be possible to avoid this, but try to prevent it whenever possible.
•
Install and use the cable management brackets.
•
We recommend that you install and use the cable management brackets that are included with the
router; these brackets will help keep your cables organized and untangled, and will enable access
to interface processors without having to disconnect interface cables from adjacent interface
processors unnecessarily. (See the section “Rack-Mounting the Chassis” in this chapter.)
•
Do not defeat cable strain-relief systems.
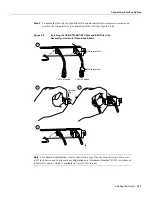
Most interfaces provide some type of strain relief to prevent the cables from being accidentally
disconnected. Among these types of strain relief are the slide fasteners on Ethernet cables, the
cable retention clip on the power supply cord, and the screw-type fasteners on serial cables. The
cable management brackets can also help to provide strain relief, especially when you use cable
ties to secure the cables to the brackets. Use all strain-relief devices provided to prevent potential
problems caused by inadvertent cable disconnection.
•
Verify proper interface cabling before starting the system.
Before applying power to the system, prevent unnecessary problems or component damage by
double-checking your cabling.
•
Verify all cabling limitations before applying power to the system.
When setting up your system, you must consider a number of factors related to the cabling
required for your connections. For example, when using EIA/TIA-232 connections, be aware of
the distance and electromagnetic interference limitations. For cabling distances and other
requirements, refer to the section “Site Requirements” in the chapter “Preparing for Installation.”
•
Check the power cord and power supply for compatibility with your power service.
Check the labels on the equipment and ensure that the power service at your site is suitable for
the chassis you are connecting. If you are not sure, refer to the section “AC and DC Power” in
the chapter “Preparing for Installation.”
Warning
A voltage mismatch can cause equipment damage and may pose a fire hazard. If the
voltage indicated on the label is different from the power outlet voltage, do not connect the chassis
to that receptacle.
Tools and Equipment
Have the following tools on hand to secure interface cables and complete the installation:
•
Number 1 Phillips screwdriver
•
3/16-inch flat-head screwdriver
•
Cable ties
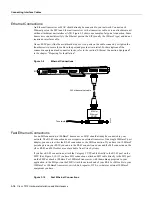
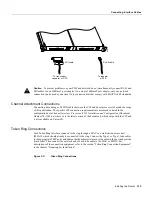
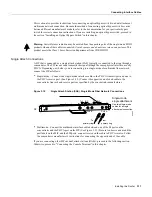
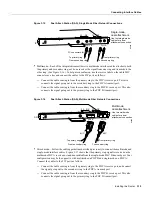
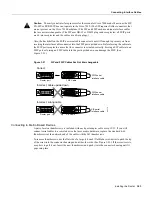
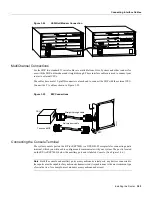
The sections that follow provide illustrations of the connections between the router interface ports
and your network(s). Network interface equipment, such as Ethernet transceivers, MAUs, and CSUs,
should be available and in place already. If they are not, refer to the section “Preparing Network
Connections” in the chapter “Preparing for Installation” for descriptions of the equipment you need
for each interface type to complete the connection to your network.
Summary of Contents for TelePresence Server 7010
Page 10: ...x Cisco 7010 Hardware Installation and Maintenence ...
Page 14: ...iv Cisco 7010 Hardware Installation and Maintenance Document Conventions ...
Page 148: ...3 36 Cisco 7010 Hardware Installation and Maintenance Using the Flash Memory Card ...
Page 158: ...4 10 Cisco 7010 Hardware Installation and Maintenance Troubleshooting the Processor Subsystem ...
Page 242: ...5 84 Cisco 7010 Hardware Installation and Maintenance Replacing Internal Components ...
Page 258: ...A 16 Cisco 7010 Hardware Installation and Maintenance MIP Interface Cable Pinouts ...
Page 270: ...B 12 Cisco 7010 Hardware Installation and Maintenance Interface Processor LEDs ...
Page 274: ...C 4 Cisco 7000 Hardware Installation and Maintenance ...
Page 287: ...Index 13 ...


