

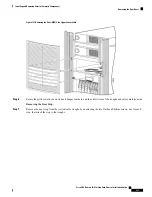
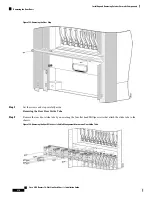


Figure 129: Removing the Upper Rear Grille—Fixed Configuration Power Shown
Prerequisites
Ensure that
all
power to the LCC is OFF prior to initiating the tasks to install the exhaust baffle.
Steps
To remove the currently attached upper rear grille, follow these steps:
SUMMARY STEPS
1.
Remove the upper grille by unsnapping the bottom portion from the ball stud snaps on the vertical mounting
brackets.
2.
Rotate the grille toward you on its hook hanger brackets, and then lift it clear of the brackets.
3.
Set it carefully aside.
4.
Be sure that all parts have been carefully set aside and repackaged appropriately.
DETAILED STEPS
Step 1
Remove the upper grille by unsnapping the bottom portion from the ball stud snaps on the vertical mounting brackets.
Step 2
Rotate the grille toward you on its hook hanger brackets, and then lift it clear of the brackets.
Step 3
Set it carefully aside.
Step 4
Be sure that all parts have been carefully set aside and repackaged appropriately.
Cisco CRS Routers 16-Slot Line Card Chassis Installation Guide
223
Upgrading Chassis Components
Prerequisites


