


b) To decrease the door gap, loosen the five screws that secure the vertical trough to the chassis. Tighten the bottom
set screws one full turn. Snug the five screws that attach the vertical trough to the chassis and check the door
alignment.
c) To increase the door gap, loosen the five screws that secure the vertical trough to the chassis. Tighten the top set
screws one full turn. Snug the five screws that attach the vertical trough to the chassis and check the door alignment.
d) Repeat the procedure as necessary until the doors are properly aligned.
e) Tighten the five screws that secure the vertical trough to the chassis.
What to do next
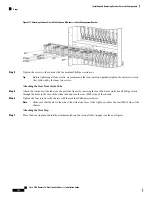
After performing this task, you can insert the rear horizontal Velcro cable bracket straps. Their use is optional
when the chassis is lightly populated; you will need the straps as fiber starts filling the troughs above the top
of the fiber retainers.
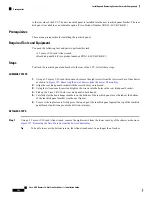
The front (PLIM) side of the fabric chassis has upper and middle horizontal cable troughs; the rear has a
middle cable trough.
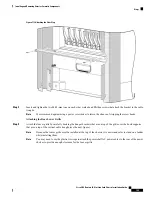
Installing the Lower Chassis Cosmetic Bezel
To install the lower chassis cosmetic bezel, follow these steps:
SUMMARY STEPS
1.
Carefully slot the hook hanger brackets on the bottom of the lower chassis cosmetic bezel over the tabs
on the vertical cable troughs.
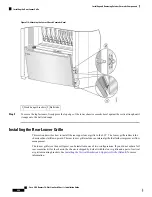
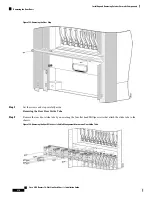
2.
To secure the top fasteners, firmly press the top edge of the lower chassis cosmetic bezel against the
vertical trough until it snaps onto the ball stud snaps.
DETAILED STEPS
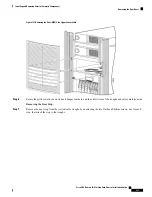
Step 1
Carefully slot the hook hanger brackets on the bottom of the lower chassis cosmetic bezel over the tabs on the vertical
cable troughs.
Cisco CRS Routers 16-Slot Line Card Chassis Installation Guide
203
Installing and Removing Exterior Cosmetic Components
Installing the Lower Chassis Cosmetic Bezel


