C I R R U S
A I R P L A N E M A I N T E N A N C E M A N U A L
M O D E L S R 2 0
51-20
Page 7
All
EFFECTIVITY:
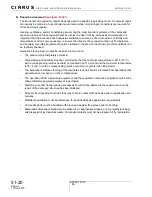
(b)
Using brush and vacuum, thoroughly remove any loose contaminants from repair area.
(c)
Mark the outline of the extent of the damage and the area of surface protection to be
removed.
(d)
Remove surface protection from the damage area.
CAUTION:
Remove the minimum amount of undamaged and uncontaminated support-
ing material. If questions on appropriate damage removal exist, contact Cir-
rus Design for disposition.
(e)
If performing a Sandwich Structure Replacement:
CAUTION:
Minimum overlap is 1.0 inch (2.54 cm). If laminate is 4-ply or greater, maxi-
mum overlap is 2.0 inch (5.08 cm). Laminate less than 2-ply is too thin for
this repair.
1
Using putty knife, remove enough core to expose a border of undamaged inner lam-
inate 0.5 inch (1.3 cm) wide minimum for each ply of the repair. For example: A 3-ply
damaged laminate would be trimmed back 1.5 inches (3.8 cm) minimum.
2
Sand off residual core from the surface of the inner laminate. Be careful not to cause
separation between core and inner laminate during this operation.
3
Inspect for separation of the inner laminate from the core. Continue to sand back
until all separated laminate is removed.
(f)
If applicable, Remove EMM:
CAUTION:
Exercise great care while removing EMM. Abrasive materials can quickly
cut through EMM, damaging underlying fiberglass plies.
Avoid operating the removal tool at high speeds, excessively tilting the tool,
or leaving the tool in the same area for more than a few seconds. Use
slower tool speeds combined with a flatter edgeless operation to cause the
EMM to disbond from the laminate surface without damaging underlying
fiberglass plies. Move the tool frequently to visually ensure no damage
occurs during the removal process.
1
Using rotary tool or orbital sander, gently abrade the EMM surface.
2
As outer resin coat is abraded, the EMM with become polished and begin to blister.
3
Once blistered, remove EMM with a utility knife.
(g)
Remove damaged material using a utility knife, rotary tool, or die grinder with depth
gauges installed when applicable.
(3)
Determining Ply Count
Ply count refers to the number of plies in a given thickness of unfinished laminate. To determine
ply count, measure the thickness of undamaged, unpainted laminate in a area adjacent to the
repair area then verify by comparing the measurement to the ply lay-up tables in the Airframe
Zone Diagrams.
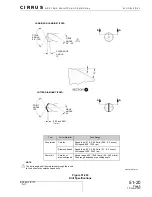
90° Die Grinder
-
Any Source
Damage removal.
Orbital Sander
-
Any Source
Abrasion.
Description
P/N or Spec.
Supplier
Purpose
01 May 2012


