


51-20
Page 12
All
EFFECTIVITY:
C I R R U S
A I R P L A N E M A I N T E N A N C E M A N U A L
M O D E L S R 2 0
01 May 2012
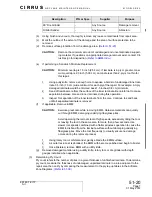
(a)
Acquire necessary tools, equipment, and supplies.
(b)
Prepare repair surface.
(c)
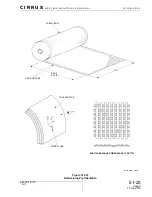
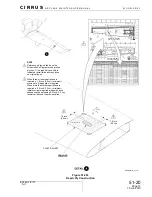
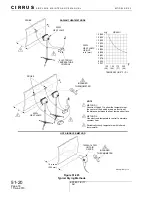
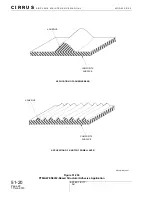
Construct template as follows:
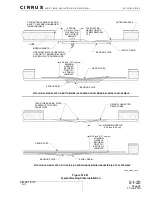
1
Referencing ply lay-up tables in the Airframe Zone Diagrams, determine number of
repair plies necessary for repair.
2
Tape plastic sheet over damaged area.
3
Center, offset, and draw perimeter line on plastic 1.0 inch (2.5 cm) from the inside
edge of damage. This is the dimension of the first and smallest repair ply.
4
Center, offset, and draw another perimeter line 0.5 - 1.0 inch (1.3 - 2.5 cm) from the
existing line. This is the dimension of the next repair ply.
5
Repeat above steps for each subsequent repair ply.
6
Label template boxes with correct ply orientation for later reference.
(d)
Cut repair plies as follows:
1
Place fabric on a contaminate-free cutting surface.
2
Position and orient template on fabric.
3
Cut fabric to the same dimension as template.
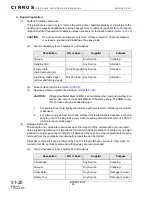
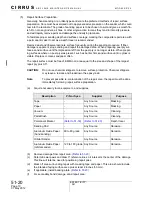
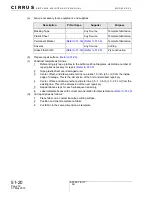
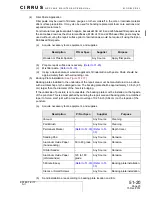
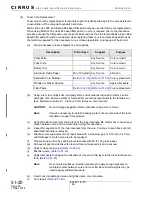
Description
P/N or Spec.
Supplier
Purpose
Masking Tape
-
Any Source
Template fabrication.
Plastic Sheet
-
Any Source
Template fabrication.
Permanent Marker
(Refer to 51-30) (Refer to 51-30)
Template fabrication.
Scissors
-
Any Source
Cutting.
Glass Fiber Cloth
(Refer to 51-30) (Refer to 51-30)
Ply construction.


