OPERATION
3-38
Roadster/Mirage S+ User’s Manual
Image Orientation
Set the orientation of the image according to the orientation of your projector. If the
setting is incorrect, projected images will be reversed and/or upside down.
Reserved
No function.
Auto Power-up
Enter a checkmark to enable the projector to automatically power up after losing
power due to a power failure or due to unplugging the projector during operation.
Note that unsaved display adjustments may be lost.
Set Date & Time
Enter/read the current year-month-day and hour-minute-second. Changes here reset
the projector’s real-time clock.
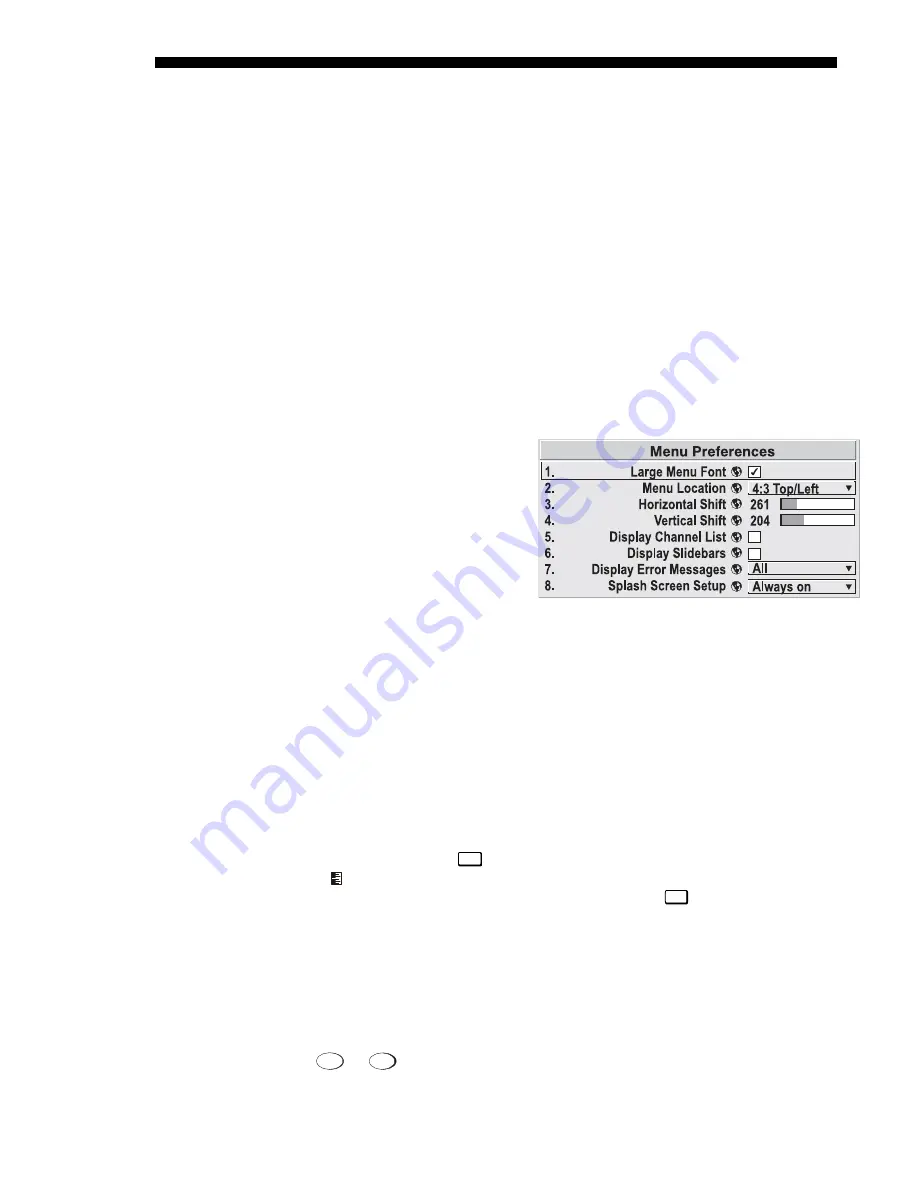
Menu Preferences
— SUBMENU
Adjust the appearance, content
and/or location of on-screen
menus and messages.
LARGE MENU FONT
—
Enter a
checkmark to enlarge menus and
their text. You may have to adjust
“Menu Location” to
accommodate the increased menu
area.
MENU LOCATION
—
Use the pull-down list to choose a pre-defined default or
customized location for the display of all on-screen menus.
To create a custom menu location quickly, choose a preset that is closest to the
desired location. Then adjust “
Horizontal
Shift”
and “
Vertical Shift”
slidebars to
move the menu to the desired location. Avoid locations too close to a corner or edge
to prevent cropping of larger menus.
HORIZONTAL SHIFT AND VERTICAL SHIFT
—
Shift your menus as desired, creating a
customized menu location.
DISPLAY CHANNEL LIST —
Enter a checkmark if you want to see a scrollable channel
list whenever you press
Chan
from your presentation. Channels marked with a list
icon in the
Channel Setup
menu will appear here. The “Display Channel List”
option also enables on-screen feedback when using the
Input
key. If you prefer to hide
the channel list and input dialog box while switching channels and sources during a
presentation clear the checkbox.
NOTE:
The Channel List and input dialog box cannot be hidden during use of the
menus.
DISPLAY SLIDEBARS
—
Enter a checkmark to superimpose a small slidebar over the
current image whenever an adjustable parameter is selected directly with a key such
as
Contrast
or
Bright
. If “Display Slidebars” is unchecked, these slidebars can still be
Summary of Contents for Mirage S+
Page 6: ......
Page 112: ......
Page 136: ......
Page 144: ......
Page 145: ...Appendix B Keypad Reference Roadster Mirage S User s Manual B 1 Figure B 1 Remote Keypad...
Page 148: ...SERIAL COMMUNICATION CABLES C 2 Roadster Mirage S User s Manual...
Page 158: ......


