


62-11637
5–4
1. Enter the Technician Mode, as described in
, then press the ALARM key.
2. Press the INACTIVE ALARMS soft key.
3. If there are inactive alarms, the alarm number will be displayed preceded by the letter “I” (inactive alarm) or
“P” (inactive Pretrip alarm). The last alarm that occurred will be the first alarm displayed and so on.
4. Press the
▲
or
▼
key to scroll through the list of alarms.
5. To clear only the inactive alarms and leave the active alarms, press the CLEAR INACTIVE soft key. The
LCD Display will provide an “INACTIVE ALARMS CLEARED” message to confirm the alarms have cleared.
6. To clear both the active and inactive alarms, press the CLEAR ALL soft key. The operators message panel
will provide an “ALL ALARMS CLEARED” message to confirm the alarms have cleared.
7. If there are no inactive alarms, the operators message panel will provide a “NO INACTIVE ALARMS” mes-
sage and then return to the default display after 5 seconds.
NOTICE
Technician Mode should be canceled when work is complete. If Technician Mode is not can-
celed, Technician Mode will be available for 60 minutes after the last key press without requir-
ing a code, even after placing the SROS in the OFF and then back in the RUN/STOP position.
8. Once activity requiring use of Technician Mode is complete, Technician Mode should be manually canceled,
refer to
5.2.3
Configuration Settings
Configuration settings match the control system to the unit and define control system action under various opera-
tional conditions. Instructions for working with Configurations are provided in
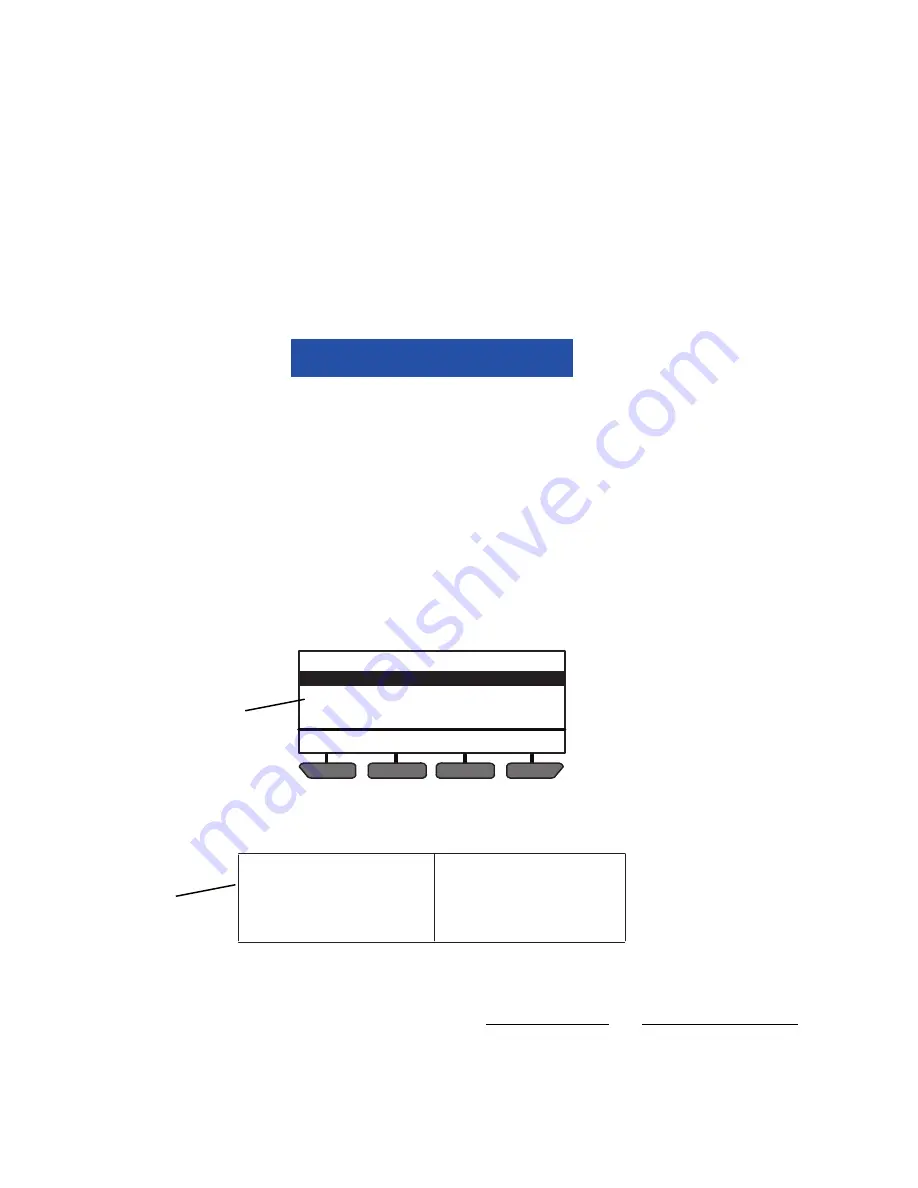
Figure 5.4 Setting Configurations
1. Enter the Technicians Menu, highlight CONFIGURATION SETTINGS and then press the “=” key as
described in
.
2. Eleven Configuration sub-menus will be available. To scroll through the Configuration sub-menu list, press
the
▲
or
▼
key. The sub-menus will highlight as the list is scrolled. The available sub-menus include:
for information on the settings in each sub-menu and resultant System actions.
3. With the desired sub-menu highlighted, press the “=” key. The individual Configurations within the sub-menu
will display. There are two types of Configuration screens, data entry screens and value selection screens.
BACK
EXIT
UNIT IDENTIFICATION
SETPOINT(S) & RANGE LOCK
START-STOP SETTINGS
INTELLISET & PRODUCTSHIELD
CONFIGURATION SETTINGS (1 OF 11)
2 & 3
UNIT IDENTIFICATION
SETPOINT(S) & RANGE LOCK
START-STOP SETTINGS
INTELLISET & PRODUCT SHIELD
ENGINE SETTINGS
ALARM SETTINGS
HOUR METERS
REMOTE SENSORS
OTHER SETTINGS
RAIL SETTINGS
AUTO FRESH AIR SETTINGS
END OF LIST
2
Summary of Contents for Transicold X4 7300
Page 21: ...62 11637 1 6 1 3 SAFETY DECALS ...
Page 22: ...1 7 62 11637 62 03958 ...
Page 23: ...62 11637 1 8 ...
Page 24: ...1 9 62 11637 ...
Page 119: ...62 11637 SECTION 6 MESSAGECENTER PARAGRAPH NUMBER Page 6 1 MESSAGECENTER MESSAGES 6 1 ...
Page 278: ......


