pCOWeb
+030220966 – rel. 1.1 – 12.12.2017
23
NOTES
on using the XML standard
•
The syntax of a file with the .xml extension can be validated, for example, by displaying it in Mozilla Firefox;
pCOWeb
nonetheless only recognises the syntax
shown above. In particular, it does not recognise the standard XML <text /> tag, which in standard XML is equivalent to the pair <text> + <text/>.
•
pCOWeb
does not validate the template file used.
•
Information, strings and tags other than those shown above can be entered in any position; if not recognised according to the syntactical limits shown in
Table 4.a, they will be copied textually without any action.
4.3.3
Setting the common properties to all events
Section 4.3.1 on page 25 describes the operation of the notification events. Below is a description of the setting procedure.
IMPORTANT:
For
pCOWeb
to send the notifications, normally the “Gateway” needs to be set in the network configuration (see 9.4.1 on page 45). The
gateway configuration is not however required if the address of the
pCOWeb
and the addresses of the receiving network devices are in the same subnetwork.
For further information see APPENDIX B on page 59.
NOTE 1
All the following settings are valid from when they are confirmed; the
pCOWeb
does not need to be rebooted.
NOTE 2
The Tests page (see 9.9 on page 51) can be used to manually send all the notifications set, regardless of whether the events occur; once the
events have been set, it is recommended to check the sending of the notifications on this page.
NOTE 3
APPENDIX D on page 63, APPENDIX E on page 66 and APPENDIX F on page 67 describe some freeware applications downloadable from the
Internet that, once installed on a computer, can receive e-mails, files via FTP and TRAP messages from the
pCOWeb
.
These should be used for testing without requiring an external server.
PROCEDURE
a.
From the
pCOWeb
main page (see a pagina 42) open the “Events” page (
b.
Figure
4.n
).
c.
The page is divided into eight tabs, four of them (
d.
Figure
4.o
, Figure 4.p and Figure 4.q) contain the common settings for all
the events generated.
Each one has a confirmation button . In order to keep the configuration selected
this button must be clicked.
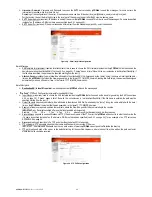
Figure 4.n - Notification events page
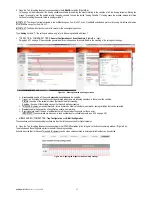
•
“SNMP”
: SNMP TRAP recipients (see chapter 6 on page 34).
Up to 5 recipients can be specified; to be able to receive SNMP TRAP notifications, at least the first (Host 1) needs to be specified.
SETTINGS AVAILABLE:
Hostname: IP address or name of the recipient PC (to use a name, a DNS must be specified, see 9.4.1 on page 45).
Community: this represents a sort of SNMP keyword that is sent (not encrypted) to the recipient, which can exclude any notifications from
communities other than its own; if left empty, the Default trap community will be used (see 6.3 on page 35), but if that too is empty, the TRAP will not
be sent to the Host.
•
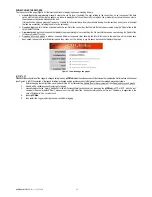
“E-Mail”
: e-mail configuration page now is divided in three different parts:
a)
E-mail Account
b)
E-Mail Message
c)
E-Mail Recipients
Figure 4.o - SNMP Hosts configuration for sending the TRAP
messages
E-mail Account
E-Mail Account (required for sending e-mail notifications): in the message received this will be shown as the sender’s e-mail address.
If this address is required to send e-mails to the
pCOWeb
, remember that
pCOWeb
does not feature a client for reading or downloading the
messages; these must then be read / downloaded using a client (for example “Microsoft Outlook”) that accesses the e-mail server corresponding to
the domain address in this field (in the example “provider1.com”); the corresponding MAILBOX must have been created on the server: also see the
APPENDIX D on page 63.
Identification (optional): in the message received this will be displayed as the sender’s name.
Reply to (optional): if the recipient selects the “Reply to” option in the e-mail client used, this represents the return e-mail address that the reply will be
sent to.


