77
Oper
ation
U
sef
ul
Fu
n
ctio
n
s A
vaila
ble
D
ur
ing
a
Pr
es
en
ta
tion
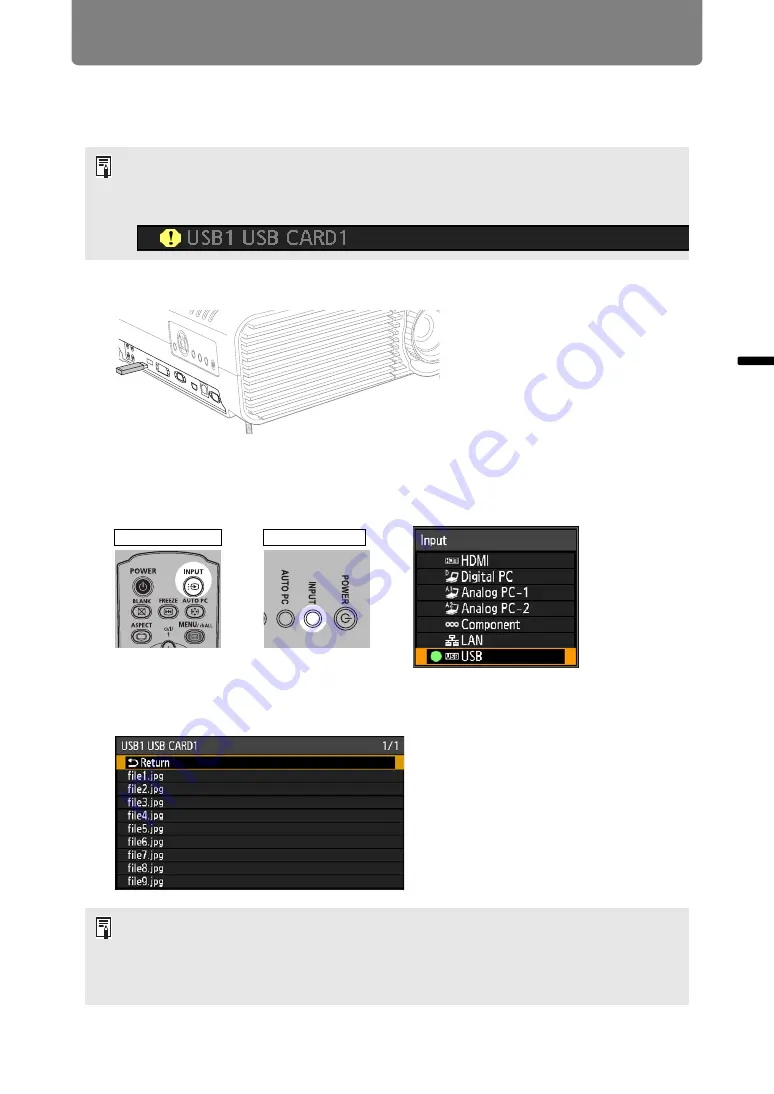
Projecting Images on a USB Flash Drive
Images stored on a USB flash drive in the projector can be projected as follows.
You can select the images to project, or you can project images automatically, one
after another. JPEG images up to 7000x7000 can be projected.
1
Insert the USB flash drive in the USB port.
Insert the USB flash drive directly into the projector’s USB port. The USB flash
drive will not be recognized if you connect it via a hub.
2
Press the INPUT button.
3
Press the INPUT button repeatedly to select [USB].
JPEG files on the USB flash drive are now listed.
• USB flash drives with security features are not recognized by the projector and cannot
be selected as the image source.
• If the projector cannot mount the file system, the drive name is grayed out and the
following icon is displayed. In this case, the USB flash drive cannot be used.
• If the USB flash drive contains multiple partitions, a screen is displayed for you to select
the desired partition. Use the pointer buttons to select the partition, and then press the
OK
button. Files on the partition are now listed.
• Enlargement with the
D.ZOOM
button and split-screen display are not available when
[USB] is selected as the input signal.
Remote control
Projector
Summary of Contents for WUX450
Page 30: ...30 ...
Page 46: ...46 ...
Page 47: ...47 MULTIMEDIA PROJECTOR Operation ...
Page 48: ...48 ...
Page 72: ...72 ...
Page 122: ...122 ...
Page 162: ...162 ...
Page 201: ...201 MULTIMEDIA PROJECTOR Networked Multi Projection NMPJ ...
Page 202: ...202 ...
Page 216: ...216 ...
Page 250: ...250 ...
Page 264: ...Using Layout Functions 264 Meeting Mode window Classroom Mode window starting a session ...
Page 273: ...273 MULTIMEDIA PROJECTOR Appendix ...
Page 274: ...274 ...


