background image

30

„

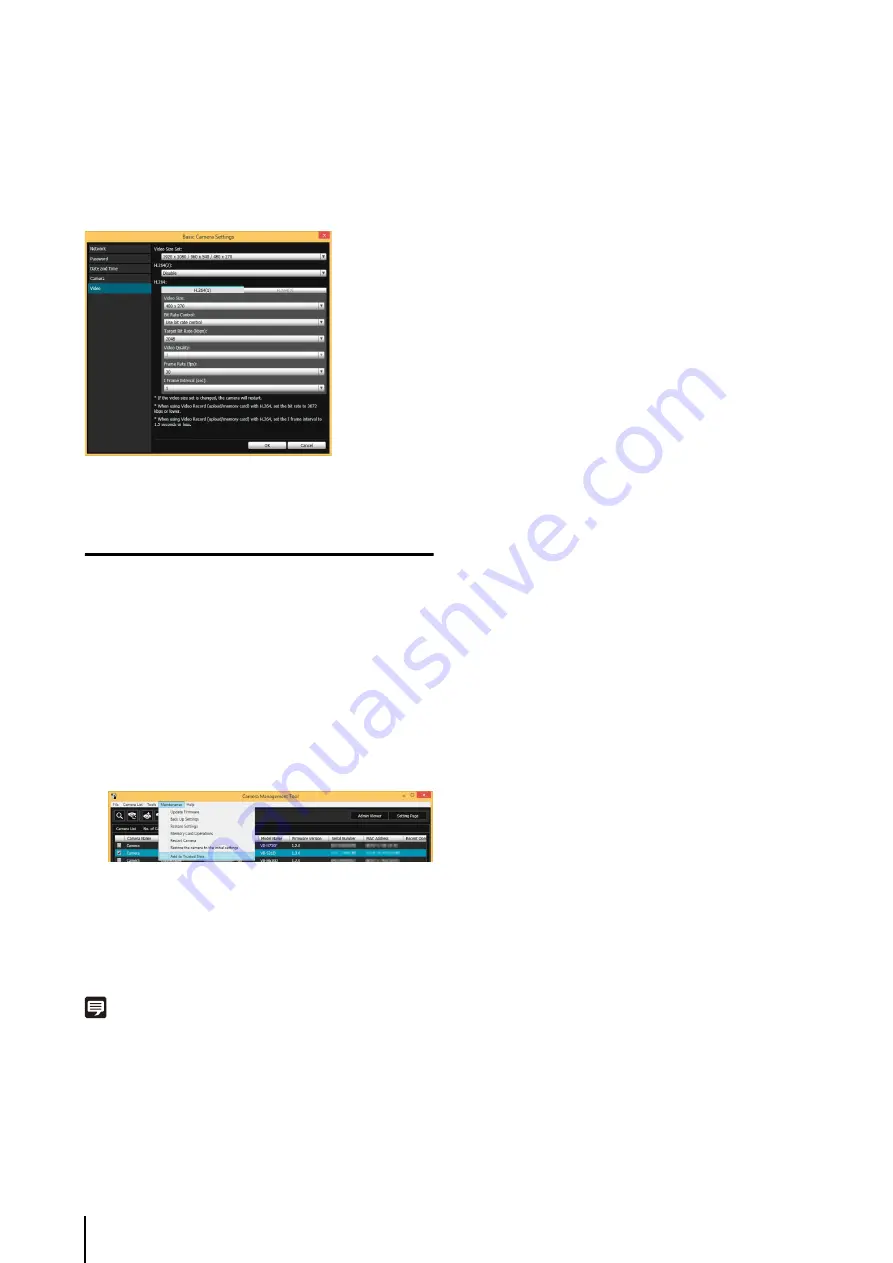
Video Settings

Click [Video] and configure the size and quality settings of 

the video transmitted from the camera.

For setting details, please refer to “[Video] Setting Video 

Size, Quality and Frame Rate” (p. 50).

Registering Camera’s IP Address to 
Trusted Sites

With Internet Explorer 9 or greater and Windows Server 

2008/Windows Server 2012, Internet Explorer’s security 

level for Internet and intranet sites is set to [High] by 

default.

As a result, it may be necessary to register the camera’s 

IP address as a trusted site to access the Admin Viewer/

VB Viewer, Setting Page or Admin Tools.

A confirmation message appears.

The camera will be registered as a trusted site for 

Internet Explorer.

Note

The registered information will be loaded when Internet Explorer 
is restarted. Close and restart Internet Explorer if it is running.

1

S

elect a camera from the camera list.

2

Click [Maintenance] menu > [Add to Trusted 

S

ites].

3

Click [Yes].

Summary of Contents for VB-S30D MKII

Page 1: ...ENGLISH Network Camera Network Camera Operation Guide Be sure to read this User Manual before using the network camera ...

Page 2: ...ROM THE USE OF THIS MATERIAL OR THE CAMERA Notes 1 All rights reserved 2 The contents of this guide are subject to change without any prior notice 3 This document has been prepared with the utmost attention to accuracy If you have any comments however please contact a Canon sales representative 4 Canon shall assume no liability for any outcome of using this product regardless of Items 2 and 3 abov...

Page 3: ...ery Directive 2006 66 EC and or national legislation implementing those Directives If a chemical symbol is printed beneath the symbol shown above in accordance with the Battery Directive this indicates that a heavy metal Hg Mercury Cd Cadmium Pb Lead is present in this battery or accumulator at a concentration above an applicable threshold specified in the Battery Directive This product should be ...

Page 4: ...n the source code under GPL LGPL please contact us at nvsossg canon co jp and provide the following information in English or Japanese 1 Product name and firmware version 2 Name of the software module or modules you would like to obtain You can obtain the source code for at least three years from the day you purchased this product Please note we may bill you for any costs we incur in providing you...

Page 5: ...ation Guide Installation Guide Included This guide provides notes and procedures on camera installation Sections you should reference in this guide will be marked Installation Guide along with the name of the reference items Operation Guide This Document This document explains the initial camera settings Admin Tools settings viewer operations troubleshooting and the main camera specifications etc ...

Page 6: ...to comply with the limits for a Class B digital device pursuant to Part 15 of the FCC Rules These limits are designed to provide reasonable protection against harmful interference in a residential installation This equipment generates uses and can radiate radio frequency energy and if not installed and used in accordance with the instructions may cause harmful interference to radio communications ...

Page 7: ...delay or loss Canon will assume no liability for any accident or damage resulting from use of the camera in the aforementioned devices or systems Caution Do not capture the sun halogen lamps and other very bright light sources or subjects Do not expose the camera to strong impact or vibration Do not forcibly turn the rotating parts of the camera by hand This may cause malfunction This installation...

Page 8: ...op cover cannot be cleaned well remove it following the steps below to clean it more thoroughly 1 Remove the top cover See steps in Installing the Camera in the Installation Guide included with the camera to remove the top cover 2 Dampen a soft cloth with water or diluted neutral detergent and wipe away the grime gently 3 Wipe with a dry cloth 4 Reattach the top cover to its original position Peri...

Page 9: ...Indicating Particular Camera Models 5 Symbols Indicating Safety Precautions 5 Safety Precautions 6 Maintenance 8 Disposing of the Camera 8 Chapter 1 Before Use Features 14 Camera Software 15 Installed Software 15 Included Software 15 Additional License Sold Separately 15 Network Video Recording Software Sold Separately 15 RM Lite Please Refer to the Administrator Manual 17 Operating Environment 18...

Page 10: ...ress DNS etc 40 Date and Time Setting Date and Time 44 Camera Setting Initial Camera Settings and External Device Name 46 Video Setting Video Size Quality and Frame Rate 50 RTP RTP Server Audio Multicast and RTP Streaming 53 Upload Setting HTTP FTP Upload and E mail Notification 55 Server Setting the Video Server Audio Server HTTP Server FTP Server and WS Security 58 Event Setting Video Record Vol...

Page 11: ...Image as Image Files Opening from Image Files 91 View Restriction Setting Tool 92 Display Screens of View Restriction Setting Tool 93 Setting View Restrictions 94 Preset Setting Tool 96 Display Screens of Preset Setting Tool 97 Setting the Preset 98 Preset Tour 101 Intelligent Function Setting Tool 103 Display Screen of Intelligent Function Setting Tool 106 Flow of Intelligent Function Setting 107...

Page 12: ... 134 Cropping and Displaying Part of Video Digital PTZ 136 Setting Video and Audio 137 Checking Information 140 Performing Operations and Settings in the Admin Viewer 141 Using Control for Admin 141 Displaying Event Status 146 Recording to a Memory Card Manually 147 Chapter 6 Appendix Memory Card Access 150 Modifiers 152 Troubleshooting 154 List of Log Messages 156 Log Messages on the Camera 156 L...

Page 13: ...Chapter 1 Before Use Camera Features Software Information Operating Environment and Precautions ...

Page 14: ...Categories 2 Video sizes can be selected from 1080p 720p and 4 3 categories 2 Video Distribution Supports two video compression methods JPEG H 264 Multi stream distribution is also supported using different video sizes belonging to the same category Custom Settings Preset camera settings can be applied or loaded when switching between day night mode or by a timer Supports microSD microSDHC microSD...

Page 15: ...oftware included in the camera RM Lite p 17 This software displays and records video from up to four cameras in real time Proxy Authentication Admin Viewer Admin Tools This software lets you use Admin Viewer Admin Tools via a proxy server with proxy authentication It is saved in the ProxyAuthSupport folder on the Setup CD ROM Additional License Sold Separately You can purchase additional licenses ...

Page 16: ... to be able to view video captured by the camera from multiple sites and for other similar purposes RM Lite V This additional license lets you install the RM Lite Viewer and RM Lite Manager on multiple computers Purchase the license to be able to view video captured by the camera from multiple sites and for other similar purposes ...

Page 17: ...captured by the camera Up to four cameras can be registered for the viewer 1 license RM Lite Manager Used for registering cameras and configuring recording schedules 1 license Supported cameras VB R11VE VB R11 VB R10VE VB M641VE VB M641V VB M640VE VB M640V VB M741LE VB M740E VB H43 VB H630VE VB H630D VB H730F VB M42 VB M620VE VB M620D VB M720F VB S30D VB S31D VB S800D VB S900F VB S805D VB S905F VB...

Page 18: ...t Tool please refer to Camera Management Tool User Manual Operating Environment CPU Intel Core i7 2600 or higher Operating Systems 1 Windows Vista Ultimate Business Enterprise Home Premium SP2 32 64 bit Windows 7 Ultimate Professional Enterprise Home Premium SP1 32 64 bit Windows 8 Windows 8 Pro Windows 8 Enterprise 32 64 bit 4 Windows 8 1 Windows 8 1 Pro Windows 8 1 Enterprise 32 64 bit 4 Windows...

Page 19: ... Windows Server 2008 Windows Server 2012 the security level for Internet sites and intranet sites on Internet Explorer is set to High by default Thus when accessing the Admin Viewer VB Viewer the camera s Setting Page or the Admin Tools a content block dialog box appears and the page fails to display correctly To correct this problem follow the procedure below to register the top page as a trusted...

Page 20: ...r Security Settings When Using SSL Connection When an SSL connection to the camera is made from a web browser Internet Explorer 9 10 11 in Windows Server 2008 Windows Server 2012 the following operations may display the content block dialog box and prevent further operation Startup of Admin Tools or Admin Viewer Audio reception from VB Viewer This happens when Internet Explorer Enhanced Security C...

Page 21: ...nel is in the classic view double click Sound Important Note that when IE Enhanced Security Configuration is turned back on the Do not save encrypted pages to disk checkbox also becomes enabled 1 Open Control Panel and click Hardware 2 Click Sound 3 When the Audio Service Not Running message appears click Yes 4 The Sound dialog box appears Click the Playback tab to confirm that an audio device has...

Page 22: ...22 ...

Page 23: ...Chapter 2 Initial Settings Preparing the Camera for Use Installing the Necessary Software Initial Settings Access the Top Page of the Camera to Check Video ...

Page 24: ...be used in Installation Guide Configuring the Camera from the Setting Page The setting page lets you configure basic camera settings network operations user registration and access restrictions Chapter 3 Setting Page Using Admin Tools Admin Tools let you set viewing restrictions make preset settings and make settings for using intelligent functions In addition you can review logs to check on the c...

Page 25: ...ror message appears or the camera fails to operate correctly see the error message and log message information in Chapter 6 Appendix Chapter 6 Appendix Important Before starting operations make sure that the setting page and Admin Tools settings are functioning correctly ...

Page 26: ...er than the one where the Camera Management Tool is installed The installation screen appears Note If the User Account Control screen appears click Yes or Continue Easy Installation Camera Management Tool and Admin Tools certificate are installed Custom Installation The user can select and install desired software The User License Agreement screen appears Installation starts Installing the Necessa...

Page 27: ...Installing the Necessary Software 27 2 Initial Settings The Camera Management Tool icon appears on the desktop ...

Page 28: ...arching for Cameras and Setting up Networks This will explain network settings so you can search for network connected cameras and connect to them from a computer The examples will be for setting one camera The Camera Management Tool however can set multiple cameras at the same time Detected cameras will appear in the camera list The Basic Camera Settings dialog box appears 1 IPv4 Address Setting ...

Page 29: ...en you click OK other settings in Password Date and Time Camera Video Basic Camera Settings will also take effect Set the Password Date and Time Camera Name and Video Set basic camera information such as the camera name administrator password and date Once you have entered information for each item click OK Password Setting Click Password and set the administrator password Date and Time Settings C...

Page 30: ...ecurity level for Internet and intranet sites is set to High by default As a result it may be necessary to register the camera s IP address as a trusted site to access the Admin Viewer VB Viewer Setting Page or Admin Tools A confirmation message appears The camera will be registered as a trusted site for Internet Explorer Note The registered information will be loaded when Internet Explorer is res...

Page 31: ...lick to switch the display language 2 Setting Page Displays the Setting Page p 38 You can make initial camera settings and settings to suit how the camera will be used 3 Admin Tools Displays the Admin Tools top page p 82 You can launch various tools for making settings such as for using the camera or launch a utility for managing recorded video 4 Admin Viewer Launches the Admin Viewer p 32 5 VB Vi...

Page 32: ... trusted site Viewing Video With VB Viewer VB Viewer allows any user with camera access to use the camera The user however is restricted to a limited set of functions When you click VB Viewer on the top page the VB Viewer launches and displays the camera video Viewing Video With Admin Viewer The Admin Viewer can only be used by administrators and registered users with camera control privilege It a...

Page 33: ...Access the Top Page of the Camera to Check Video 33 2 Initial Settings ...

Page 34: ...34 ...

Page 35: ...ings Video Server Audio Server HTTP FTP Server and WS Security Settings Settings Related to Events Administrator Password User Registration Authorities and Access Restriction Settings IPsec Settings HTTP Communication Encryption SSL TLS Settings 802 1X Authentication Memory Card Operations and Displaying Information Settings for Items Requiring Rebooting Maintenance Displaying Log and Setting Info...

Page 36: ...and e mail notification settings p 55 Server Video server audio server HTTP Server FTP Server and WS Security settings p 58 Event Video record settings volume detection external device output external device input and timer settings p 60 Access Control Administrator Password Authorized user account user authorities host access restriction settings p 64 IPsec IPsec settings p 66 SSL TLS Certificate...

Page 37: ...Use with Internet Explorer 8 9 10 11 If the pop up is blocked and an information bar appears when attempting to access View Logs or View Current Settings on the maintenance page enable Pop up by following the procedure explained in the information bar ...

Page 38: ...re flagged with an orange mark When any item accompanied by an orange mark is changed the Apply shown at the top right and bottom right of each setting page changes to Apply and reboot Click Apply and reboot to confirm the new setting The new setting will be reflected and the camera will be rebooted Click Clear to restore the previous setting Accessing the Setting Menu Important To ensure security...

Page 39: ... at the beginning of any item to display a detailed explanation of that setting item Important Do not open multiple setting pages at one time and try to change the settings of a single camera Do not use the Back or Forward buttons in the web browser to navigate between setting pages The changed settings may return to the original settings or unwanted setting changes may be applied ...

Page 40: ...istrator Password LAN IP Address DNS etc The following can be set here Administrator Password Set the administrator password LAN Set the IP address and other items needed to establish a LAN connection IPv4 Set IPv4 address IPv6 Set IPv6 address DNS Set the name server address host name and DDNS registration mDNS This will configure settings for using multicast DNS SNMP Configure the necessary sett...

Page 41: ...e Server Address Select the method for setting the name server address automatically using DHCP Select Use DHCP to use a name server address obtained automatically from the DHCP server Select Use DHCPv6 to use a name server address obtained automatically from the DHCPv6 server Select Use DHCP DHCPv6 to use a name server address obtained automatically from the DHCP server or DHCPv6 server Select Di...

Page 42: ... IP Address Setting Method is Auto DHCP p 40 DNS server registration settings must be set in advance Contact your System Administrator for the DNS server settings If the name server address 1 is unavailable the name server address 2 will be accessed However the name server address 2 must be set in advance mDNS 1 Use mDNS Set mDNS to Disable or Enable If you use mDNS the IP address and host name of...

Page 43: ...is selected for Security Level select MD5 or SHA1 for the authentication algorithm 4 Authentication Password When Authentication but no encryption or Authentication and encryption is selected for Security Level set the authentication password 5 Encryption Algorithm When Authentication and encryption is selected for Security Level select DES or AES for the encryption algorithm 6 Encryption Password...

Page 44: ...v6 you must change Network IPv6 to Enable then set Auto DHCPv6 to Enable p 41 The NTP server address acquired from the DHCPv6 server will appear in NTP Server DHCPv6 Use DHCP DHCPv6 The camera time is synchronized with the time of the NTP server at the address acquired from the DHCP server or DHCPv6 server If the NTP server address can be acquired from both the DHCP server IPv4 and DHCPv6 server t...

Page 45: ...ress of the NTP server is incorrect or a connection with the NTP server cannot otherwise be established the date and time will not be changed The NTP server query interval is 300 seconds Synchronization will take time if the time difference is large The camera s NTP broadcast mode does not support IPv6 If the Time Zone setting is changed the date and time display will update automatically accordin...

Page 46: ...t Disable 1 15 1 8 1 4 or 1 2 As slower shutter speed generates residual video when capturing a moving subject select an appropriate time according to the capture conditions Shutter Speed Shutter speedcan be usedonlyif Auto Shutter priority AE is selected in AE Mode Select a desired shutter speed from the 16 levels from 1 2 to 1 16000 When capturing a moving subject selecting a higher shutter spee...

Page 47: ...hade Control Level and Exposure Compensation are not displayed 6 White Balance Select the white balance according to the light source to achieve natural color in the video Auto The white balance is adjusted automatically Manual Set the values of red and blue gain according to the light source Enter a value from 0 to 1023 for both the R Gain and B Gain Daylight Fluorescent Select this option to cap...

Page 48: ...ickerless 2 some screen flicker may still occur under unstable light source conditions Setting a slow shutter speed may make it impossible for intelligent functions to work correctly Select a shutter speed that suits the capture conditions and purpose In conditions where an outdoor scene is captured from an indoor location through a glass window the camera may focus on the glass surface if there i...

Page 49: ... changes frequently such as when a light source passes in front of the camera Select 5 or 10 if change in brightness is minimal Installation Conditions 1 LED Setting Select Turn Off or Turn On for the LED operation status on the camera Set to Turn Off if you do not want to turn on the LED 2 Image Flip Select Disable or Enable for the orientation of the camera video Note The LED will light for seve...

Page 50: ...setting Use Event Video Record Action p 60 to specify the destination of a video recording upload or memory card recording H 264 1 Configure settings using H 264 1 when using H 264 video for upload or memory card recording H 264 2 video cannot be used for upload or memory card recording H 264 1 video can be displayed using Admin Viewer and RM Lite Viewer It cannot be displayed using VB Viewer 1 Vi...

Page 51: ...r left or Lower right for the position of date display information 3 Format of date display Select YYYY MM DD DD MM YYYY or MM DD YYYY for the format of the date display Important When streaming two H 264 videos setting the video size settings for H 264 1 and H 264 2 to the following combinations restricts the frame rate to a maximum of 15 fps For all other combinations a frame rate of up to 30 fp...

Page 52: ...p to 15 ASCII characters spaces and printable characters for superimposed display on the video 9 Color of text Select Black Blue Cyan Green Yellow Red Magenta or White for the color of text to be displayed over the video 10 Background color Select Black Blue Cyan Green Yellow Red Magenta or White for the background color 11 Color depth of text and background Select Fill text and background color M...

Page 53: ...264 and video size of the RTP stream The video sizes for JPEG will vary depending on the Video Size Set configured in Video All Videos p 50 The video sizes for H 264 will be determined according to the H 264 1 and H 264 2 settings configured in Video In addition H 264 1 and H 264 2 cannot be set for multiple RTP streams 2 Frame Rate Set the frame rate if the RTP stream is JPEG video For H 264 the ...

Page 54: ...t necessarily specify the method used for transmission For H 264 the bit rate control and video quality are determined by the settings in Video p 51 Regardless of the Server Audio Server Audio Transmission from the Camera setting RTP streaming audio will be used However to use audio settings select Enable for Audio Transmission from the Camera and make the settings The Access Control User Authorit...

Page 55: ...n Event is enabled disabled ON Event Operation OFF Event Operation or Ongoing ON Event Operation p 60 Upload Setting HTTP FTP Upload and E mail Notification The following can be set here General Upload Set the upload operation to be performed and the video buffer HTTP Upload Set HTTP connection uploads FTP Upload Set FTP connection uploads E mail Notification Set event information and video e mail...

Page 56: ...tly entered Only one JPEG image is uploaded It is not necessary to click Apply After entering a password first click Exec then Apply the password FTP Upload 1 Notification The content of notification is set to Video data upload with FTP 2 FTP Server Enter the host name or IP address of the FTP server using up to 63 characters 3 User Name Password Enter the user name and password required for authe...

Page 57: ...ters 4 Mail Server Port Enter the port number of the SMTP server factory default setting is 25 5 Sender From Set the e mail address of the sender using up to 63 characters 6 Recipient To Set the e mail address of the recipient using up to 63 characters 7 Authentication Select None POP before SMTP or SMTP AUTH for the e mail authentication method Set an appropriate method according to the authentic...

Page 58: ...audio transmission is stopped temporarily when no audio is output This way the load of the applicable network can be reduced 4 Audio Input Set the microphone input Select Line In Microphone In dynamic microphone or Microphone In condenser microphone Server Setting the Video Server Audio Server HTTP Server FTP Server and WS Security The following can be set here Video Server Set the video transmiss...

Page 59: ...o Disable or Enable WS Security 1 Check Time on Authentication Select whether to check the time information in data sent from the client by selecting Check or Do not check The audio may be temporarily interrupted depending on the performance of the computer and the network environment The audio may be interrupted if anti virus software is enabled Communication may be temporarily interrupted cuttin...

Page 60: ... meeting the detect criteria has continued for the duration or longer an ON event is generated 6 ON Event Operation Select the operation to be performed upon an ON event If Enable is selected 9 Preset 10 Video Record and 11 E mail Notification will be executed according to their settings upon an ON event 7 OFF Event Operation Select the operation to be performed upon an OFF event If Enable is sele...

Page 61: ...tate during normal operation and the terminals close upon an active event and open upon an inactive event When Normally Close is selected the output terminals remain in the closed state during normal operation and the terminals open upon an active event and close upon an inactive event 2 Active Output Format Select Pulse or Continuous for the external device output format 3 Pulse Output Time sec E...

Page 62: ...ternal device output is active or inactive upon an inactive event Select Disable to disable external device output 11 Day Night Mode Switching Select the Day Night Mode switching behavior when an external device input event is triggered When Switch to Day Mode is selected switches to Day Mode when an active event is triggered and switches to Night Mode when an inactive event is triggered When Swit...

Page 63: ...rs that run continuously for 24 hours with a Repeat Interval of 30 seconds or less set the timer start and end times so the timers can run continuously Example Important Day Night Mode Switching can only be set in Timer 1 External Device Output and Day Night Mode Switching do not support Repeat Interval When Day Night in the Admin Viewer is set to Auto Day Night Mode switching will not happen when...

Page 64: ... users have higher authorities than guest users For details see User Authorities and Camera Control Privileges p 126 IPv4 Host Access Restrictions 1 Apply Host Access Restrictions Set IPv4 host access restrictions to Disable or Enable 2 Default Policy If IPv4 host access restrictions are applied select Authorize Access or Prohibit Access for the default policy 3 Network Address Subnet Create a lis...

Page 65: ...IPv6 host access restrictions to Disable or Enable 2 Default Policy If IPv6 host access restrictions are applied select Authorize Access or Prohibit Access for the default policy 3 Prefix Prefix Length Create a list of permitted hosts and restricted hosts and set IPv6 address access for each host to Yes or No You can specify the prefix length and set access restriction by network or host If access...

Page 66: ...default setting is 480 IPsec Set Auto Key Exchange IPsec Sets 1 to 5 are available and you can specify IPsec settings for one communication device for each IPsec Set 1 IPsec Set Set IPsec Set to Disable Enable in IPv4 or Enable in IPv6 2 IPsec Mode Set IPsec mode to Tunnel Mode or Transport Mode 3 Destination IPv4 Address Destination IPv6 Address Enter the IP address of the connection destination ...

Page 67: ...thm Set the ESP encryption algorithm to AES 3DES DES or NULL according to the encryption algorithm supported by the device to connect to Normally AES or 3DES is recommended 9 SA ESP Authentication Algorithm Set the ESP authentication algorithm to HMAC_SHA1_96 HMAC_MD5_96 or No Authentication according to the authentication algorithm supported by the device to connect to If ESP is used alone No Aut...

Page 68: ...MAC_SHA1_96 or HMAC_MD5_96 was selected in 16 set a 160 bit or 128 bit hexadecimal respectively 20 SA AH SPI inbound Set the SA SPI value for inbound Set a desired value in the range of 256 to 4294967295 Since this setting is used as an ID for identifying the SA be careful not to specify an inbound SPI whose value is already used in the SPI for another AH Note If IPsec is used video transmission p...

Page 69: ...o it is recommended that you stop video transmission and upload processes 2 Display Certificate Signing Request Click Exec to view the details of the certificate signing request 3 Install Server Certificate Perform this operation to install a server certificate Click Browse to select the certificate file for installation then click Exec The certificate installed will take effect after rebooting 4 ...

Page 70: ...pted Communications 1 HTTPS Connection Policy Select whether or not to use SSL communications with HTTPS connections To not use SSL communications select HTTP To use SSL communications select HTTPS or HTTP and HTTPS SSL connections will be possible after rebooting When HTTPS is selected even HTTP connections will be redirected to HTTPS and SSL communications will be used Note It may take a few min...

Page 71: ... displayed This is displayed only when Authentication Method is set to EAP TLS 3 Client Private Key Status If no client private key is installed Not Installed is displayed If a client private key is installed Installed is displayed This is displayed only when Authentication Method is set to EAP TLS Certificate Management This is displayed only when Authentication Method is set to EAP TLS EAP TTLS ...

Page 72: ...tificates client certificates and client private keys already exist they are discarded and new versions are installed An error occurs if the format of the certificate or private key to be installed is incorrect Client certificates and client private keys are checked as a pair when installing and an error occurs if they do not match The certificate and private key used for 802 1X authentication mus...

Page 73: ...ormat setting the frame rate is fixed at 1 fps Video size and quality of the recorded video are made according to the settings in the Video menu 4 Pre event Buffer number of frames Pre event Buffer sec Enter the number of frames or seconds of video to be buffered before the event The maximum amount is number of frames for a JPEG selection and number of seconds for an H 264 1 selection in Video For...

Page 74: ...ates that video management information is being recreated Other operations cannot be performed Deleting videos This status indicates that videos are being deleted Other operations cannot be performed 3 Video Management Information Status Displays the status of the video management information The two status messages are as follows Normal This status indicates that video management information is n...

Page 75: ...cessing files saved to the memory card see Memory Card Access p 150 Important Information recorded to the memory card may be regarded as personal information Take sufficient precautions for handling this information when releasing to third parties for disposal transfer or repair ...

Page 76: ... changed to a value that may disable camera connection from the active web browser a dialog box appears and alerts the user Click OK to apply the new setting Depending on the new setting it may not be possible to connect to the camera again after rebooting If this happens a candidate URI for reconnecting the camera will appear if available Try the URI displayed to reconnect the camera If you canno...

Page 77: ...vate key files are also restored The camera reboots after settings are restored Note It is recommended that you back up all current setting values before restoring factory default settings in Restore Default Settings The camera can be restored to factory default settings using the reset switch as well Note however that this will reset all camera settings to factory default settings except for date...

Page 78: ...cters 8 Authentication Select None POP before SMTP or SMTP AUTH for the e mail authentication method Set an appropriate method according to the authentication method used by the SMTP server to send to User Name Password POP Server If POP before SMTP is selected as the e mail authentication mode enter the user name and password as well as the host name or IP address of the POP server required for a...

Page 79: ...ngs saved in the camera Note Camera Angle can be operated only from the Setting menu It cannot be operated from Admin Viewer or VB Viewer Connecting to the camera from the Camera Angle menu will disconnect connections from each type of viewer and recording software that are not connected via RTP The higher the digital zoom ratio the lower the video quality becomes Revise the following settings aft...

Page 80: ...80 ...

Page 81: ...Chapter 4 Admin Tools Privacy Mask Setting Panorama Image Registration View Restriction Setting Camera Preset Setting Intelligent Function Setting Viewing Logs Managing Memory Card Video ...

Page 82: ...ation Tool A panorama image creation tool that shows the entire area that can be captured by this camera Once a panorama image is captured and registered it is shown in the panorama display panel of the viewer As the panorama image is also shown when view restrictions and presets are set you can see at a glance which part of the entire area the set area is occupying View Restriction Setting Tool T...

Page 83: ...d video due to movement of a subject By setting the conditions you can let the camera detect events such as moving object abandoned object removed object camera tampering passing You can view the video on the camera while setting the position and size of the detection area and line detection conditions etc Log Viewer This viewer shows the logs of operating conditions of the camera Recorded Video U...

Page 84: ...ion download time will take longer about 20 to 30 seconds None of the following tools can be launched concurrently Privacy Mask Setting Tool Panorama Creation Tool View Restriction Setting Tool Preset Setting Tool and Intelligent Function Setting Tool In environments without a proxy server select Internet options Connections tab LAN settings and clear the Automatically detect settings checkbox in ...

Page 85: ...to privacy masks can be resized moved While in this mode the camera orientation will not change When the button is set to pan tilt operations can be performed 3 Switch Screen Size button Each time this button is clicked the screen size of the video display area switches between 480 x 270 and 960 x 540 4 BLC Back Light Compensation button This button turns on off backlight compensation This control...

Page 86: ... and show them in 14 2 14 4 Privacy Mask Position and Size Set left and upper edge width and height of the privacy mask 14 5 Preview settings The settings will be reflected in the video display area and in the registered privacy mask display area capture area 15 Restore settings Clear the settings you have specified on the screen of the tool and restore the settings saved in the camera 16 Save set...

Page 87: ... Check privacy mask settings again if the Video Video Size Set settings on the Setting page have been changed The privacy mask function is not available in the following situations While the camera is starting up after being turned on For the video display area in Setting Page Camera Angle While a panorama image is being created The position of the privacy mask will need to be set again if the ima...

Page 88: ... the preview frame Click Get camera position to load the current pan tilt and zoom settings If you want to cancel the changes and restore the settings saved in the camera click Restore settings The changed privacy mask area is saved in the camera Note Select a disabled privacy mask and click Quick change to enable it How to Delete Select the privacy mask area you want to delete and click Delete Th...

Page 89: ...set area is occupying Admin Viewer Preset Setting Tool Panorama Creation Tool Important If the privacy mask settings were changed using the Privacy Mask Setting Tool it is recommended that you recreate the panorama image to reflect the new privacy mask settings in the panorama image Create capture a panorama image with the Panorama Creation Tool and save it in the camera You can see at a glance wh...

Page 90: ...tatus such as Capturing images etc 12 Exposure Lock Select Center or Current Position for the auto exposure lock position 13 White Balance Lock Set the white balance to Do not lock Center or Current Position 14 Focus Lock Set the focus to Do not lock Center or Current Position Capturing a Panorama Image The capture is started Change the settings beforehand for Exposure Lock White Balance Lock and ...

Page 91: ...orama image saved in the camera is deleted Saving a Panorama Image as Image Files Opening from Image Files You can save a recorded panorama image as an image file or open image files as a panorama image Only JPEG image files created using Panorama Creation Tool can be handled How to Save Click Save to file and then select the folder you want to save the image file in and enter the file name in the...

Page 92: ...ctions set by the View Restriction Setting Tool are applied in the following cases When the Admin Viewer is accessed with authorized user authorities When the VB Viewer is accessed When accessed via the Intelligent Function Setting Tool When accessed via RM Lite View Restriction Setting Tool To limit zoom or a certain field of view when publishing live video use the View Restriction Setting Tool t...

Page 93: ... by top bottom left right edges 6 2 Wide angle preview frame green frame Wide angle restriction setting restriction of capture frame 6 3 Telephoto preview frame yellow frame Telephoto restriction setting restriction of maximum zoom ratio 7 Digital Zoom The current digital zoom usage status of the camera is shown in real time 8 Apply the view restriction To use view restrictions select this checkbo...

Page 94: ...ry box or view restriction preview frame The settings are saved in the camera Note Even when view restrictions are set an area outside the view restriction may still appear momentarily when the camera is controlled near the boundary of the view restriction To cancel the view restrictions clear the Apply the view restriction checkbox and then click Save settings If the setting fields are cleared wh...

Page 95: ...om range Pan controllable area Maximum horizontal captured area Maximum wide angle viewing angle Maximum vertical capture area Tilt controllable area Setting view restrictions automatically restricts the camera operating angle When wide angle is selected the capture of the camera operating angle would exceed the view restrictions if it remained the same Therefore it is narrowed automatically View ...

Page 96: ...you want to use intelligent functions The camera angle will be as follows when the camera is rebooted Home position registered Camera angle will move to the home position Home position not registered Camera angle will move to the factory default home position When using presets registered in digital zoom range the registered camera positions may not be reproduced with high accuracy It is recommend...

Page 97: ...lection box Select the preset or Home Position you want to set 8 Quick Registration Load the current camera position and register them as preset settings 9 Preset Name You can enter a preset name of up to 64 characters You can set a name in alphanumeric characters Be sure to enter a single byte alphanumeric preset name When the Home Position is selected in 7 the preset name function is grayed out ...

Page 98: ...a to reflect it in the preset preview frame in Full Image and the camera parameters 17 Preview settings Preview camera parameter values that are being edited in the video display area 18 Clear settings Delete the settings for the preset selected 19 Restore settings Clear the settings you have specified on the screen of the tool and restore the settings saved in the camera 20 Save settings Save the...

Page 99: ...o display area If you previewed incorrect settings etc and want to restore the settings registered in the camera click Restore settings Note Digital PTZ is a function for transmitting only the specified part of a camera video Therefore this function reduces the load on the network 2 Click Detailed Settings and select the Show in viewers checkbox 3 Drag to move or resize the preset preview frame ye...

Page 100: ... Shade Control is set to Auto If you set Smart Shade Control to Auto or 1 to 7 Haze Compensation is set to Disable If you set Haze Compensation to Auto or 1 to 7 Smart Shade Control is set to Disable 1 Select the Show in viewers checkbox 2 Click Get camera info 3 Fine tune the camera angle and adjust the video quality with focus VB S30D only or smart shade control while checking the video 4 Click ...

Page 101: ...Set the time at which the camera stops at the preset position You can set between 1 and 900 seconds in 1 second increments 9 Add Add the preset to the tour schedule list 10 Change Change the speed or pause time for presets selected from the tour schedule list Note Preset tour is not performed while the camera is being controlled with viewers Admin Tools etc Preset tour is not performed when contro...

Page 102: ...102 When you complete setting the tour schedule list click Save settings The settings are saved in the camera Note The home position cannot be added to the tour schedule list 5 Click Save settings ...

Page 103: ...n Network Video recording on storage server Upload to FTP server HTTP server Volume Detection Moving Object Detection Removed Object Detection Abandoned Object Detection Camera Camera Tampering Detection Moving Object Detection Detect moving objects This function can be used to detect visitors or suspicious individuals Moving object detection is triggered when moving objects are inside the detecti...

Page 104: ...object detection is triggered when an object is removed from the detection area for a specified duration Removing an object Background Video Generated Detected Change in Designated Area Analysis Object Removal Detected The picture object is removed and detection begins after set time Camera Tampering Detection Detect when the capture is being obstructed This function can be used to detect when the...

Page 105: ...desirable outcomes resulting from intelligent function operations Passing Detection Detect when a person or moving object crosses a specified line It determines that an object is passing when the decision point of the object detection frame crosses a detection line Passing detected Background Video Generated Detected Video Area Changes Analysis Passing Detected Detection begins when the decision p...

Page 106: ...ensation This control is effective when the video is dark due to backlight 5 Obtain Release Camera Control button This button is used to obtain release the camera control privileges For details see Obtaining Camera Control Privileges p 131 If camera control privileges have not yet been obtained elsewhere such as in the Admin Viewer the control privileges will be obtained the moment the Intelligent...

Page 107: ...heckbox to enable the detection settings that are selected in the Detection Setting List 18 Detection Criteria tab Event tab Switch between the Detection Criteria and Event tabs Detection Criteria Specify detection settings name detection area line and detection criteria p 109 Event Specify operations to be performed when events occur p 110 19 Restore settings Clear the settings you have specified...

Page 108: ...to 5 minutes If the display switches between Day mode and Night mode Restarting intelligent function Please wait is shown and intelligent function will restart Detection will not be performed while intelligent function is restarting If the camera is operated during intelligent function setting or operation Restarting intelligent function Please wait is shown and intelligent function will restart D...

Page 109: ... the video display area 4 Object Size Change Ratio Duration Sec Set the lower limit for the size change ratio and judgment time for the set detection area to trigger detection If the value set here is exceeded Detected mode is triggered Click the text box to enter a value directly or specify a value using the slider For details on the setting method see Setting Detection Criteria per Detection Typ...

Page 110: ... ON Event checkbox Select this checkbox for enabling external device output at an ON event and select operation active or inactive External Device Output for OFF Event checkbox Select this checkbox for enabling external device output at an OFF event and select operation active or inactive Setting Detection Areas Set detection areas in the video display area Setting a Rectangular detection area A r...

Page 111: ...ing Detection Criteria per Detection Type Specify different detection criteria for each detection type Detect criteria for Moving Object Detection Set detection areas where you want to detect moving objects For Object Size enter a value or move the slider to set the ratio of the size of an object moving in the detection area to the size of the detection area When the ratio of an area where the cam...

Page 112: ...ll be triggered to ON when an object is taken away from the detection area for a period longer than the set Duration Sec Any moving objects detected are shown with contour lines As long as Duration Sec has not elapsed contour lines are white When Duration Sec has elapsed contour lines take on the same color as the detection area indicating that detected mode has been triggered to ON Detect criteri...

Page 113: ...ayed to indicate the decision point in the detection frame Object Size Enter or use the slider to set the size ratio of moving objects for the entire screen When a moving object exceeds the value set for Object Size it becomes a passing detection target When Object Size is changed an indicator frame showing the size of the object is displayed for 1 second in the center of the video display area al...

Page 114: ...detection settings may reduce this effect Note Since changing Detection Settings restarts the intelligent functions detection will not be performed during the tens of seconds that it takes to complete a restart Displaying Event Status Click the Event Display button to open the event display panel and confirm the detection status icon of the intelligent functions This panel displays the same inform...

Page 115: ...ce from where log files are loaded is shown From the camera s internal memory Camera Internal memory From a memory card Camera Memory card From files saved to a computer File name 8 Copy Copy to the clipboard logs that you have selected on the log display area 9 Select all Select all the logs that are shown in the log display area 10 Show all logs checkbox When selected all logs including those wi...

Page 116: ...splayed automatically To download a new log file list click Download A Download dialog box is shown where you can select Internal memory or Memory Card as a download source When the list has been downloaded a dialog box showing the log file list opens Select the log file you want to view and click Download and the selected log file will be downloaded How to View Logs The log contains the following...

Page 117: ...cified conditions Log Type Select the Specify type or Specify code checkbox to filter logs by type If you do not want to filter logs by type select Not specified Specify type Specify the log level Select Error Warning or Information for the level of logs to be shown Specify log output module Select Application HTTP Server or System for the output source module whose logs will be displayed Specify ...

Page 118: ...o mov format Export the Downloaded video selected in the video list to a mov format video file 7 Enable H 264 playback checkbox Select to play H 264 video in the Playback Videos area p 121 8 Video List Displays a list of videos recorded on a memory card and downloaded to a computer 9 Delete from Camera Delete videos selected in the video list from the memory card 10 Download Download videos select...

Page 119: ...deos Click a video to select it Use the Ctrl key or the Shift key while clicking to select multiple videos Click Select All to select all videos on the list Narrowing Down the Number of Videos Use Filter to narrow down the number of videos that appear in the video list to the ones you need Set the following conditions and click Apply filter to show only the videos matching the specified conditions...

Page 120: ...owse For Folder dialog box appears The video is exported Note The exported video files can be played back using QuickTime 7 7 and Windows Media Player 11 12 For Windows Vista and earlier use QuickTime However playback when using this software is not guaranteed A recorded JPEG video whose size is changed during recording and exported to a mov file cannot be played back by Windows Media Player Use Q...

Page 121: ...s file numbers and total number of video files that are being displayed Note The H 264 video playback interval varies depending on the download status If the download status is Downloaded each frame is played back in real time interval according to the recording time For empty frames the preceding frame is displayed If the status is Not Downloaded or Partially Downloaded empty frames are skipped u...

Page 122: ...size for mov type files is 1 MB or greater they are split into several files If mov files are split into several files only the initial few seconds of the first file can be played back To play back the files in succession use Export to mov format p 120 The downloaded video files can be played back using QuickTime 7 7 and Windows Media Player 11 12 For the Windows Vista operating system or earlier ...

Page 123: ...mera control privileges but the items will be grayed out Operating the Control Items The panel operates in the same way as Control for Admin of the Admin Viewer Smart Shade Control You can set Smart Shade Control For details see Setting the Smart Shade Control p 142 Haze Compensation You can adjust the video if the subject is obscured by haze For details please refer to Setting the Haze Compensati...

Page 124: ...124 ...

Page 125: ...Viewer Differences between the Admin Viewer and the VB Viewer User Authorities and Camera Control Privileges Viewer Startup and Operation Camera Control and Obtaining Camera Control Privileges Admin Viewer Operation and Settings ...

Page 126: ...e authentication etc User Authorities and Camera Control Privileges User authorities and their relative camera control privileges are specified as follows Can be changed The Administrator can change the privileges of Authorized Users and Guest Users p 64 The four authorities that can be set for users are privileged camera control camera control video distribution and audio distribution Users must ...

Page 127: ...all guest user authorities are disabled the user authentication dialog box will appear when the VB Viewer is launched When an authorized user or administrator name and password are entered the VB Viewer can be used with authorized user or administrator authorities respectively Important At any time the Administrator can launch the Admin Viewer to override the camera control privileges of another i...

Page 128: ...ct settings checkbox in Internet Explorer Shutting Down the Viewer Close the web browser in the viewer to shut down Connecting from Admin Tools Only the administrator can connect to this viewer Refer to Launching the Admin Tools p 84 for information on launching the Admin Tools Launching the Viewer Important The Admin Tools Certificate must be installed on a computer that is using the Admin Viewer...

Page 129: ...e button Live video is shown in full screen mode 5 Reconnect button The camera is reconnected 6 Audio Reception button Displays the Receive Audio panel 7 Slider for tilt This slider is used to control the tilt vertical movement of the camera 8 Slider for pan This slider is used to control the pan horizontal movement of the camera 9 Slider for zoom This slider is used to control the zoom ratio You ...

Page 130: ...ove the camera angle to the home position 25 Event Display Panel This panel is displayed upon clicking the Event Display button The panel shows the input status of external devices and the status of video and volume detection by intelligent functions 26 Panorama Display Panel This panel is displayed upon clicking the Panorama Display button 27 Panorama Display Area Displays panorama images registe...

Page 131: ...ome Position button Move the camera angle to the home position 21 Panorama Display Panel This panel is displayed upon clicking the Panorama Display button 22 Panorama Display Area Displays panorama images registered in the camera You can operate the camera by controlling the frame lines within the panorama display area 23 Digital PTZ Panel This panel is displayed upon clicking the Digital PTZ butt...

Page 132: ... point in the panorama window moves the pan and tilt to center on that point Move by dragging Dragging the yellow frame lines in the panorama window moves the pan and tilt to capture that area Note Clicking outside the yellow frame lines and dragging will create blue frame lines When you release the mouse button the blue lines will turn yellow and the camera will change the pan tilt and zoom in or...

Page 133: ...dragged right to left the camera will zoom out centered around the area in the rectangle Use Drag to Move to Change the Camera Angle The camera angle will move in the direction of the arrow The maximum length of the arrow is half the width and height of the video display area and movement speed increases in accordance with the length of the arrow Note When using Drag to Move the sliders will not m...

Page 134: ...o move the camera angle to the home position Note Register presets and home position beforehand using the Preset Setting Tool p 98 Registered presets will appear in the preset selection box Compensating Backlight This control is effective when the video is dark due to backlight Clicking BLC brightens video that is dark due to backlight Clicking the button again cancels backlight compensation Magni...

Page 135: ...ick and drag outside the preview frame to draw a new preview frame Note The Viewer PTZ uses digital zoom so the higher the digital zoom ratio the lower the quality of the video becomes Moving the Preview Frame You can move the preview frame to the desired position Move by dragging Click within the preview frame and drag it over the subject that you want to see magnified The preview frame turns blu...

Page 136: ...n the state of the Digital PTZ function Specifying a Cropping Range Change the position and size of the preview frame on the Digital PTZ panel to specify the range to display in the video display area You can also click and drag outside the preview frame to draw a new preview frame The preview frame is blue when you have not obtained camera control privileges When you obtain camera control privile...

Page 137: ...sition to specify the range for Digital PTZ Click the preset selection box and select a preset from the displayed list to move the preview frame on the Digital PTZ panel to the preset position and display the video inside the frame in the video display area Click the Home Position button to move the preview frame on the Digital PTZ panel to the home position and display the video inside the frame ...

Page 138: ...u You can display the necessary panels for controlling the camera in the full screen mode Right click on the screen and select the necessary panel from the menu that appears Start Stop Control Obtain and release the camera control privileges Preset Select a preset Home Position Move the camera angle to the home position Panorama Displays the panorama display panel Start Exit Viewer PTZ The viewer ...

Page 139: ...io reception will stop and camera control privileges will be lost Receiving Audio You can receive audio through the microphone attached to the camera Click this button to receive audio Select the Receive audio checkbox in the Receive Audio panel that appears and use the slider to set an appropriate volume Note To receive audio set Server Audio Server Audio Transmission from the Camera to Enable in...

Page 140: ...on Appears when a camera operation has been successful The following information appears Help messages such for each button and pull down menu Frame rate information Pan tilt zoom camera information Pan tilt and zoom information for Digital PTZ Yellow Warning A message will appear notifying the user when camera control privileges cannot be obtained audio reception stops etc Orange Error Appears wh...

Page 141: ... release it Click the center button to center the camera at 0 pan 45 tilt When upright 45 when ceiling mounted 2 Pan Tilt Speed button Select a pan tilt speed from Fast Normal and Slow 3 Control speed by zoom position checkbox Check the box to adjust the pan tilt speed in response to the visible range Pan tilt speed is slowest at maximum telephoto and fastest at maximum wide angle Uncheck the box ...

Page 142: ...ompensation Auto Automatically uses Compensation Removal Manual Use buttons in 2 to manually set the compensation strength Disable Disables Haze Compensation 2 Haze Compensation Strength When Haze Compensation is Manual set one of the 7 levels from 1 Mild to 7 Strong Note When Auto or Manual is selected for Haze Compensation the video data size increases When using Haze Compensation contrast may b...

Page 143: ...ng page p 46 4 Shutter Speed When Manual or Auto Shutter priority AE is selected for Exposure select the shutter speed desired If Manual is selected set the shutter speed in the range of 1 1 sec to 1 16000 sec from a pull down menu If Auto Shutter priority AE is selected set the shutter speed in the range of 1 2 sec to 1 16000 sec from a pull down menu When capturing a moving subject selecting a h...

Page 144: ...e conditions When Camera Camera Control AGC Limit is set to OFF in the setting page and Exposure is set to Auto Shutter priority AE exposure compensation and backlight compensation will not be performed 1 2 3 Important Since the light source selection options are based on representative characteristics proper colors may not be achieved depending on the applicable light source In this case use the ...

Page 145: ...ing you want to register from the selection box 4 Include Current PTZ Position checkbox Select the checkbox to register the current pan tilt and zoom settings 5 Register Register the current camera settings in the custom setting number selected in Register to 6 Auto Control Settings Displays the Auto Control Settings panel 7 Verify registered contents of custom settings Displays the settings regis...

Page 146: ...video The Software Product License Agreement dialog box appears Click Yes to accept the terms of the license agreement The decoder is downloaded from the camera enabling H 264 video reception Displaying Event Status Clicking the Event Display button will show the event display panel which shows the input status of external devices as well as the status of video and volume detection by the intellig...

Page 147: ... settings made on the Setting page Video format Memory Card Video Format Video size JPEG Video JPEG Video Size Upload Memory card H 264 Video H 264 1 Video Size Recording Videos Manually The Start Stop Memory Card Recording button appearance changes as shown below depending on recording status Confirming Manually Recorded Video Use the Recorded Video Utility p 118 to confirm video manually recorde...

Page 148: ...148 ...

Page 149: ...Chapter 6 Appendix Memory Card Access Modifiers Troubleshooting List of Log Messages List of Viewer Messages Restore Default Settings List of Factory Default Settings Specifications Index ...

Page 150: ...ings Address Camera IP address factory default setting 192 168 100 1 User ID Administrator user ID factory default setting root Password Administrator password factory default setting camera Directory Structure for Data Downloaded with Recorded Video Utility When video on a memory card is downloaded to a computer with the Recorded Video Utility folders are created automatically in accordance with ...

Page 151: ...ad Note The file creation time will be earlier than the actual start of recording time If multiple video files were created because recording continued for several seconds or more a new file name with different values for 2 and the sequential number ending will be used In the above example if recording starts at 16 09 19 and the next file is switched to 4 seconds later the file name will be as fol...

Page 152: ... Function Detection Setting 12 173 Intelligent Function Detection Setting 13 174 Intelligent Function Detection Setting 14 175 Intelligent Function Detection Setting 15 N Reason for capture character string External input device name alphanumeric characters NULL blank entry or timer event test X Width of video Number of pixels in horizontal direction Y Height of video Number of pixels in vertical ...

Page 153: ...specified below HTTP Upload p 56 Parameter query string All modifiers can be used FTP Upload p 56 Subdirectory Name to Create Only the modifiers y m d w H h n can be used File Name to Create Only the modifiers y m d w H M S s n can be used E mail Notification p 57 Message Body All modifiers can be used ...

Page 154: ...s displayed set Active Script to Enable in Internet Explorer s security settings See 3 below for instructions on how to set this The settings from 1 to 3 below must be carried out to use the Admin Viewer and Admin Tools If this message is displayed set the following 1 Install the Admin Tools Certificate with the installer p 26 2 When using Internet Explorer 9 or greater follow the steps in Registe...

Page 155: ...act your System Administrator You cannot use recording mode stream transmission You cannot use recording mode stream transmission if Upload Upload is set to HTTP or FTP Set Upload to Upload Disabled p 55 Video cannot be recorded on a memory card To record video to a memory card when an event occurs check the Video Record Action settings under Event in the setting page When Video Record Action is s...

Page 156: ...webview has started or stopped Description 1 2 host Host user User prio Priority W030 1 W WebView session V Session less video client N Session less event client 2 Connect Disconnect Meaning The camera server client was connected or disconnected Description 1 host Host user User video jpg h264 Number of frames W031 1 W WebView session V Session less video client Meaning When a client disconnected ...

Page 157: ...0 Meaning The name of the upload destination could not be resolved Description uploader cannot connect the server A121 Meaning Execution of connect to upload destination failed Description uploader cannot connect the server A122 Meaning The upload destination could not be connected due to a reason other than A120 and A121 Description ftp http mode invalid uploader set none forcibly A134 Meaning Th...

Page 158: ... error 42 insufficient resource 43 specification of unsupported codec 45 specification of unpermitted user level 47 too many clients 49 or invalid operation mode 4a Countermeasure 41 Check user name password or user list used when connecting 42 Check playtime or maximum connection time settings used when connecting 43 Reconnect or restart 45 Use supported client software 47 Check user level used w...

Page 159: ...mode setting fail V321 Meaning An error occurred in the pseudo mode setting of intelligent service Countermeasure If the problem persists after rebooting the camera is faulty Arrange for servicing Description video 1 initialization failure 2 3 V400 1 Video number 2 Process description 3 Error details Meaning The video input function was stopped because the video input system could not be initializ...

Page 160: ...ng or stopping Meaning The memory card control module sdctrl has started or stopped Description There is not available space M203 Meaning Insufficient memory card capacity Description Invalid file 1 was removed M204 1 Name of removed file Meaning An invalid file was removed Description Memory card was pulled before unmount M207 Meaning The memory card was removed while still mounted Description Vi...

Page 161: ...360 sec Description starting paramd S001 Meaning Parameter management module started Description Updated system settings S002 Meaning Settings not requiring rebooting were changed Description starting event S010 Meaning The event service was started Description shutdown event S011 Meaning The event service was shut down Description starting extio S012 Meaning The external device input output servi...

Page 162: ...ng the camera is faulty Arrange for servicing Description cannot work timer 1 2 3 S312 1 Error number 2 Cause of error 3 Error information Meaning An internal error occurred in the timer service Countermeasure If the problem persists after rebooting the camera is faulty Arrange for servicing Description event initialization error 1 2 S410 1 Error number 2 Cause of error Meaning An error occurred i...

Page 163: ...tream 7 Total distribution count of AudioBackChannel Meaning RTSP TEARDOWN request was received Description start multicast profile 1 num_of_sessions 2 V 3 A 4 M 5 BC 6 R005 1 Client IP address 2 Profile name of requested MulticastStreaming START 3 Total distribution count of Video stream 4 Total distribution count of Audio stream 5 Total distribution count of Metadata stream 6 Total distribution ...

Page 164: ...curred between modules Countermeasure If the problem persists after repeated attempts and rebooting the camera may be faulty Arrange for servicing Description cannot get parameter 1 R302 1 user_account User account IP_address IP address of the camera profile_media_configuration MediaConfiguration information RTSP_port_number RTSP port number Meaning Parameter acquisition has failed Description met...

Page 165: ...hen camera control is released You cannot operate the camera until you get camera control privileges again Use the menu displayed by right clicking to exit the full screen mode When switched to full screen mode Recording to memory card aborted When recording to memory card was completed successfully The connection was terminated because the password has been changed When the password of the accoun...

Page 166: ...g video management information Video management information for the memory card is being recreated Video Management Information Recreation Required Video management information for the memory card must be recreated Audio reception is restricted Audio reception is being restricted The specified camera is not a network camera or it is not a supported model Displayed when connecting to a camera other...

Page 167: ...rded and restored to factory default settings after the camera is rebooted Administrator password Network LAN IPv4 IPv6 Date and time Host access restrictions for access control SSL TLS 802 1X Restoring Factory Default Settings with the Reset Switch on the Camera If you have forgotten or do not know the IP address of the camera or your Administrator password you cannot operate the camera via the n...

Page 168: ...g the reset switch and keep pushing the reset switch for 5 seconds or more Important If the reset switch is pushed network related settings will also be restored to factory default settings including the camera s IP address subnet mask default gateway address etc Accordingly you can no longer operate the camera from the computer you were using to connect to the camera before When initializing the ...

Page 169: ...and v2c Disable Use SNMP v3 Disable Administrator Contact Information Administration Function Name VB S30D VB S31D VB S800D or VB S805D VB S900F or VB S905F Installation Location SNMP v1 and v2c Server Community Name SNMPv3 Server User Name Security Level No authentication and no encryption Authentication Algorithm MD5 Encryption Algorithm DES Current Date and Time Setting Setting Method Set manua...

Page 170: ...VB S900F 3 Video Size video Transmission 480 x 270 Maximum Frame Rate Video Transmission 30 0 Video Size Upload Memory card 480 x 270 Item Setting H 264 1 Video Size 480 x 270 Bit Rate Control Use bit rate control Video Quality 3 Target Bit Rate kbps 2048 Frame Rate fps 30 I Frame Interval sec 1 H 264 2 H 264 2 Disable Video Size 480 x 270 Bit Rate Control Use bit rate control Video Quality 3 Targ...

Page 171: ...eo Size 480 x 270 JPEG Frame Rate 10 Multicast Address 0 0 0 0 Multicast Port 0 Multicast TTL 1 Audio Transmission Disable RTP Streaming 3 Video Size 480 x 270 JPEG Frame Rate 15 Item Setting Multicast Address 0 0 0 0 Multicast Port 0 Multicast TTL 1 Audio Transmission Disable RTP Streaming 4 Video Size 480 x 270 JPEG Frame Rate 30 Multicast Address 0 0 0 0 Multicast Port 0 Multicast TTL 1 Audio T...

Page 172: ...tion Event Disable Detect Criteria The reference volume level or above Reference Volume Level 50 Detect Criteria Duration sec 0 ON Event Operation Disable OFF Event Operation Disable Ongoing ON Event Operation Disable Preset None Video Record Disable E mail Notification Disable External Device Output for ON Event Disable External Device Output for OFF Event Disable External Device Output Operation...

Page 173: ...Checked Camera Control Checked Video Distribution Checked Audio Distribution Checked Guest user Camera Control Checked Video Distribution Checked Audio Distribution Checked IPv4 Host Access Restrictions Apply Host Access Restrictions Disable Default Policy Authorize Access Network Address Subnet 01 32 Yes Item Setting 02 32 Yes 03 32 Yes 04 32 Yes 05 32 Yes 06 32 Yes 07 32 Yes 08 32 Yes 09 32 Yes ...

Page 174: ...inbound SA ESP SPI inbound SA AH Authentication Algorithm HMAC_SHA1_96 SA AH Authentication Key outbound SA AH SPI outbound Item Setting SA AH Authentication Key inbound SA AH SPI inbound IPsec Set 2 IPsec Set Disable IPsec Mode Tunnel Mode Destination IPv4 Address Destination IPv6 Address Source IPv4 Address Source IPv6 Address Security Protocol ESP Security Gateway IPv4 Address Security Gateway ...

Page 175: ...P Encryption Algorithm AES SA ESP Authentication Algorithm HMAC_SHA1_96 SA ESP Encryption Key outbound SA ESP Authentication Key outbound Item Setting SA ESP SPI outbound SA ESP Encryption Key inbound SA ESP Authentication Key inbound SA ESP SPI inbound SA AH Authentication Algorithm HMAC_SHA1_96 SA AH Authentication Key outbound SA AH SPI outbound SA AH Authentication Key inbound SA AH SPI inboun...

Page 176: ...ble Authentication Status Stop Authentication Method Authentication Method EAP MD5 User Name Memory Card Operations Operation Settings Save Logs and Videos Video Format JPEG Pre event Buffer number of frames 0 Post event Buffer number of frames 0 Pre event Buffer sec 0 Post event Buffer sec 0 Overwrite videos Disable Log Notifications Use log notifications Disable Notification Level Error Mail Ser...

Page 177: ...shade control on 7 50IRE 0 45 lux F1 6 shutter speed 1 30 sec smart shade control off 50IRE 0 03 lux F1 6 shutter speed 1 2 sec smart shade control off 50IRE 0 01 lux F1 6 shutter speed 1 2 sec smart shade control on 7 50IRE 0 4 lux F1 6 shutter speed 1 30 sec smart shade control off 50IRE 0 03 lux F1 6 shutter speed 1 2 sec smart shade control off 50IRE 0 01 lux F1 6 shutter speed 1 2 sec smart s...

Page 178: ...fps Max Frame Rate When streaming JPEG H 264 1920 x 1080 30 fps When used in the following combinations When streaming H 264 1 1920 x 1080 and H 264 2 all sizes simultaneously 15 fps When streaming H 264 1 all sizes and H 264 2 1920 x 1080 simultaneously 15 fps When streaming H 264 1 1280 x 960 and H 264 2 1280 x 960 simultaneously 15 fps When streaming H 264 1 1280 x 720 and H 264 2 1280 x 720 si...

Page 179: ...6 x 144 128 x 72 640 x 480 512 x 384 384 x 288 256 x 192 128 x 96 On Screen Display Available Daylight Saving Time Available Custom Settings Number of registers 4 Items to Reg Pan Tilt Zoom Exposure Smart Shade Control Haze Compensation Focus White Balance Image Quality Adjustment Day Night Items to Reg Pan Tilt Zoom Exposure Smart Shade Control Haze Compensation White Balance Image Quality Adjust...

Page 180: ...er Miscellaneous Operating Environment Temperature 10 C to 50 C 14 F to 122 F Humidity 5 to 85 without condensation Power Supply PoE PoE power supply via LAN cable IEEE802 3af compliant Power Consumption Class 0 power sourcing equipment requests 15 4 W Max 7 8 W Max 7 6 W Class 2 power sourcing equipment requests 7 0 W Max 4 1 W Max 4 3 W Dimensions φ x H φ120 x 54 mm φ4 72 x 2 13 in excluding pro...

Page 181: ...mera Control Privileges 126 131 Camera Management Tool 15 26 Camera Name 46 Camera Position Control 49 Camera Tampering Detection 112 Certificate Information 71 Certificate Management 69 71 Client 58 71 Color Saturation 47 146 Control for Admin 123 141 Custom Installation 26 Custom Settings 145 D Date 44 Day Mode 144 Day Night 48 49 144 Day Night Mode Switching 62 63 Daylight Saving Time 44 Defaul...

Page 182: ...tial Camera Settings 46 Initial Settings 167 Input Volume 58 Installation Conditions 49 Installation Guide 5 Installing the Necessary Software 26 Intelligent Function Setting Tool 103 IP Address 40 IPsec 66 IPsec Set 66 67 IPv4 40 IPv4 Host Access Restrictions 64 IPv6 41 IPv6 Host Access Restrictions 65 J JPEG 50 L LAN 40 Language Button 31 LED 49 Lock camera position 107 Log Code 116 Log Messages...

Page 183: ...vacy Mask Setting Tool 85 Privileged Camera Control 64 126 Privileges 131 Pulse 61 R Reboot Item 76 Reconnect 139 Recorded Video Utility 118 147 Recording Manually 147 Reference Volume Level 60 Removed Object Detection 112 Reset Switch 167 Restore Default Settings 77 Restore Settings 77 RM Lite 17 RTP 53 RTP Streaming 53 RTSP 53 S Search Domain 42 Self Signed Certificate 69 Server 58 Setting Menu ...

Page 184: ...ion 146 Video Record 61 62 110 Video Record Action 60 Video Record Setting 60 Video Saving 74 Video Server 58 Video Size 50 137 Video Size Set 50 View Restriction Setting Tool 92 Viewer Admin Viewer 141 RM Lite Viewer 17 VB Viewer 130 Viewer PTZ 134 Voice Activity Detection 58 Volume Detection 60 147 W Warning Message 165 White Balance 47 144 WS Security 59 Z Zoom 79 133 141 ...

Page 185: ...BIE 7020 002 CANON INC 2015 ...

Reviews: