


Stack the prints with an offset
Introduction
The 'Offset stacking' function creates a visible distinction between sets or jobs in an
output location. The active workflow profile or the active automated workflow determines
the default type of offset stacking. The table below describes the possible types of offset
stacking. Furthermore, the table describes when you can change the defined type of offset
stacking in the 'Properties' window.
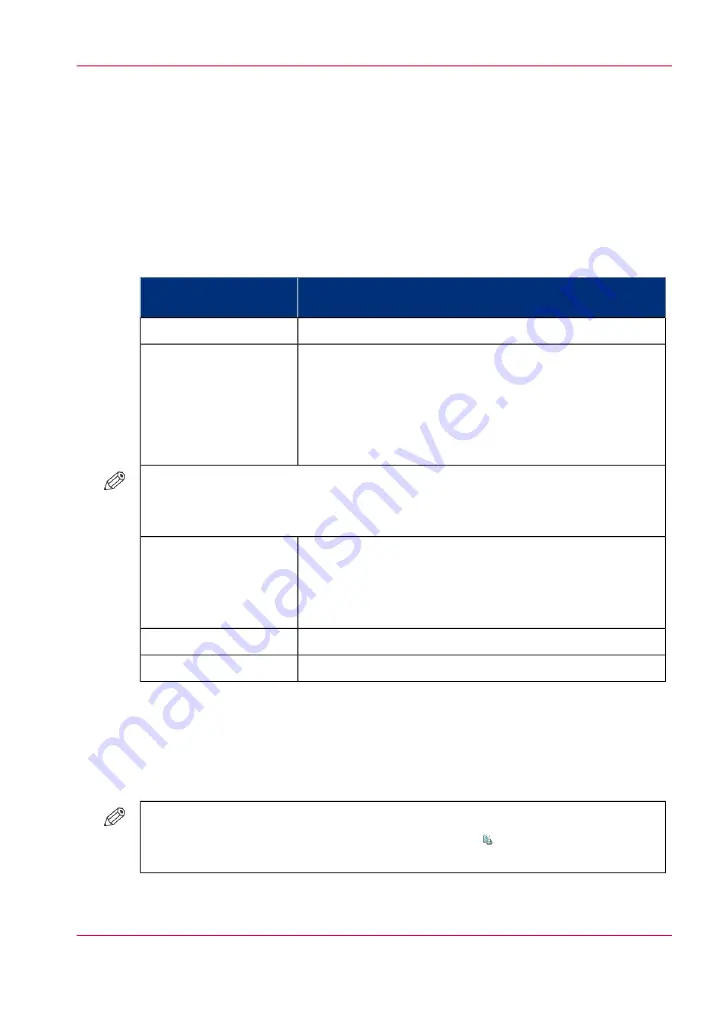
Types of offset stacking
#
Possible changes in the 'Properties' window
Default type of offset
stacking
No changes possible.
'Jobs'
You can indicate the number of sets (N sets) after which
an offset will be applied, for example 5.
Then 5 sets will be delivered in a straight stack. The next
5 sets will also be delivered in a straight stack, but with a
shift compared to the previous stack.
N must be a value between 1 and 65536 (default = 1).
'Sets (always)'
NOTE
When 'Sets (always)' is possible, the 'Properties' window displays a special button at
the upper right-hand side which is otherwise not visible.
You can set the 'Offset stacking' function to:
• 'On' - each set will be shifted compared to the previous
set, or
• 'Off' - all sets are delivered in 1 straight stack.
'Sets (as in job)'
No changes possible.
'Banners'
No changes possible.
'Off'
How to change the type of offset stacking in the Properties window
1.
Touch 'Jobs' -> 'Waiting jobs'.
2.
Touch the job of which you want to change the type of offset stacking.
#
NOTE
You can only change the settings of the active print job after you have stopped the
printer (press the 'Stop' button two times).
3.
Touch 'Properties' - or touch the job two times to open the 'Properties' window.
Chapter 6 - Print jobs
155
Stack the prints with an offset
Summary of Contents for imageRUNNER ADVANCE C9065S PRO
Page 1: ...Please read this guide before operating this product Operating Information ENG ...
Page 7: ...Chapter 1 Preface ...
Page 15: ...Chapter 2 Main parts ...
Page 51: ... Overview of the machine configuration on page 16 Chapter 2 Main parts 51 Inserter ...
Page 58: ...Chapter 2 Main parts 58 Folder ...
Page 59: ...Chapter 3 Operating concept ...
Page 82: ...Chapter 3 Operating concept 82 Manage production printing ...
Page 83: ...Chapter 4 Operator panel views ...
Page 92: ...Chapter 4 Operator panel views 92 The System view ...
Page 93: ...Chapter 5 Power information ...
Page 100: ...Chapter 5 Power information 100 Use the Sleep mode ...
Page 101: ...Chapter 6 Print jobs ...
Page 123: ... Delete print jobs on page 128 Chapter 6 Print jobs 123 Reprint a job ...
Page 169: ...Chapter 7 Copy jobs ...
Page 213: ...Chapter 8 Scan jobs ...
Page 233: ...Chapter 9 Paper toner and staples ...
Page 317: ...Chapter 10 Adapt printer settings to your needs ...
Page 343: ...Chapter 11 Maintenance and calibra tion ...
Page 369: ...Chapter 12 Specifications ...
Page 390: ...Chapter 12 Specifications 390 Specifications ...
Page 391: ...Chapter 13 Third party software ...


