


●
Clear the check box for the name of the button you want to remove and then select <Apply>. Once you
remove a registered button, a space appears where the button was displayed in the Home screen. If
necessary, delete the space.
5
Read the message that is displayed, and select <OK>.
➠
A button for the newly selected settings is added to the Home screen.
●
If the Home screen is full and no more settings can be registered, delete registered buttons and spaces
in <Home Screen Settings>.
Changing the Arrangement of Buttons
To make the buttons easier to use, you can rearrange the buttons however you like. For instance, you can put the most
frequently used functions first, or arrange the function buttons together with shortcut buttons for Favorite Settings.
You can also insert a blank (space) instead of a button to make it easier to view the Home screen.
1
Select <Home Screen Settings> in the Home screen. Home Screen(P. 126)
●
If the login screen appears, enter the correct ID and PIN. Logging in to the Machine(P. 137)
2
Select <Set Display Order>.
3
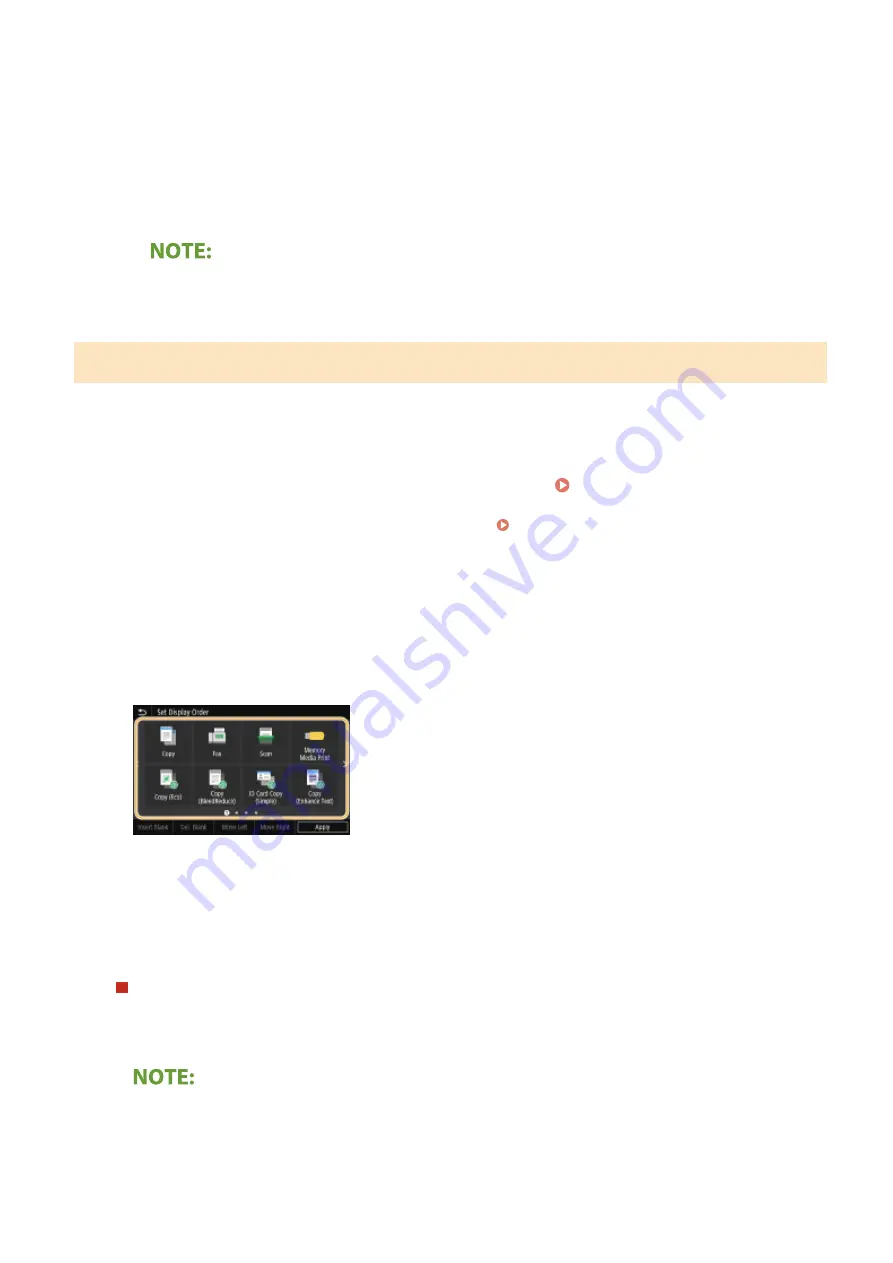
Select the button to move.
●
The selected button is highlighted. Tap the selected button again to deselect it.
4
Select <Move Left> or <Move Right>.
●
The button moves as many times as you tapped.
●
A long touch on <Move Left> or <Move Right> moves the selected button continuously.
Inserting a blank
●
When <Insert Blank> is selected, a blank is inserted on the left side of the selected button.
●
If the button at the end is selected, a blank is inserted even if <Move Right> is selected.
Deleting a blank
●
Select the blank to be deleted, and select <Del. Blank>.
Basic Operations
174
Summary of Contents for Color imageCLASS MF746Cdw
Page 13: ...LINKS Viewing User s Guide P 689 Setting Up 5...
Page 113: ...Basic Operations 105...
Page 166: ...Basic Operations 158...
Page 183: ...5 Select Apply LINKS Basic Operation P 132 Basic Operations 175...
Page 201: ...Saving Data to a USB Memory Device P 294 Basic Operations 193...
Page 229: ...Sending and Receiving Faxes via the Internet Using Internet Fax I Fax P 255 Faxing 221...
Page 251: ...6 Select Apply Faxing 243...
Page 332: ...Sending I Faxes P 256 Scanning 324...
Page 335: ...LINKS Checking Status and Log for Scanned Originals P 309 Scanning 327...
Page 338: ...LINKS Using ScanGear MF P 331 Scanning 330...
Page 361: ...5 Specify the destination 6 Click Fax Fax sending starts Linking with Mobile Devices 353...
Page 418: ...LINKS Configuring the Key and Certificate for TLS P 389 Managing the Machine 410...
Page 447: ...5 Click Edit 6 Specify the required settings 7 Click OK Managing the Machine 439...
Page 458: ...You cannot set or change the security policy on this machine Managing the Machine 450...
Page 586: ...Off Only When Error Occurs Setting Menu List 578...
Page 637: ...5 Select Apply Maintenance 629...
Page 650: ...Troubleshooting FAQ Troubleshooting FAQ 643 Troubleshooting FAQ 642...
Page 689: ...Appendix 681...
Page 730: ...19 MD4 RSA Data Security Inc MD4 Message Digest Algorithm...
Page 761: ...19 MD4 RSA Data Security Inc MD4 Message Digest Algorithm...


