50
PANEL PRO
Make sure the machine is level. With the power off, move the x1 and x2 lead screws
using the knobs on the left end of the machine simultaneously until both touch their
stops. The stop is a 6mm dog point (blunt) set screw that is Lock-Tited into the Motor
mounting plates on the X1, and X2 axis.
Both should normally hit their stops at the same time, but if an obstruction gets in the
way of one x axis, it will stop, but the other will continue until there is enough binding to
stop it as well. At this point the X and Y axis will be out of square with each other and
the position will be lost.
Turn off SC3 power and relieve any obvious binding. Turn back on and go through the
home sequence. Verify both xq and x2 contact their hard stops at the same time. If
they don’t, turn the controller power off or disable the drivers from the AvCAM >
machine menu.
Adjust Ballnut backlash:
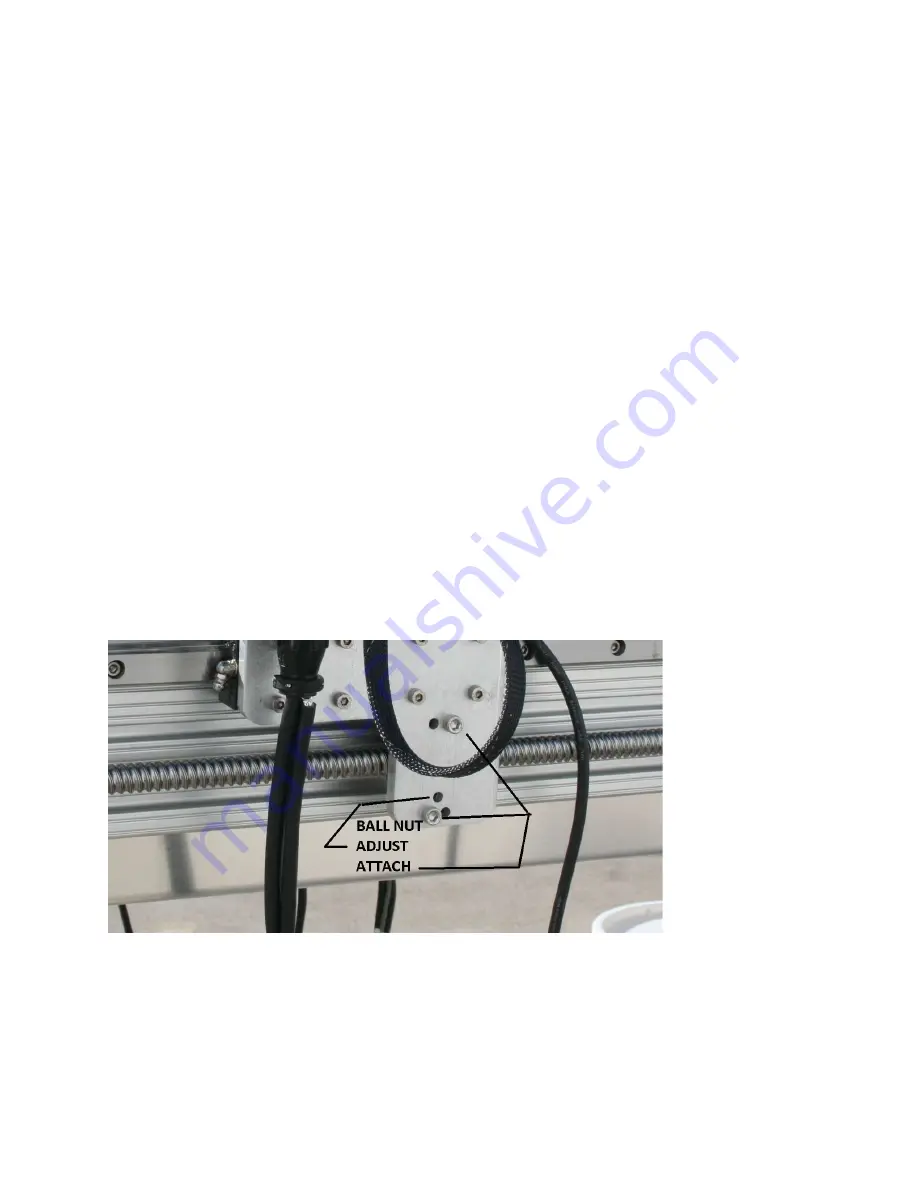
The X and Y axis ball nuts have an adjustment for back lash. To check for backlash
grasp the axis in question near the ball nut mounts and wiggle back and forth. If there
is backlash, a clunking sound will be heard. Make sure the ball nut mount screws are
tight. The adjust screw is located between the mount screws and uses a 3mm Allen
wrench. Tighten slightly until clunking sound disappears. Traverse the axis end to end
and listen for any unusual sounds or binding. Some areas of the lead screw may be
slightly tighter than others. The ball nut needs to be adjusted for the tightest location.
The picture shows the X2 axis, but the X1 axis and Y axis have a similar arrangement.
ADJUST LEAD SCREW BACKLASH:
This adjustment preloads the lead screw bearings.


