


1
2
3
4
5
1. Back of media
2. Black mark
3. 4 mm or more
Make sure there is at least 4 mm on the left and right of the centre of the black mark.
4. Centre of the black mark
5. Reflective/black mark sensor
When using media with the maximum width of 118 mm, make a black mark at least 12 mm long in from
either the left or right edge of the paper so that the reflective/black mark sensor can detect the black mark.
If the black mark is too short, it cannot be detected by the reflective/black mark sensor.
Media With Holes
The reflective/black mark sensor detects the hole and feeds the media to the correct position.
•
Align the slider as shown in the illustration.
2
3
1
1. Back of media
2. Hole in media
3. Reflective/black mark sensor
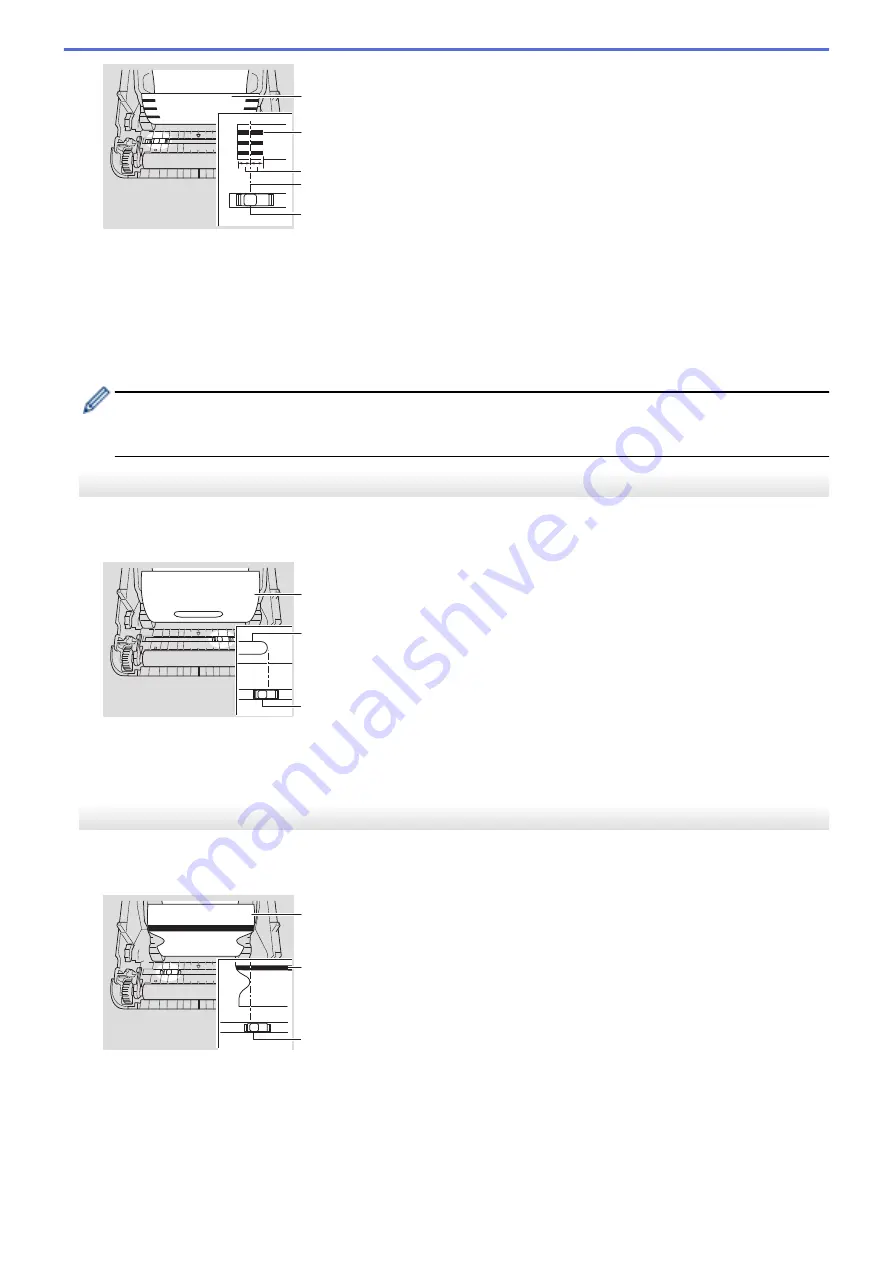
Wristband
The reflective/black mark sensor detects the mark and feeds the media to the correct position.
•
Align the slider as shown in the illustration.
3
1
2
1. Back of media
2. Black mark
3. Reflective/black mark sensor
19
Summary of Contents for TD-4550DNWB
Page 1: ...User s Guide TD 4550DNWB 2019 Brother Industries Ltd All rights reserved ...
Page 24: ...Related Information Set Up Your Printer Related Topics Auto Media Configuration 20 ...
Page 50: ...Correct Barcode Layout Related Information Print Barcode Labels Using Crop Print Windows 46 ...
Page 93: ...Related Information Try the P touch Template Function Using the Barcode List 89 ...
Page 125: ...Home Update Update Update P touch Editor Windows Update the Firmware 121 ...
Page 127: ...Related Information Update 123 ...
Page 139: ...Related Information Change Printer Settings Using the Printer Setting Tool Windows 135 ...
Page 145: ...Related Information Change Printer Settings Using the Printer Setting Tool Windows 141 ...
Page 168: ...Related Information Routine Maintenance Related Topics Set the Date and Time 164 ...
Page 191: ...Related Information Options 187 ...
Page 195: ...Visit us on the World Wide Web www brother com UK Version 0 ...


