34
1
2
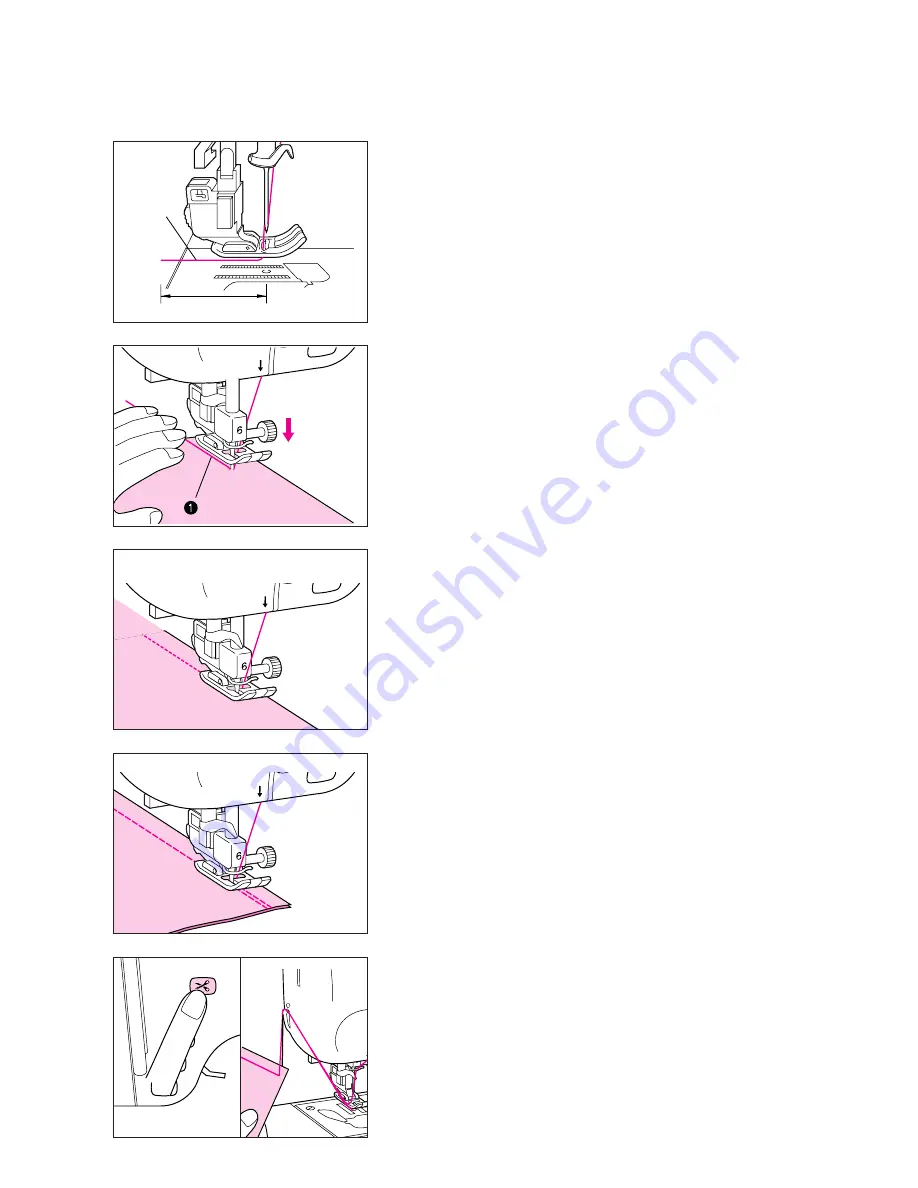
2. Pass the thread underneath the presser foot and pull it out
from the rear of the machine by about 5 cm.
1
Upper thread
2
5 cm (1-15/16)
5
3. While pressing down on the thread and the fabric with your
left hand, turn the balance wheel with your right hand to
move the needle to the sewing start position.
1
Thread
*
Sewing can begin without pulling out the bobbin thread.
5
3
4. Lower the presser foot. Press the “REVERSE STITCH”
button to sew a reverse stitch, and then press the
“START/STOP” button. The machine will start to run at slow
speed.
5
3
5. When sewing is completed, press the “REVERSE STITCH”
button to sew a reverse stitch.
5
6. Press the “THREAD CUTTER” button to cut the threads .
*6. Cut thick thread (thicker than # 30) with the cutter on the
side of the machine as illustrated.
*
BOBBIN THREAD SENSOR
If a warning message appears on the message screen, the
bobbin thread is running out. Replace the bobbin thread at
this time.
Summary of Contents for PC-8200
Page 40: ...38 ...
Page 72: ...70 5 Iron the folds toward the same direction ...
Page 74: ...72 Finished flat fell seam 1 Surface ...
Page 127: ...125 1 1 Satin stitch Finished applique on the project ...
Page 175: ...173 Decorative stitch Size can be set to L Large or S Small ...
Page 178: ...176 ...


