


Preparing Media on Mac
Use the Disk Utility application included with Mac OS to format your card in the HFS+ or exFAT
formats. Remember to back up anything important from your CFast or SD card as all data will be
lost when it is formatted.
1
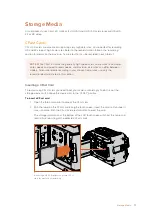
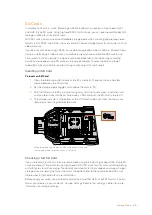
Connect the CFast or SD card to your computer using a CFast 2.0 or SD reader/
writer or CFast drive, and dismiss any message offering to use your card for Time
Machine backups.
2
Go to applications/utilities and launch Disk Utility.
3
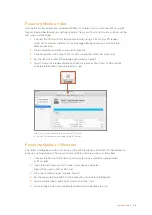
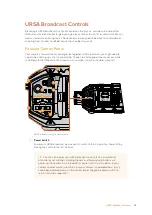
Click on the disk icon of your CFast or SD card and then click the ‘erase’ tab.
4
Set the ‘format’ to ‘Mac OS extended (journaled)’ or ‘exFAT’.
5
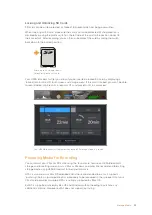
Type a ‘name’ for the new volume and then click ‘erase’. Your CFast or SD card will
quickly be formatted and made ready for use.
Use Disk Utility on Mac OS to erase your CFast card
in the Mac OS extended (journaled) or exFAT format
Preparing Media on Windows
The ‘format’ dialog box can format a drive in the exFAT format on a Windows PC. Remember to
back up anything important from your card as all data will be lost when it is formatted.
1
Connect the CFast or SD card to your computer using an external reader/writer
or CFast drive.
2
Open the ‘start’ menu or ‘start’ screen and choose ‘computer’.
Right click on your CFast or SD card.
3
From the contextual menu, choose ‘format’.
4
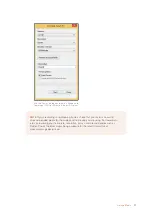
Set the file system to 'exFAT' and the allocation unit size to 128 kilobytes.
5
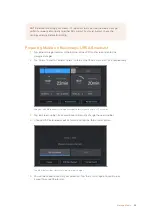
Type a volume label, select ‘quick format’ and click ‘start’.
6
Your storage media will quickly be formatted and made ready for use.
26
Storage Media