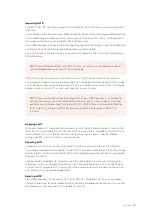


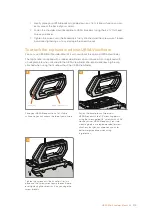

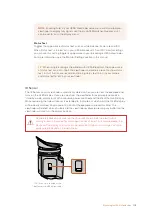

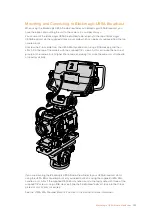
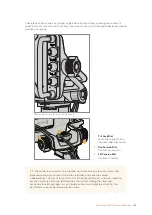


To connect your URSA Viewfinder to your URSA Broadcast, simply connect the viewfinder’s
attached cables to your camera's front 12V power and 3G-SDI outputs. The URSA Viewfinder
will turn on automatically when your camera is powered.
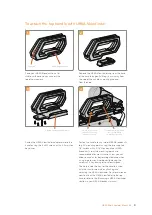
Connect your viewfinder’s SDI and power cables to your
URSA Broadcast's HD-SDI monitoring output and +12 volt output
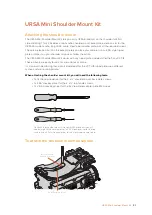
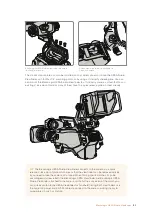
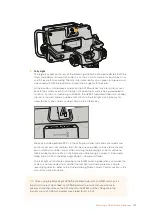
When using the URSA Viewfinder with URSA Broadcast, it is highly recommended that you also
install the URSA Mini shoulder mount kit as this provides the correct mounting points, 1/4”
thumb screw, and height adjustments to optimize the positioning of your viewfinder. See the
‘URSA Mini shoulder mount kit’ section in this manual.
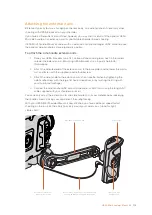
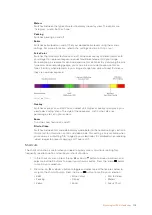
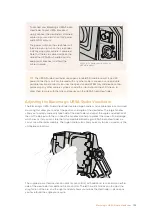
Adjusting the Eyepiece
The detachable rubber eyepiece can be adjusted to fit your left or right eye. Adjust the
viewfinder arm by loosening the knob on the bottom of the arm and sliding it left or right to
comfortably fit your eye.
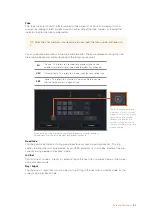
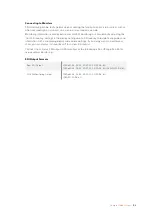
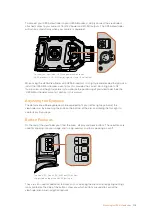
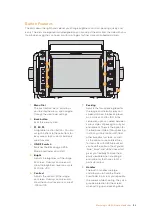
Button Features
On the top of the viewfinder you’ll find the zoom, display and peak buttons. These buttons are
used for zooming into your image, and turning overlays and focus peaking on or off.
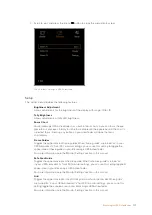
The Zoom (F1), Display (F2) and Peak (F3) buttons
are located on top of the URSA Viewfinder
They are also used for additional features, such as opening the menu and navigating settings.
Icons printed on the side of the buttons show you which buttons are used to control the
viewfinder menu and navigation features.
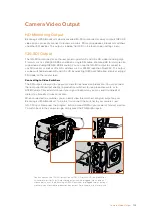
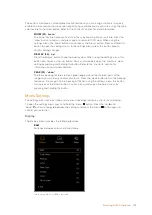
SDI OUT
SDI OUT
SDI IN
12V
LENS
REF IN
TC IN
12V OUT
PUSH
PUSH
ZOOM
F1
F2
F3
DISP
PEAK
ZOOM
F1
F2
F3
DISP
PEAK
114
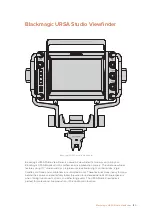
Blackmagic URSA Viewfinder


