R5915525 /00
Fx400 Series
80
8.1 Position
8.1.1 Orientation
What can be done?
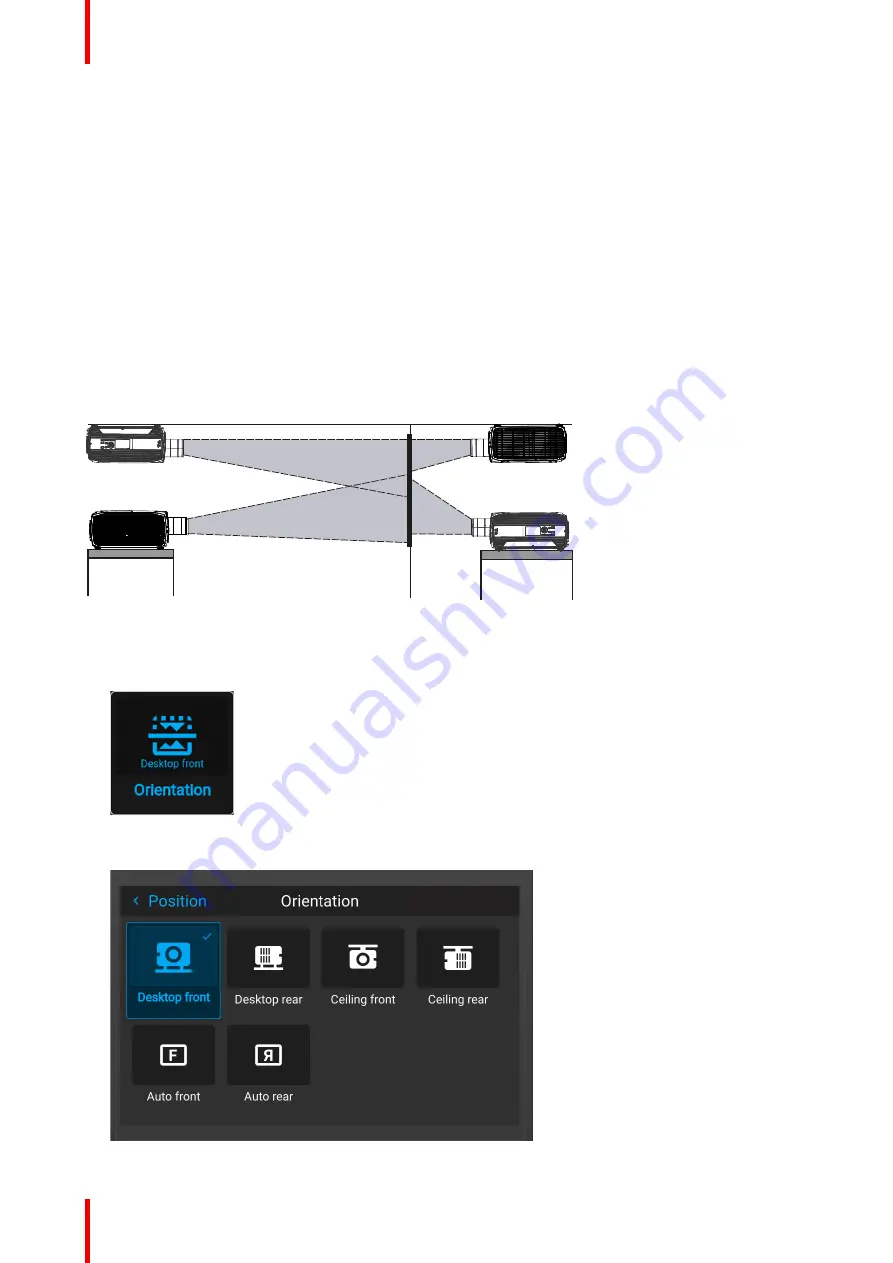
The way of physical installation of the projector can be defined to the projector.
The following installation are possible:
•
Desktop front
: Projected image will not be flipped or mirrored.
•
Desktop rear
: Projected image will be flipped horizontally (left side switches to the right side).
•
Ceiling front
: Projected image will be flipped vertically (top side switches to the bottom side).
•
Ceiling rear
: Projected image will be flipped both vertically and horizontally.
•
Auto front
: The tilt sensor will detect if the projector is desktop or ceiling mounted and will project a
readable image accordingly.
•
Auto rear
: The image will be flipped horizontally. The tilt sensor will detect if the projector is desktop or
ceiling mounted and will project a readable image accordingly.
Image 8–1
How to set the correct orientation
1.
In the main menu, select
Installation
→
Position
→
Orientation
.
Image 8–2 Installation menu, orientation
The Orientation menu is displayed.
Image 8–3 Example of the orientation menu
Summary of Contents for F400
Page 1: ...ENABLING BRIGHT OUTCOMES User guide Fx400 Series...
Page 2: ......
Page 10: ...R5915525 00 Fx400 Series 10...
Page 21: ...21 R5915525 00 Fx400 Series 1 6 Compliance Safety Information...
Page 22: ...R5915525 00 Fx400 Series 22 Safety Information...
Page 32: ...R5915525 00 Fx400 Series 32 Remote Control Unit...
Page 38: ...R5915525 00 Fx400 Series 38 Input Communication...
Page 62: ...R5915525 00 Fx400 Series 62 GUI Source...
Page 118: ...R5915525 00 Fx400 Series 118 GUI Installation...
Page 126: ...R5915525 00 Fx400 Series 126 GUI Projector profiles...
Page 158: ...R5915525 00 Fx400 Series 158 GUI Advanced settings...
Page 162: ...R5915525 00 Fx400 Series 162 GUI Status menu...
Page 186: ...R5915525 00 Fx400 Series 186 Advanced blend...
Page 210: ...R5915525 00 Fx400 Series 210 Video timing tables...
Page 218: ...R5915525 00 Fx400 Series 218 Index...
Page 219: ......


