


Important:
On the Scopia
®
XT Executive, the system menus are automatically activated when you
receive an incoming call to allow you accept or reject the call.
2. Scopia
®
XT Control enables a number of functions using the keyboard or mouse (see
2: Using the keyboard or mouse with Scopia
on page 26).
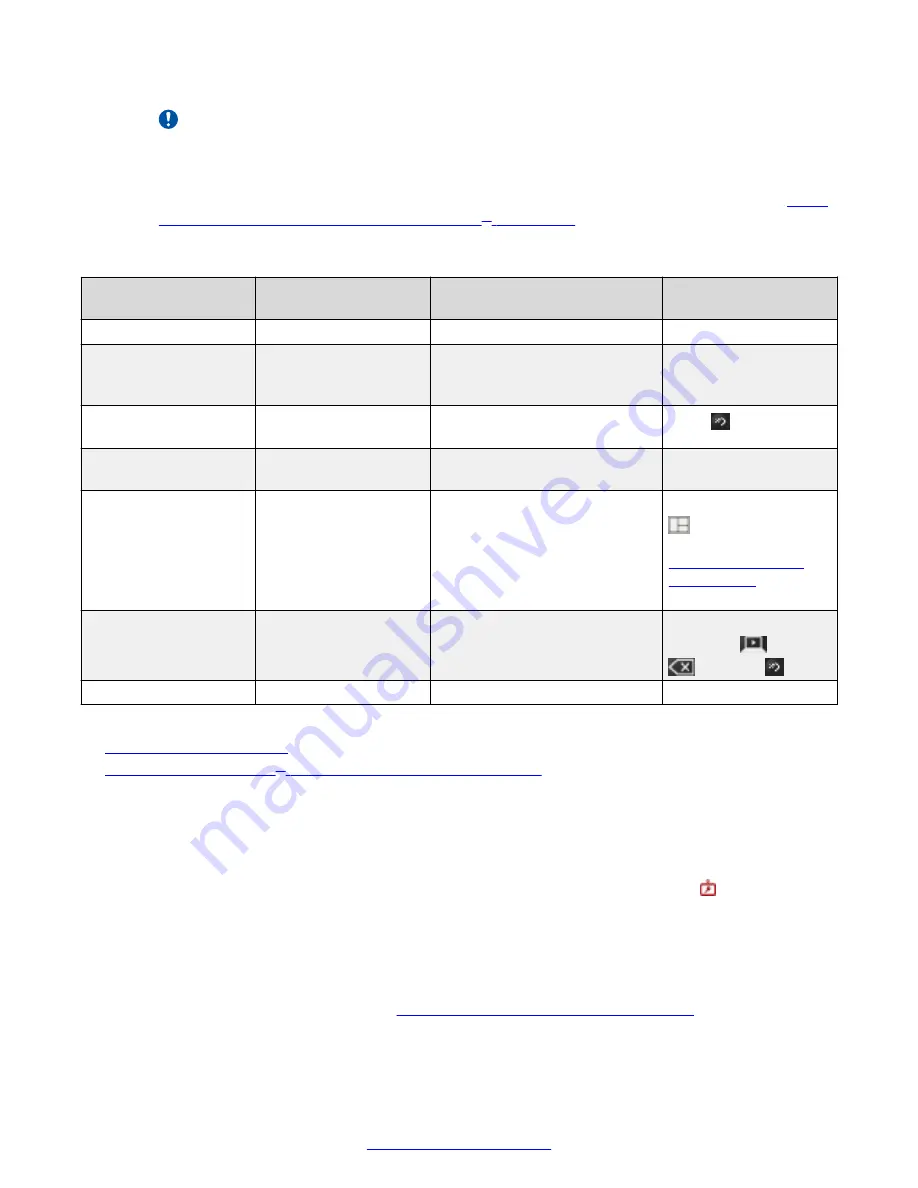
Table 2: Using the keyboard or mouse with Scopia
®
XT Control
Function
Using your keyboard
Using your mouse
Using XT Remote
Control Unit
Select an option
Press
Enter
.
Click on the option.
Press
ok/menu
.
Enter text
Use the keyboard.
N/A
Use the XT Remote
Control Unit keypad to
enter letters and digits.
Go back to previous
page
Press
Esc
.
Click on an empty area on the
screen.
Press
Back
.
Navigate endpoint
menus
Press the arrows then
Enter
.
Select the option.
Use the arrow keys then
ok/menu
.
Move windows in
video layout
-
Drag and drop the windows to
the desired position.
Press and hold
Layouts
and select the
desired layout (see
on
page 61).
Switch control to
computer
Press
Esc
,
Backspace
,
or
Ctrl+Shift+1
.
Select the window in the layout
representing your desktop.
When you are not in a
call, press
Present
,
Delete
or
Back
.
Zoom in or out
-
Scroll up or down
Press the zoom keys.
Related Links
on page 18
XT Executive as a Room Endpoint
Connecting to a Scopia
®
XT Executive as a Room Endpoint
About this task
If using the Scopia
®
XT Executive as a room endpoint, you must first connect to Scopia
®
XT Control
before using your keyboard and mouse to control the Scopia
®
XT Executive. The icon appears,
indicating that authentication is required.
If you are using the Scopia
®
XT Executive as a personal endpoint, you only authenticate the first
time you connect your computer.
Before you begin
Connect your computer as described in
Connecting a Computer to the XT Series
Getting Started
26
Avaya Scopia
®
XT Series User Guide
April 2015