


Initializing IP Endpoint configurations
Issue 1.1 August 2004
105
9. Select the
Next
button.
Avaya IP Agent displays the next window of the Configuration Wizard.
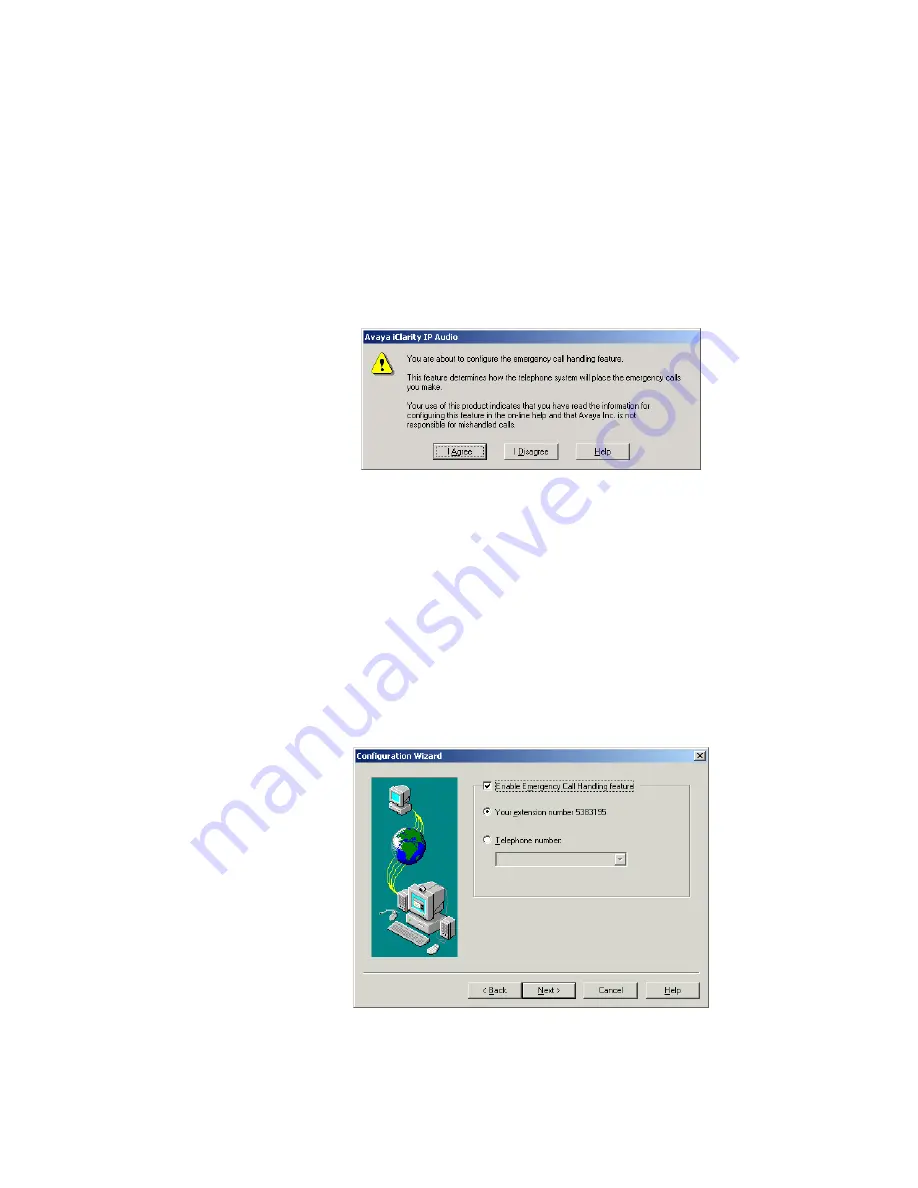
10. Select the pre-defined
Dialing Location
from the drop-down list. This selection will
control certain telephony properties such as area code, outside line access, and so
forth.
11. Select the
Next
button.
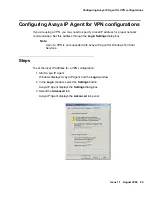
Avaya IP Agent displays a warning message regarding the Emergency Call Handling
feature.
Note:
Note:
For the IP Telephone configuration, the Emergency Call Handling window is
not displayed. If you are using the IP Telephone configuration, proceed to
Step 17.
12. Read the text of this warning completely and select the
I Agree
button if you
understand and agree to the conditions stated in this message.
If you select the
I Disagree
button, the
Configuration Wizard
will exit or, for Windows
Terminal Services, return to a previous
Configuration Wizard
window.
After you select
I Agree
, Avaya IP Agent displays the next window of the Configuration
Wizard.
Summary of Contents for IP Agent
Page 1: ...Avaya IP Agent Release 5 0 Installation and User Guide Issue 1 2 April 2005 ...
Page 26: ...Introduction 26 Avaya IP Agent Installation and User Guide ...
Page 166: ...Using VuStats 166 Avaya IP Agent Installation and User Guide ...
Page 178: ...Using a Public Directory with Avaya IP Agent 178 Avaya IP Agent Installation and User Guide ...
Page 194: ...Screen pops 194 Avaya IP Agent Installation and User Guide ...
Page 244: ...Dialog Reference 244 Avaya IP Agent Installation and User Guide ...
Page 252: ...Language support 252 Avaya IP Agent Installation and User Guide ...
Page 268: ...Troubleshooting 268 Avaya IP Agent Installation and User Guide ...
Page 286: ...286 Avaya IP Agent Installation and User Guide ...


